
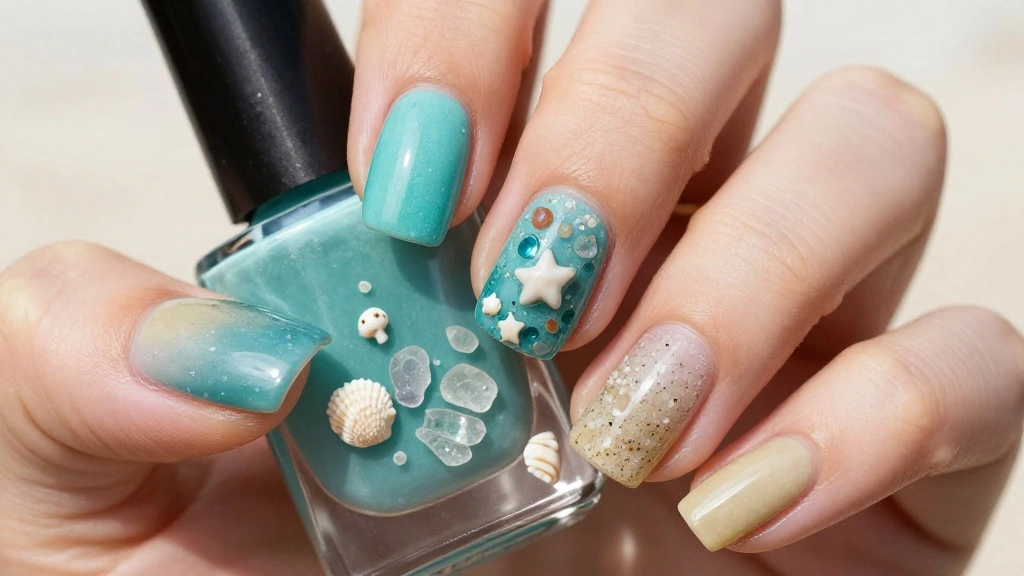
Picture this: you’re lounging on a sun-kissed beach, the sound of waves lapping gently against the shore. The sand beneath your toes feels warm, and your gaze is drawn to the stunning colors of the ocean. This time of year always reminds me of that blissful feeling of summer, and I crave a little piece of the beach every day. That’s why I created this post about sea glass nails—to bring that coastal vibe right to your fingertips.
If you’re someone who loves all things oceanic, especially nail designs that capture the magic of the sea, this one’s for you. Nail art enthusiasts and beach lovers alike will find inspiration in these stunning styles. Whether you want to embody the shimmering blues and greens of the water or the soft, sandy hues of the shore, these designs will transport you straight to a seaside paradise.
You’ll discover twelve breathtaking sea glass nails that not only look fabulous but also evoke the beauty of oceanic colors. Each design is perfect for those sunny days when you want your nails to reflect your love for the beach. Get ready to dive into a world of creativity and find the perfect look that suits your summer mood!
Key Takeaways
– Explore twelve stunning nail designs inspired by the colors and textures of sea glass, perfect for any beach lover.
– Discover styles like Mesmerizing Aqua Marble and Sandy Pastel Waves that embody serene oceanic hues.
– Get practical tips on how to achieve these nail designs at home, making your nail art journey accessible and fun.
– Learn about the materials and techniques needed to create your favorite ocean-inspired looks.
– Find inspiration for your next salon visit or DIY nail session, ensuring you leave with nails that shine like the sun on the water.
1. Mesmerizing Aqua Marble
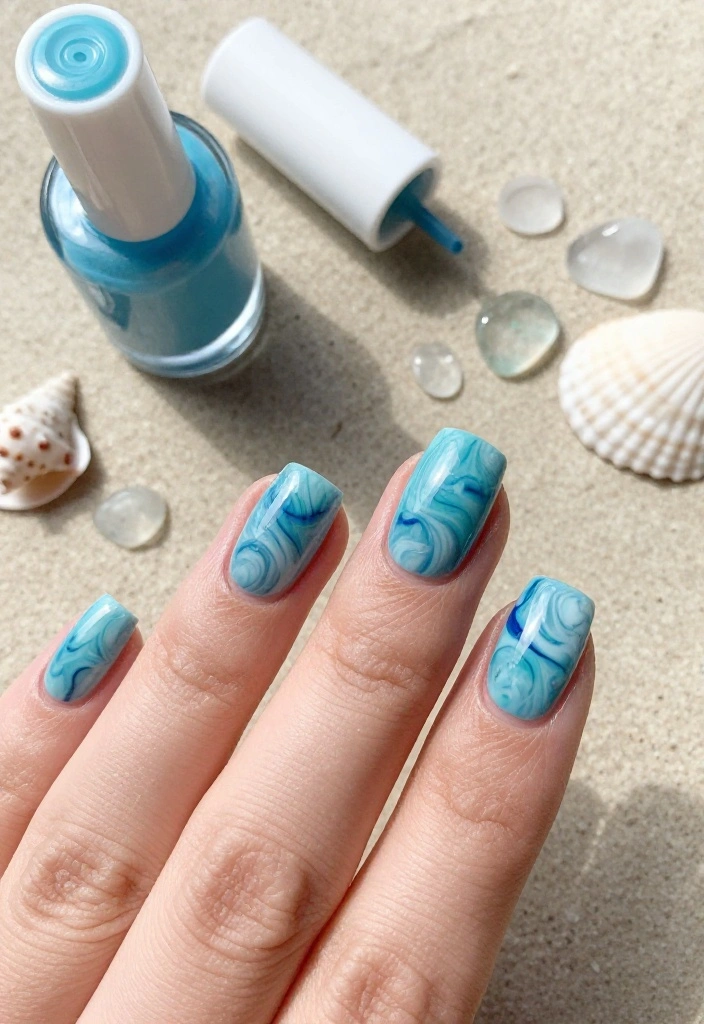
If you love the ocean, this aqua marble nail design is for you! Featuring beautiful swirls of aqua blue and soft white, it creates a stunning marble effect that resembles the gentle waves of the sea. Perfect for a beach day, this nail art is as captivating as it is customizable, allowing you to add your personal touch.
To achieve the aqua marble look, begin with a soft blue base coat. While it’s still wet, use a toothpick or a fine brush to swirl in white polish, creating a mesmerizing marbled appearance. Finish off with a glossy top coat for a shine that reflects the sun like ocean waves.
Tips: Experiment by adding hints of teal or a sprinkle of glitter for extra flair!
Ingredients:
– Soft blue nail polish
– White nail polish
– Top coat
Step-by-Step Instructions:
1. Apply a base coat to protect your nails.
2. Paint two coats of soft blue polish, allowing each coat to dry.
3. Use a toothpick to swirl white polish into the blue while it’s still wet.
4. Apply a glossy top coat for a beautiful finish.
How To Choose the Right Sea Glass Nail Designs
Choosing the right sea glass nails is all about embracing those beautiful oceanic colors and unique nail designs that transport you straight to the beach. Here’s how you can pick the perfect styles for your next manicure:
1. Consider Your Color Palette
When selecting your sea glass nail design, first think about the colors you love. Sea glass nails often feature soft blues, greens, and even milky whites. Look for shades that match your personal aesthetic and complement your skin tone. If you have warm undertones, consider sandy beiges and coral hues. For cooler undertones, aqua and turquoise look stunning.
2. Think About Nail Length and Shape
The length and shape of your nails can greatly influence the design you choose. Long, almond-shaped nails can showcase intricate designs like oceanic ombre or glittering shorelines. Shorter nails may work well with simple patterns like beachy stripes or a clear ocean dream effect. Choose a design that enhances your nail’s shape while ensuring comfort and wearability.
3. Choose the Finish You Prefer
Sea glass nails can come in various finishes, such as matte, glossy, or even textured. Matte finishes can give a chic and understated vibe, while glossy nails are eye-catching and vibrant. Textured designs, like seaglass shattered, can add depth and interest to your manicure. Pick a finish that matches your mood or the occasion you’re dressing for.
4. Evaluate Your Skill Level
Your skill level in applying nail art plays a big role in your choice. If you’re a beginner, opt for simpler designs that don’t require intricate techniques. Nail wraps and stickers can provide beautiful sea glass looks without the need for advanced skills. If you’re more experienced, take on complex designs like mesmerizing aqua marble or coral reef bliss that can showcase your artistic flair.
5. Consider the Occasion
The purpose of your manicure matters too. Are you preparing for a beach day, a night out, or a casual gathering? For beach days, go for playful designs like tropical breeze or driftwood charm that evoke coastal vibes. For formal events, consider more sophisticated styles like sandy pastel waves or sunset over the ocean that maintain a classy appearance.
6. Budget for Quality Products
Investing in quality nail products can make a big difference in your sea glass design. Higher-quality polishes tend to apply smoother and last longer. Consider spending a bit more on a few key products like a good base coat, top coat, and a versatile sea glass color. You can create stunning looks without breaking the bank if you choose wisely.
Pro Tip: Always do a patch test before trying new nail products to ensure you don’t have any allergic reactions. Test a small area on your skin and wait 24 hours. This way, you can enjoy your sea glass nails without worry!
By following these tips, you can make informed choices about your sea glass nails. Whether you prefer subtle shades or bold ocean tones, there’s a perfect design waiting for you. Happy nail painting!
2. Sandy Pastel Waves
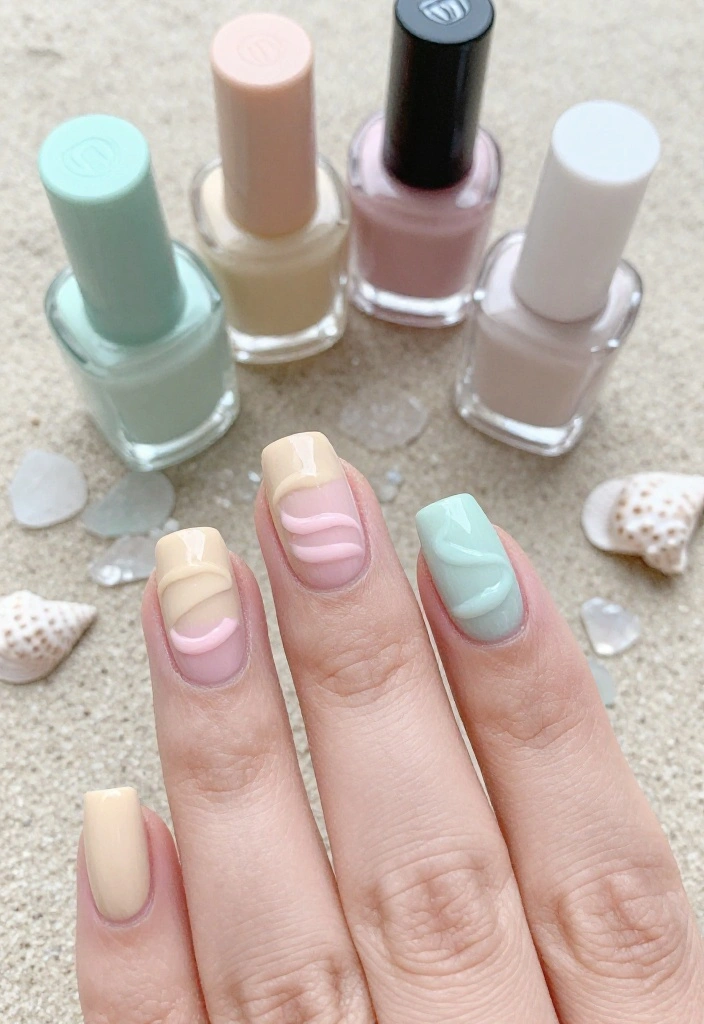
Bring the beach to your nails with sandy pastel waves! This design features a gentle blend of soft beige, pale pink, and mint green, resembling the beautiful meeting point of sand and tide. It’s understated yet eye-catching, perfect for those who enjoy a more subtle style.
To recreate this beachy effect, start with a beige base coat. Then, use a makeup sponge to dab on pastel pink and mint green, creating a soft gradient that mirrors the gentle waves. Seal it all with a glossy top coat for lasting beauty.
Tips: Consider using a textured top coat for a sandy feel that adds dimension!
Ingredients:
– Beige nail polish
– Pastel pink nail polish
– Mint green nail polish
– Textured top coat
Step-by-Step Instructions:
1. Apply a base coat for protection.
2. Paint two coats of beige nail polish and let it dry.
3. Use a makeup sponge to dab on pastel pink and mint green, blending gently.
4. Finish with a textured top coat for added effect.
Sea glass nails in sandy pastel waves bring the beach to your fingertips. Pro tip: start with a beige base, dab on pastel pink and mint green with a makeup sponge, and seal with a glossy top coat for lasting shimmer.
3. Oceanic Ombre
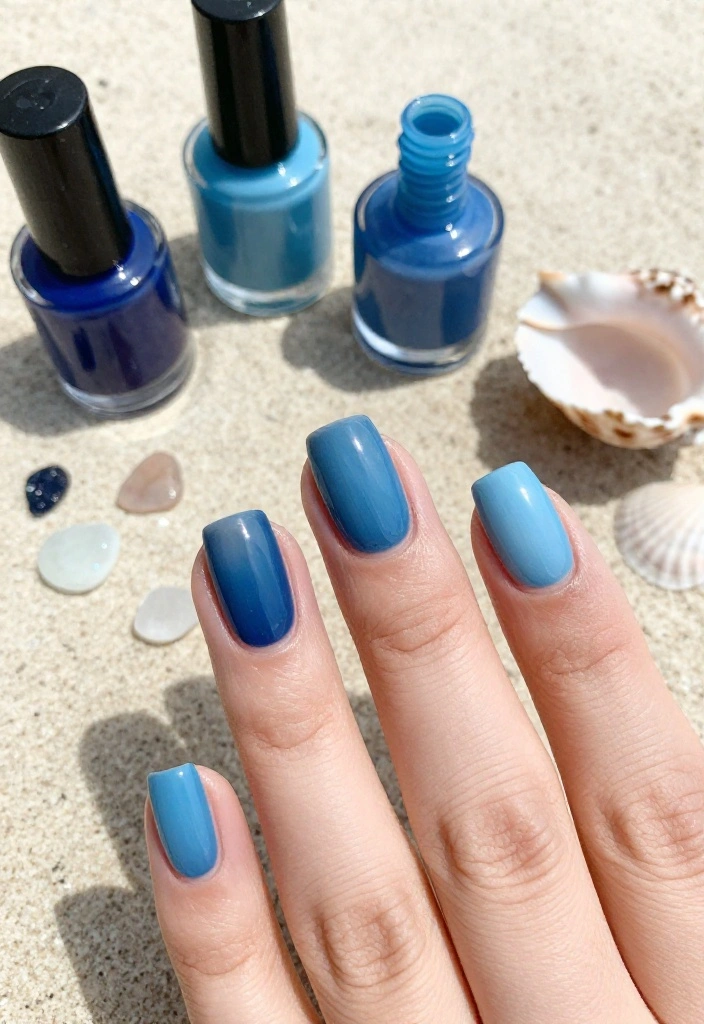
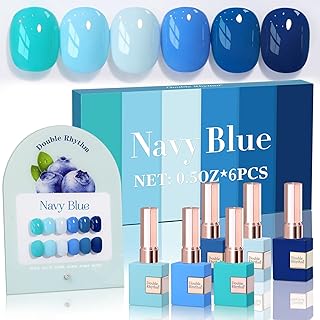
Dive into beach vibes with the oceanic ombre nail design! This stunning look transitions from deep sea blue at the base to a soft sky blue at the tips, perfectly capturing the ocean’s depth and the vast sky above. Ombre nails are visually stunning and surprisingly easy to create.
Start with a deep blue base coat. Once it dries, use a makeup sponge to apply the lighter sky blue at the tips, blending the two colors for a flawless gradient. Complete the look with a glossy top coat for maximum shine.
Tips: Add a touch of sparkle at the tips to mimic the light glimmering on the water!
Ingredients:
– Deep sea blue nail polish
– Sky blue nail polish
– Glossy top coat
Step-by-Step Instructions:
1. Apply a base coat.
2. Paint two coats of deep blue polish and let dry.
3. Use a sponge to apply sky blue to the tips, blending into the blue.
4. Seal with a glossy top coat for a vibrant finish.
Oceanic Ombre
Editor’s Choice




📹 Related Video: Seaglass Nails | Ombré With Jelly Dips | Hematite Dip Co.
4. Seaglass Shattered
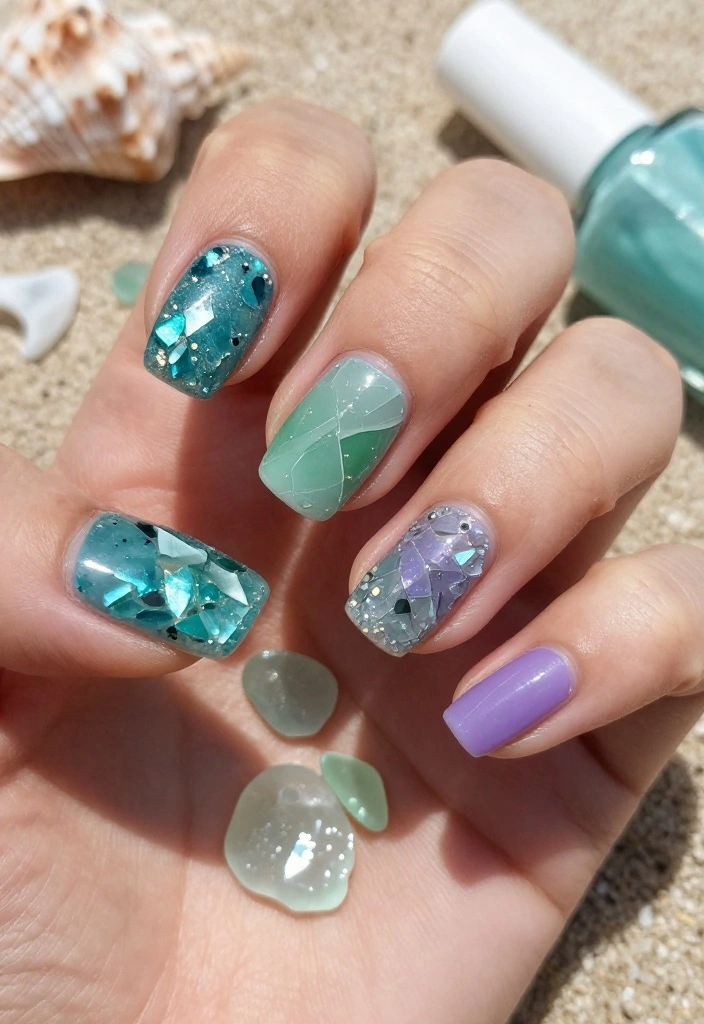
Inspired by the beauty of sea glass, this nail art features vibrant colors that mimic the irregular shapes found on shorelines. It’s a creative way to express your love for the ocean while giving your manicure a unique twist.
Choose a variety of ocean-inspired shades like teal, seafoam green, and soft lavender. After applying a base coat, randomly apply the colored polishes in jagged shapes to resemble glass shards. Finish with a matte top coat to achieve a rustic look that echoes the charm of real sea glass.
Tips: Mix in fine glitter to mimic the sparkle of glass catching sunlight!
Ingredients:
– Teal nail polish
– Seafoam green nail polish
– Soft lavender nail polish
– Matte top coat
Step-by-Step Instructions:
1. Start with a base coat.
2. Paint your nails with varying colors of teal, seafoam green, and lavender.
3. Use a thin brush to create jagged shapes that mimic sea glass shards.
4. Finish with a matte top coat for a rustic feel.
Seaglass Shattered
Editor’s Choice


5. Glittering Shoreline
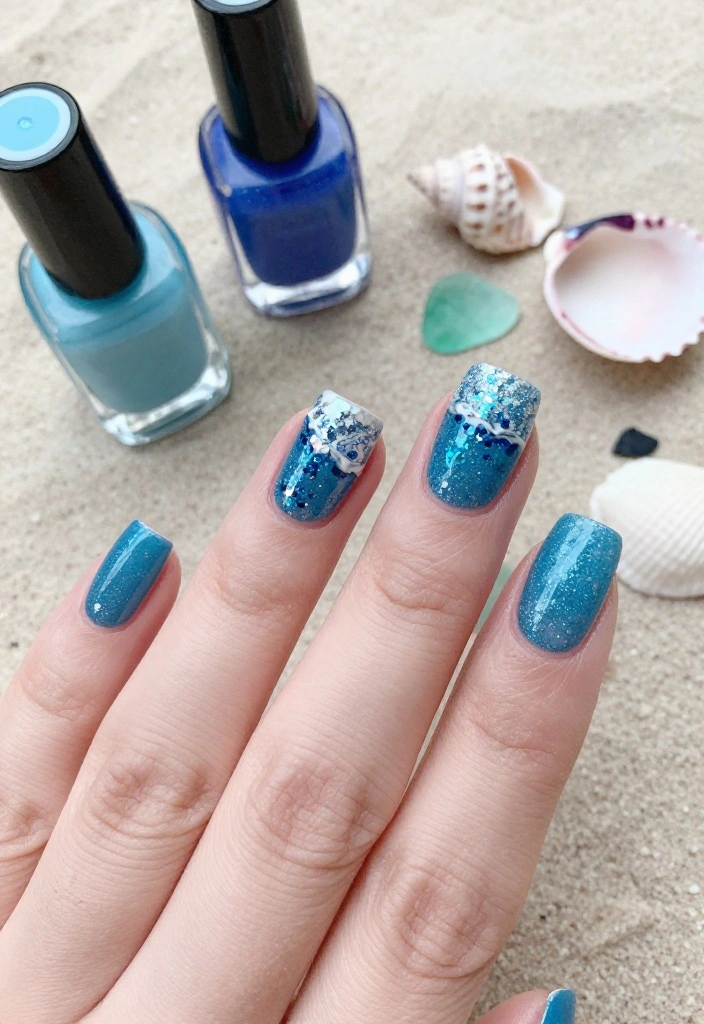
Add some sparkle to your nails with the glittering shoreline design! Combining bright ocean colors with shimmering glitter, this look is perfect for parties and special occasions, ensuring your nails catch everyone’s attention.
Begin with a bright blue base coat, then layer fine glitter on top for a dazzling effect. You can also add accents of teal or mint at the tips for a beautiful gradient. Seal it all with a high-gloss top coat to keep the sparkle shining bright.
Tips: Use a mix of small and large glitter particles to create added depth and dimension!
Ingredients:
– Bright blue nail polish
– Fine glitter polish
– High-gloss top coat
Step-by-Step Instructions:
1. Apply a base coat for protection.
2. Paint two coats of bright blue nail polish.
3. While wet, sprinkle fine glitter over the blue polish.
4. Seal with a high-gloss top coat to lock in the sparkle.
Glittering Shoreline
Editor’s Choice


6. Underwater Wave Ripples
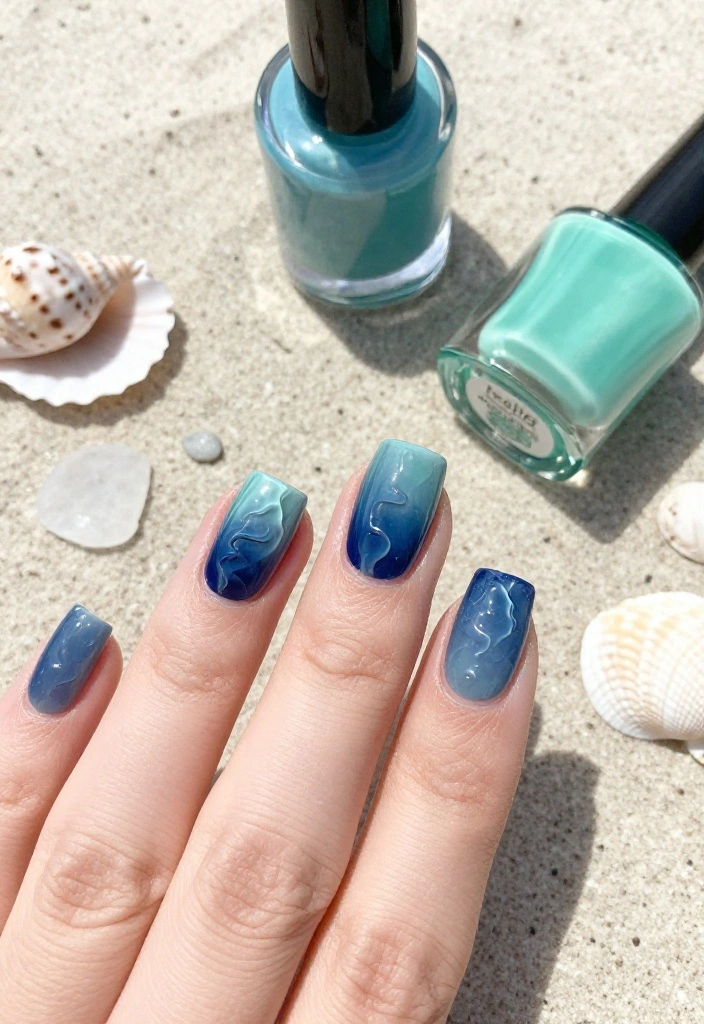
Experience the soothing beauty of underwater wave ripples with this stunning nail design. The gradient flows from deep navy blue to soft seafoam green, creating a refreshing look that feels both calming and elegant.
To achieve this effect, start with a navy base coat. After it dries, use a sponge to apply seafoam green, allowing the two colors to blend for a smooth ripple effect. Finish off with a glossy top coat to enhance color vibrancy and shine.
Tips: Consider adding a hint of silver or holographic polish at the tips for extra depth!
Ingredients:
– Navy blue nail polish
– Seafoam green nail polish
– Glossy top coat
Step-by-Step Instructions:
1. Apply a protective base coat.
2. Paint two coats of navy blue nail polish.
3. Use a sponge to apply seafoam green, creating a gradient.
4. Seal with a glossy top coat for a smooth finish.
Fun fact: a gradient like deep navy to seafoam green mirrors real ocean ripples and can instantly calm your mood in under 2 minutes. When you layer sea glass nails with a sponge, you’re actually teaching your eyes to drift like waves.
Underwater Wave Ripples
Editor’s Choice


You might also like
7. Sunset Over the Ocean
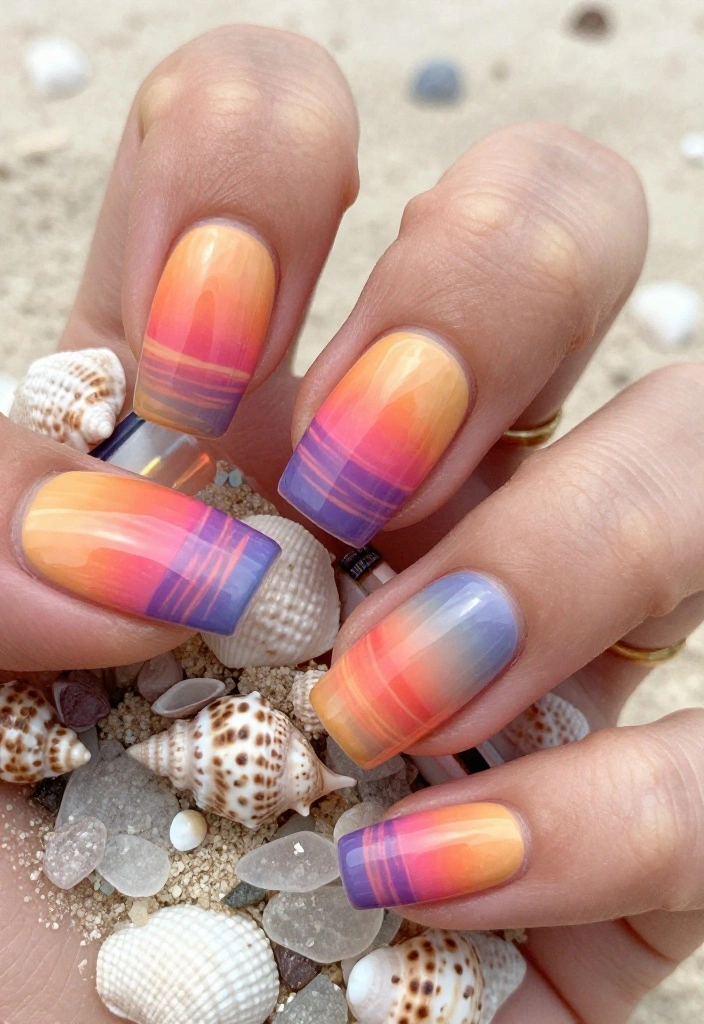
Capture the essence of a sunset with vibrant shades of orange, pink, and purple in this stunning nail design! This manicure embodies the warmth and tranquility of a seaside sunset, making it truly eye-catching.
Start with a peachy orange base coat. Blend in shades of pink and purple at the tips using a makeup sponge for a beautiful sunset gradient. Remember to start from the base and work your way to the tips for a seamless transition. Finish with a high-gloss coat for that perfect shine!
Tips: Add a glitter top coat for a little sparkle, emulating the evening sun!
Ingredients:
– Peachy orange nail polish
– Pink nail polish
– Purple nail polish
– High-gloss top coat
Step-by-Step Instructions:
1. Begin with a base coat.
2. Paint your nails with a peachy orange base color.
3. Blend pink and purple into the tips using a makeup sponge.
4. Seal with a high-gloss top coat for a shiny finish.
8. Coral Reef Bliss
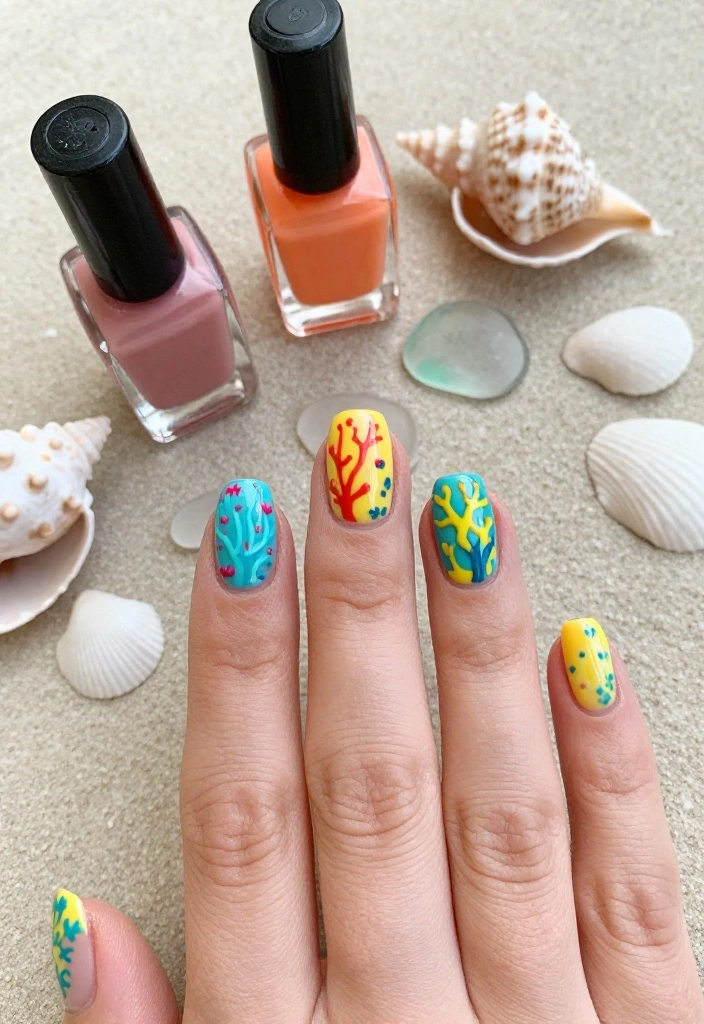
Dive into the vibrant world of coral reefs with this lively nail art design! A cheerful mix of bright coral, turquoise, and yellow creates a joyful burst of color that mirrors the beauty of underwater life.
Start with a coral base coat. Using a detail brush, paint abstract designs in turquoise and yellow that resemble coral shapes. This playful approach adds dimension and life to your nails! Finish with a glossy top coat for a beautiful shine.
Tips: Try a matte top coat for a fun twist on this vibrant design!
Ingredients:
– Coral nail polish
– Turquoise nail polish
– Yellow nail polish
– Glossy top coat
Step-by-Step Instructions:
1. Apply a base coat to protect your nails.
2. Paint two coats of coral nail polish.
3. Use a detail brush to apply turquoise and yellow in coral-like shapes.
4. Seal with a glossy top coat.
9. Beachy Stripes
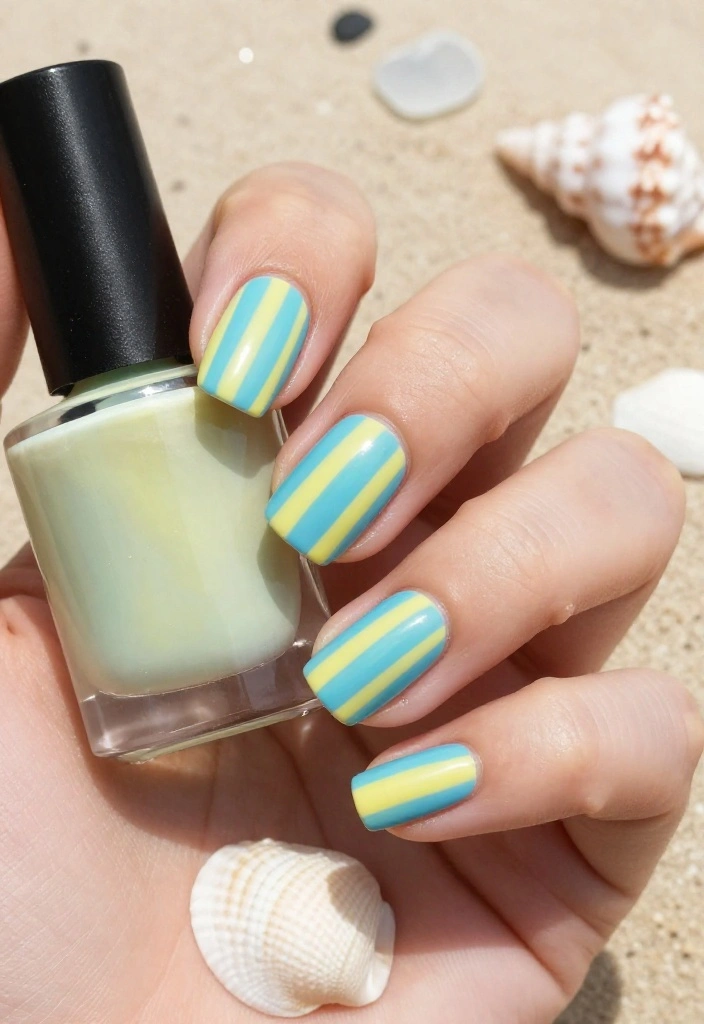
Keep your nails chic and simple with beachy stripes! This design draws inspiration from colorful beach umbrellas and lounge chairs, offering a playful touch that captures the essence of sunny seaside days.
Start with a soft beige base coat. Once dry, use nail tape to create stripes and paint alternating colors like ocean blue and sunny yellow or coral on top. Carefully remove the tape and finish with a glossy top coat for a polished look!
Tips: Use thin tape for precise lines, and add accent nails with a solid color for extra flair!
Ingredients:
– Soft beige nail polish
– Ocean blue nail polish
– Sunny yellow or coral nail polish
– Glossy top coat
Step-by-Step Instructions:
1. Start with a base coat.
2. Paint two coats of soft beige nail polish.
3. Apply nail tape in your desired stripe pattern.
4. Paint between stripes with blue and yellow, then remove tape carefully.
5. Seal with a glossy top coat for shine.
Beachy Stripes
Editor’s Choice



10. Clear Ocean Dream
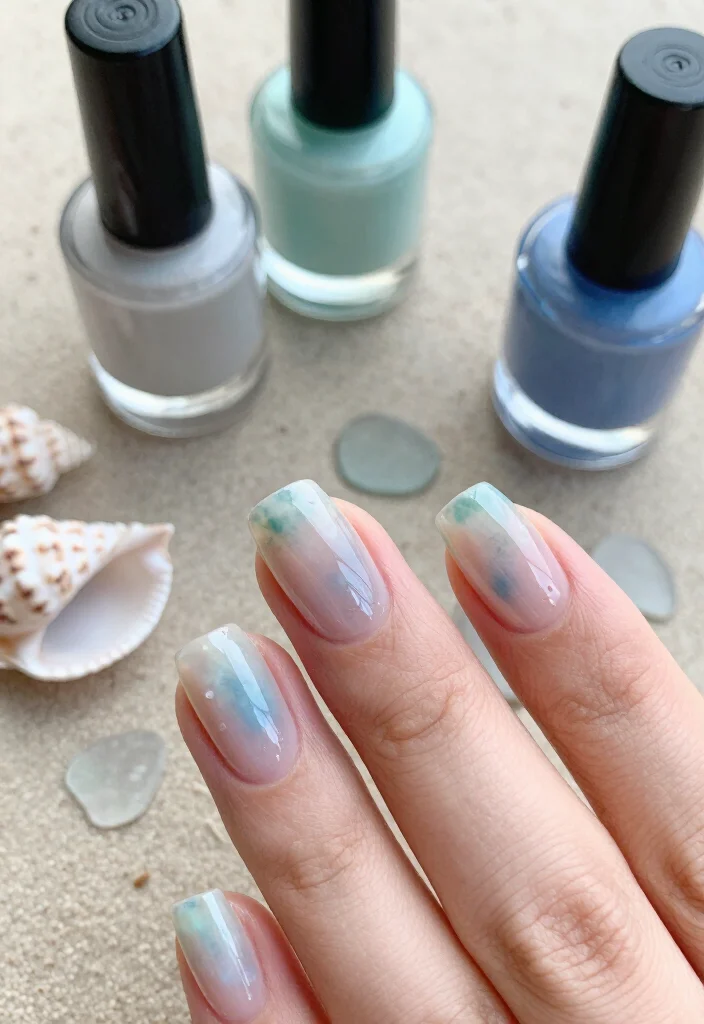
For a minimalist approach, the Clear Ocean Dream design captures the beauty of simplicity. Featuring a clear base with gentle hints of blue and green, it evokes the serene essence of clear ocean waters.
Begin with a clear base coat and, once dry, lightly apply blue and green polish to select areas. This subtle touch allows your natural nails to shine through while embracing oceanic colors. Complete the look with a glossy top coat for a polished shine that reflects tranquility.
Tips: Mix in a touch of fine glitter to keep it fresh and sparkling!
Ingredients:
– Clear base coat
– Light blue nail polish
– Light green nail polish
– Glossy top coat
Step-by-Step Instructions:
1. Apply a protective base coat.
2. Use a clear base coat on your nails.
3. Lightly apply blue and green nail polish in random patches.
4. Seal with a glossy top coat for shine.
You Might Also Like
11. Tropical Breeze
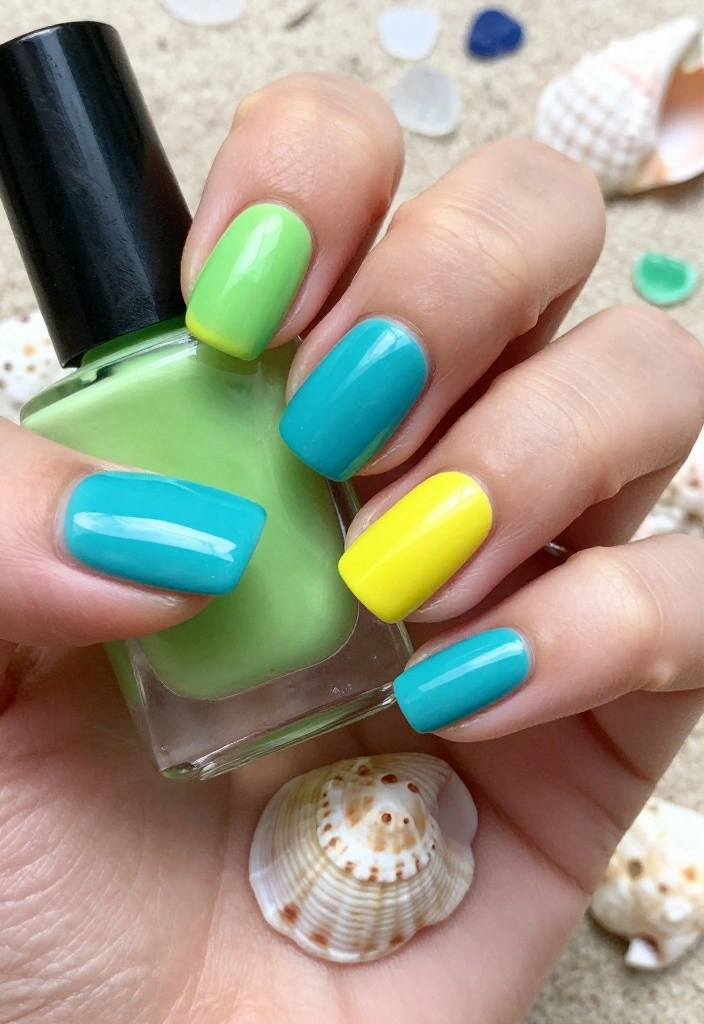
Embrace a tropical vibe with the Tropical Breeze nail design! This vibrant combination of turquoise, yellow, and green brings to mind lush palm trees and sunny beach days, making it a fun choice for any occasion.
Start with a turquoise base coat, then add bright yellow tips and soft green accents. This lively color combination captures the essence of tropical landscapes. Blend the colors at the edges using a makeup sponge for a seamless look. Finish with a glossy top coat to make those colors pop!
Tips: Consider adding a touch of white for palm tree silhouettes to elevate the design!
Ingredients:
– Turquoise nail polish
– Bright yellow nail polish
– Soft green nail polish
– Glossy top coat
Step-by-Step Instructions:
1. Start with a base coat.
2. Paint two coats of turquoise nail polish.
3. Use a makeup sponge to blend yellow at the tips.
4. Add soft green accents with a detail brush.
5. Seal with a glossy top coat for a shiny finish.
12. Driftwood Charm
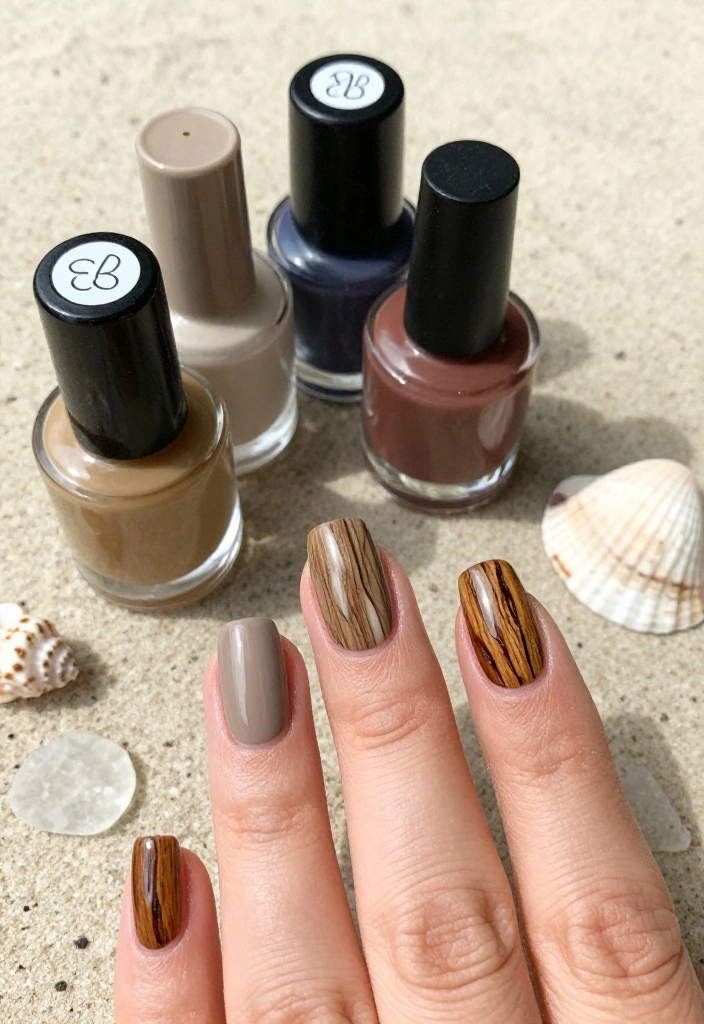
For a unique twist, the Driftwood Charm design embraces earthy tones that reflect the beauty of driftwood found on the beach. This design combines taupe, brown, and soft white for a natural, rustic look that remains stylish.
Start with a taupe base coat. Once dry, use a thin brush to create lines and texture with brown polish that mimic wood grain. Finish with a matte top coat for a rustic and earthy feel that captures the essence of beach walks.
Tips: Add a hint of white for additional highlights to enhance the wood effect!
Ingredients:
– Taupe nail polish
– Brown nail polish
– Matte top coat
Step-by-Step Instructions:
1. Apply a protective base coat.
2. Paint your nails with taupe nail polish.
3. Use a thin brush to draw grain-like patterns with brown polish.
4. Seal with a matte top coat for a rustic finish.
Did you know that a single driftwood-inspired manicure can evoke a sun-warmed beach with just 3 shades? Taupe, brown, and soft white, finished with a matte top coat, deliver a natural, earthy sea glass nails vibe.
Conclusion
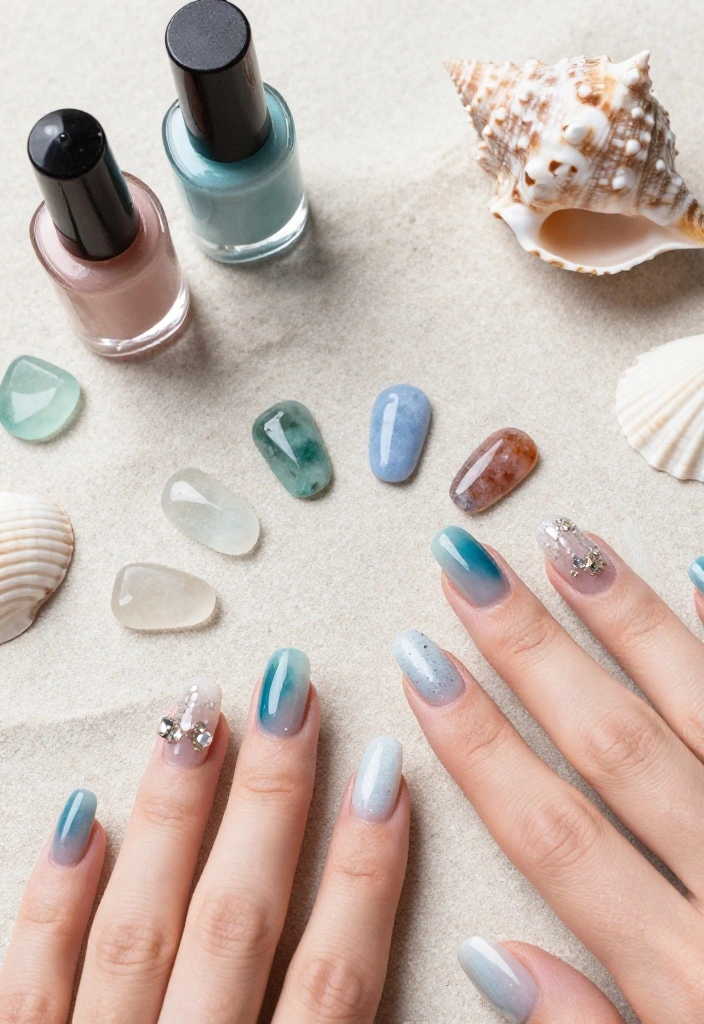
Sea glass nails are not just a trend; they are a celebration of the beauty found in the ocean. From the calming tones of underwater shades to the vibrant colors reminiscent of a tropical beach, there’s a design for every mood and occasion. Don’t hesitate to get creative and make these designs your own! Whether you opt for a dramatic look or a subtle touch of color, embrace the spirit of the sea with your nail art.
Feel free to share your favorite sea glass nail art ideas in the comments below! We can’t wait to see how you express your love for the ocean through your manicures!
Note: We aim to provide accurate product links, but some may occasionally expire or become unavailable. If this happens, please search directly on Amazon for the product or a suitable alternative.
This post contains Amazon affiliate links, meaning we may earn a small commission if you purchase through our links, at no extra cost to you.
Frequently Asked Questions
What exactly are sea glass nails and how can I recreate the look at home?
Sea glass nails mimic the soft, frosted appearance of beach-tumbled glass, using muted, translucent colors and a glassy finish. They’re all about blending pale oceanic colors into a tide-washed manicure. To recreate at home:
Prep nails and apply a sheer base coat.
Sweep on two to three sheer coats of a pale blue, mint, or sea-green polish, letting each layer dry.
Add a light sponging of a slightly different shade to create frosted edges.
For a true sea glass vibe, dab on tiny irregular patches of white or ivory to imitate glass shards.
Finish with a high-shine top coat or a frosted matte top coat for that sea-washed look.
Experiment with layering for an oceanic colors palette in your sea glass nails.
Which oceanic colors work best for sea glass nails?
Think pale, airy shades: seafoam greens, pale aquas, soft blues, dusty turquoise, and sandy neutrals. Combine two or three layers to build that delicate translucency that defines sea glass nails.
These hues are classic oceanic colors for sea glass nails designs and pair beautifully in gradients or scattered patches for a beachy look.
What are easy at-home techniques to recreate sea glass nail designs quickly?
Here are easy at-home techniques to recreate sea glass nail designs quickly:
Use a sheer base and a couple of light coats of sea glass nails colors, letting each dry.
Try a sponge gradient to blend oceanic colors for a frosted look.
Lightly dab on patches of white or ivory to mimic glass shards.
Finish with a top coat for shine or a frosted finish for that sea-washed vibe.
How can I make sea glass nails last longer and resist chipping at the beach?
To make sea glass nails last longer and resist chipping on a beach getaway:
Start with a quality base coat and apply two ultra-thin coats of your sea glass colors, sealing each layer.
Finish with a strong top coat and reapply every 2–3 days, especially after swimming or dishwashing.
If you go with regular polish, consider a gel or shellac top coat for longer wear, and moisturize cuticles to keep nails flexible.
Protect nails from harsh sun and salt by wearing gloves when doing chores, and avoid scraping nails on shells.
What nail designs pair best with sea glass nails?
Accent nails with shells, starfish, or gold foil flecks to echo the sea. White line art or a gentle wave pattern on one nail can enhance the ocean vibe, while the rest stay clean in sea glass nails style. For shape, go with a practical yet flattering short rounded-square or almond—both flatter the soft, glassy look of sea glass nails.
Related Topics
sea glass nails
ocean nail art
beach vibes
oceanic colors
nail designs
easy nail art
trending nail styles
colorful nails
summer nails
beginner friendly
DIY nail designs
manicure inspiration
I tried a similar nail design last summer, but I accidentally knocked my hand against a door and it looked like a sea glass explosion! Have you ever had a nail fail like that?
I remember the first time I tried to do my nails like this; I ended up with more polish on my hands than the nails! It was a colorful mess, but at least it made for a good laugh!