
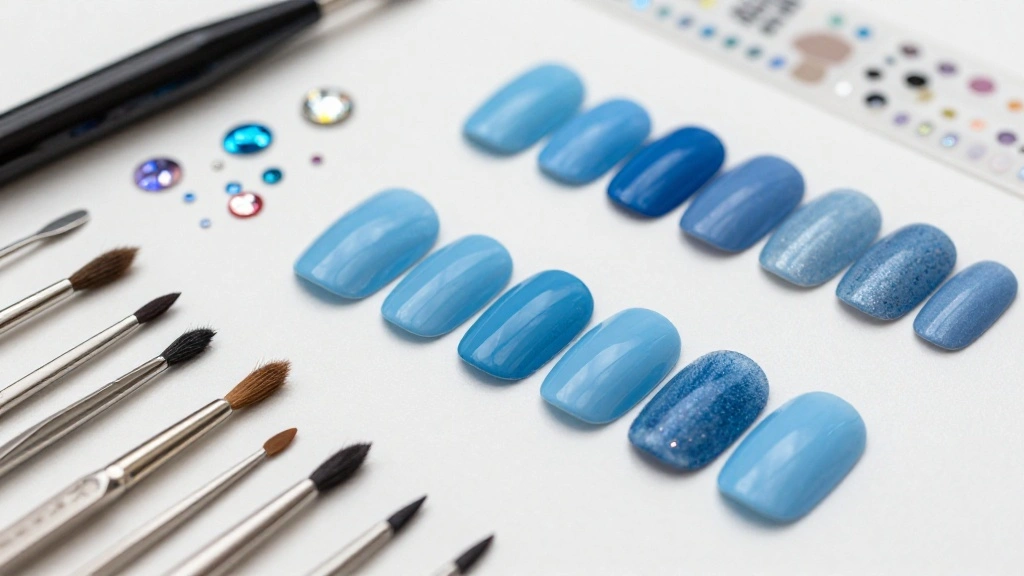
Spring is in the air, and with it comes a wave of creativity and inspiration. The fresh, vibrant color of sky blue has me dreaming of clear skies and fun times. If you’ve been searching for a way to brighten up your nails for any occasion, this guide is just what you need. Nothing lifts your spirits quite like a stunning manicure, especially when it features that perfect shade of sky blue.
Whether you’re a nail art enthusiast, a busy professional, or someone who simply loves to keep their nails looking fabulous, this blog post is for you. You’ll discover a range of creative sky blue nail art ideas that suit every mood and event. From classic floral designs to playful tie-dye effects, there’s something here that will spark your creativity and inspire your next nail session.
In this post, I’ve rounded up 18 unique sky blue nail art ideas that are fun, festive, and totally Instagram-worthy. Each design will give you fresh inspiration and practical tips to achieve that perfect look at home or at the salon. So grab your favorite nail polish, and let’s dive into this collection of delightful sky blue nail art!
Key Takeaways
– Discover 18 unique sky blue nail art designs, ensuring you’ll find something perfect for any occasion.
– Get inspired by various styles, from classic floral patterns to trendy tie-dye techniques.
– Each design includes practical tips for recreating the look at home or discussing with your nail technician.
– Enjoy a fun and creative way to express yourself through your nails, making any outfit pop.
– Elevate your nail game with these easy-to-follow ideas that cater to both beginners and experienced nail artists.
1. Classic Sky Blue with White Flowers
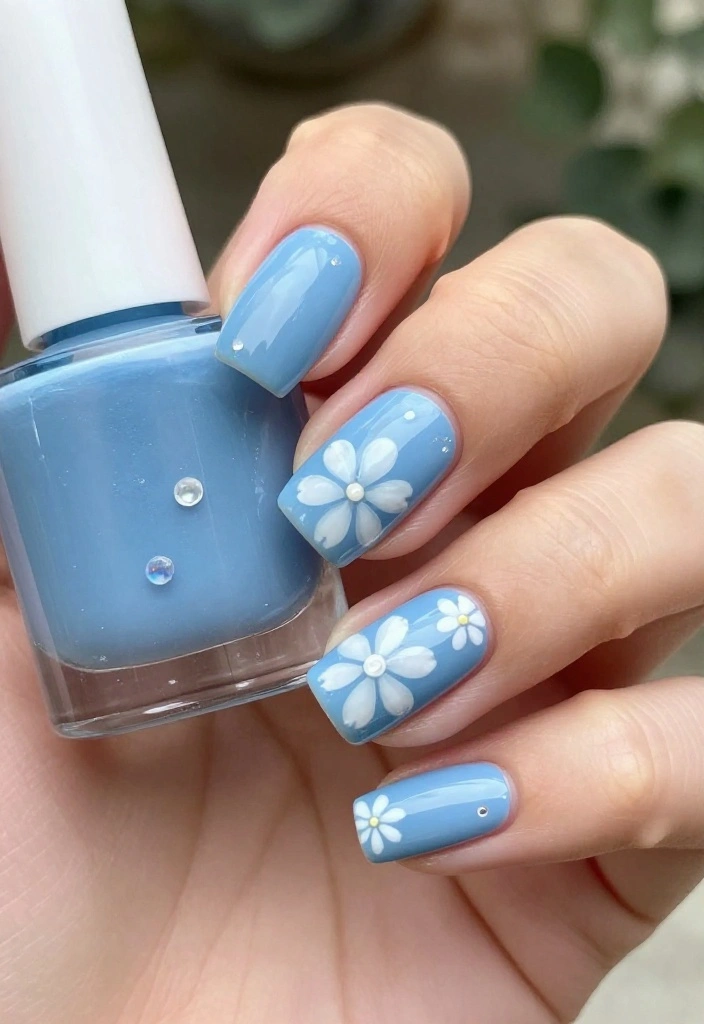
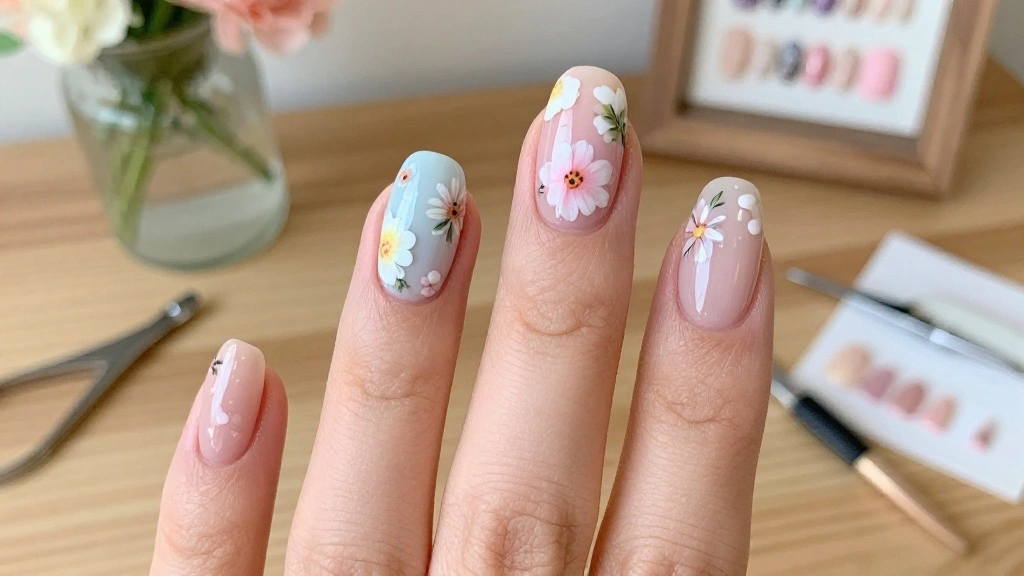
If you’re seeking a fresh and feminine nail design, try classic sky blue adorned with delicate white flowers. This charming look captures the essence of spring, making it perfect for garden parties or sunny picnics. The soft blue shade contrasts beautifully with the pristine white blooms, creating a refreshing vibe that you’ll love to show off. To nail this look, start with a smooth sky blue base coat. Once dry, use a fine brush to paint small, whimsical flowers in white. For added flair, you can dot tiny accents of yellow or pink in the center of each flower, giving them a lively pop. Tips: Always finish with a top coat to seal and protect your design. Allow each layer to dry thoroughly to avoid any smudging! Ingredients: – Sky blue nail polish – White nail polish – Accent colors (optional) – Top coat Step-by-Step Instructions: 1. Apply a base coat and let it dry. 2. Paint nails with sky blue polish and allow drying. 3. Create flower shapes on each nail using white polish. 4. Add accent colors in the center of flowers if desired. 5. Finish with a top coat for a glossy shine. Frequently Asked Questions: – How do I make the flowers more defined? Use a fine brush for intricate designs.
Fun fact: Sky blue nail art with tiny white flowers can be mastered in about 15 minutes, once you’ve got a smooth base. The soft blue plus white blooms gives a chic, garden-party vibe that’s both refreshing and easy to show off.
Classic Sky Blue with White Flowers
Editor’s Choice




2. Ombre Sky Blue Delight
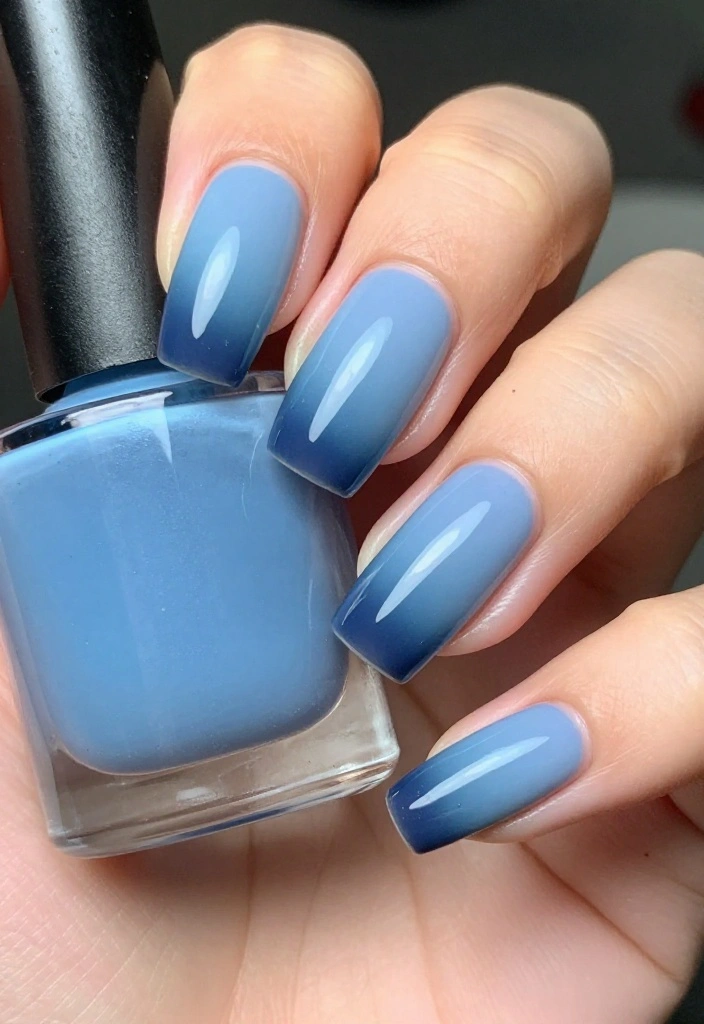
Ombre nails are a stunning trend, and they look particularly enchanting in sky blue shades. This technique beautifully blends light and dark blues, creating a dreamy gradient that is perfect for any occasion. Whether you’re headed out for brunch or an evening event, this style catches the light and draws attention. To achieve this mesmerizing look, use a makeup sponge to dab on different shades of blue, blending them seamlessly. The soft ombre effect is not only eye-catching but also very chic. Tips: Don’t hesitate to experiment with various shades of blue to find the perfect combination that suits you. Ingredients: – Light sky blue nail polish – Darker sky blue or navy polish – Makeup sponge – Top coat Step-by-Step Instructions: 1. Apply a base coat and let dry. 2. Paint the base of your nails with the light blue polish. 3. Use the sponge to dab the darker blue polish onto the tips, blending into the base color. 4. Seal the look with a top coat. Frequently Asked Questions: – Can I use more than two colors for ombre? Yes! The more colors, the more unique your ombre design can be.
Fun fact: A flawless sky blue ombre for nail art uses just 3 shades and a quick sponge dab, creating a seamless gradient in under 10 minutes. Finish with a glossy top coat to lock it in.
Ombre Sky Blue Delight
Editor’s Choice


3. Glittery Sky Blue Sparkle
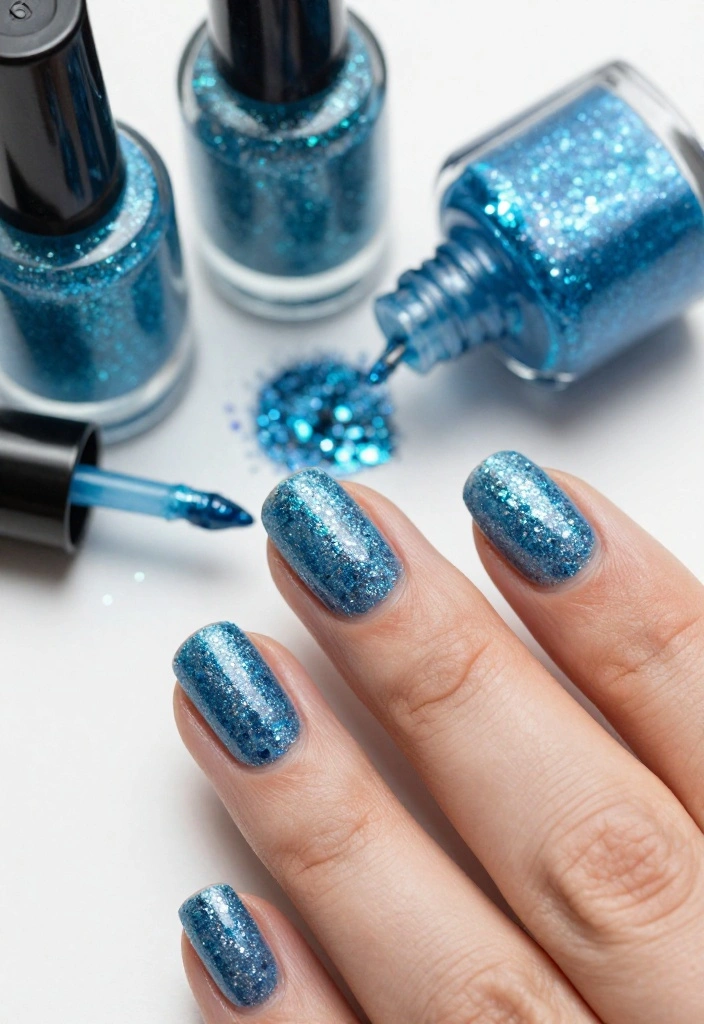
Who can resist a touch of sparkle? Glittery sky blue nails can elevate any manicure, making them perfect for celebrations like birthdays or New Year’s Eve. The glimmer of glitter transforms a simple sky blue into a dazzling masterpiece, perfect for those who love to stand out. To create this eye-catching look, choose either a glitter polish or sprinkle loose glitter on top of your base layer. This design is essential for anyone who enjoys shimmering nails! Tips: Apply a thick top coat over your glitter to keep it smooth and long-lasting. Ingredients: – Sky blue nail polish – Sky blue glitter polish or loose glitter – Top coat Step-by-Step Instructions: 1. Start with a base coat and let dry. 2. Apply sky blue polish and let it dry completely. 3. For a glittery finish, apply glitter polish or sprinkle loose glitter while the polish is still wet. 4. Seal it all in with a top coat for durability. Frequently Asked Questions: – How can I remove glitter polish easily? Use a foil method with acetone for tougher glitter polishes.
Glittery Sky Blue Sparkle
Editor’s Choice




4. Sky Blue with Geometric Patterns
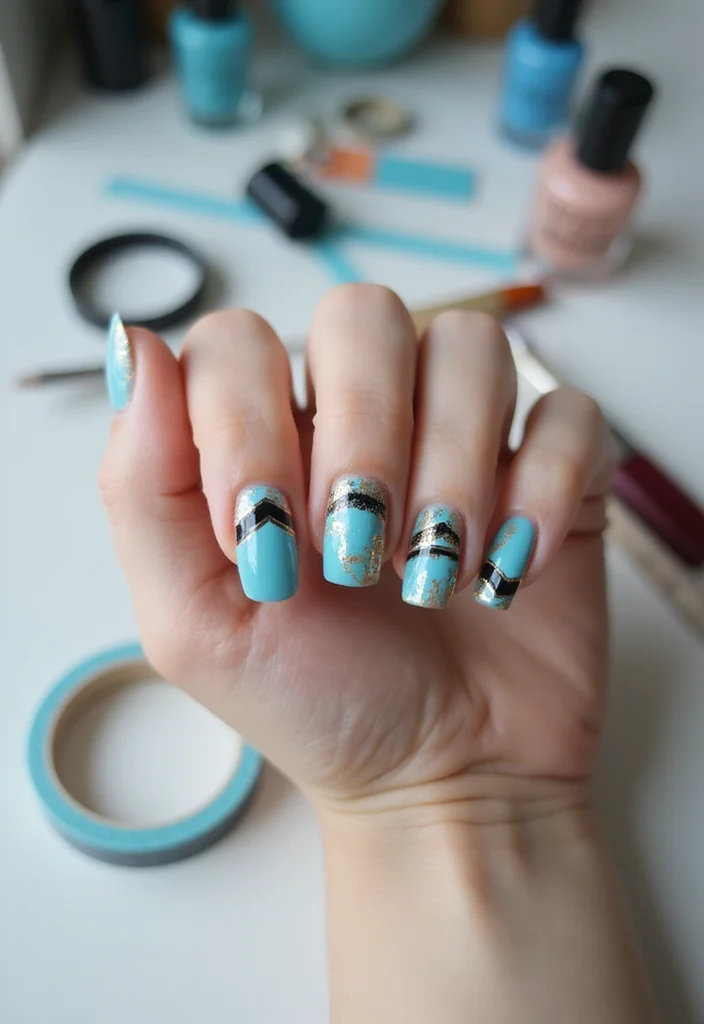
Inject a modern flair into your nail art with geometric patterns in sky blue! This design is not only stylish but also fun and playful. By combining sky blue with contrasting colors like white or black, you can create striking patterns that are sure to catch the eye. Geometric designs appeal to anyone who loves sleek and contemporary styles. Use tape for precise lines or polish pens for detailed artistry. This look transitions effortlessly from day to night, making it perfect for any occasion. Tips: Experiment with different shapes such as triangles, squares, or stripes to discover your favorite pattern! Ingredients: – Sky blue nail polish – Accent colors (white, black, or gold) – Nail tape or fine brushes – Top coat Step-by-Step Instructions: 1. Apply a base coat and let it dry. 2. Paint all nails with sky blue polish. 3. Once dry, use tape or a brush to create geometric shapes with contrasting colors. 4. Seal the design with a top coat. Frequently Asked Questions: – Can I mix different geometric shapes? Absolutely! Feel free to get creative with your designs.
How To Choose Sky Blue Nail Art Designs
Choosing the perfect sky blue nail art can feel overwhelming, especially with so many options available. To help make your decision easier, consider these key factors:
1. Occasion
Think about where you plan to wear your nail art. Are you looking for something festive for a party or a more subdued design for the office? Different occasions call for different styles. For instance, delicate patterns may suit a wedding, while bold geometric designs might be perfect for a night out.
2. Skill Level
Your nail art skills matter when selecting a design. If you’re a beginner, opt for simpler designs like classic sky blue with white flowers or sky blue French tips. Advanced artists can try more intricate styles like sky blue marble effects or tie-dye nails. Choose a design that matches your comfort level to ensure a successful outcome.
3. Nail Length and Shape
Your nail length and shape can influence the design you choose. Long, almond-shaped nails can highlight detailed artwork, while shorter nails may look better with minimalist designs. Take your nail shape into account; some designs may look cluttered on smaller surfaces. Consider the overall balance between the design and your nail’s natural characteristics.
4. Color Combinations
Sky blue pairs beautifully with various colors. Think about how you want to incorporate other shades into your design. For example, combining sky blue with metallic copper or rainbow accents can create a stunning contrast. Choose a color scheme that resonates with your personality and style. Remember, it’s all about expressing yourself!
5. Design Trends
Stay updated on nail art trends to choose a design that feels fresh. Current trends include ombre effects, bubbles and dots, and floral designs. Explore social media platforms like Instagram or Pinterest for inspiration. Remember, while trends can guide you, choose a style that feels right for you.
Pro Tip: Don’t be afraid to mix and match elements from different designs. Combining features can create a truly unique look that reflects your personality and creativity!
By considering these factors, you’ll be well on your way to selecting the perfect sky blue nail art design for any occasion. Enjoy the process and have fun expressing your creativity!
5. Sky Blue with Rainbow Accents
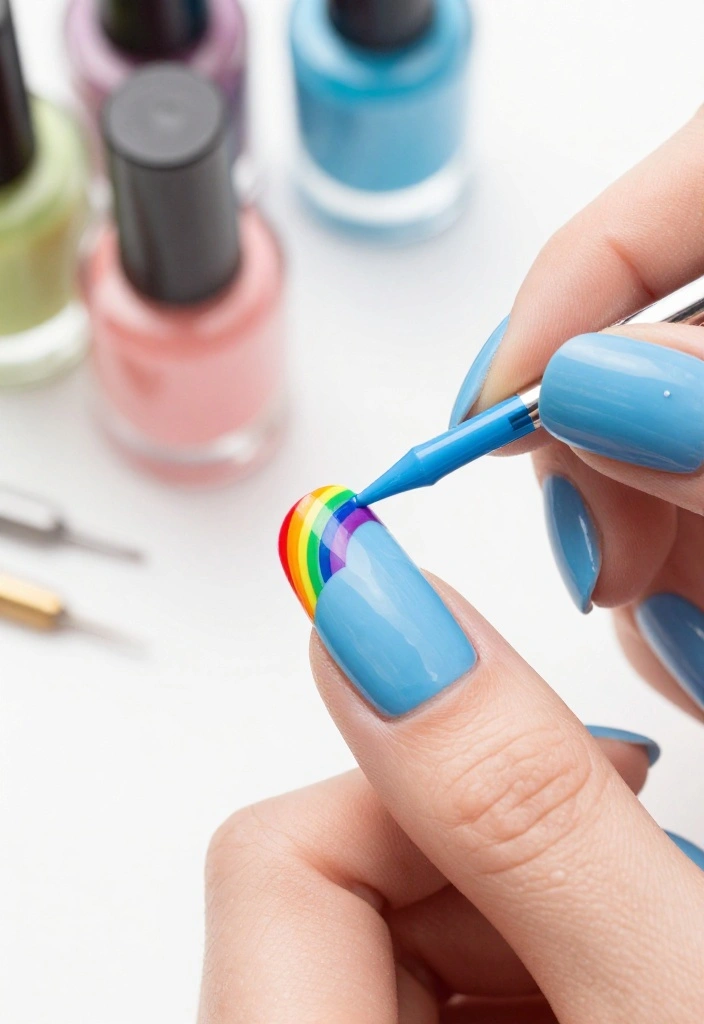
Brighten up your sky blue nails with cheerful rainbow accents! This design is all about fun and playfulness, making it perfect for festivals, parties, or casual outings with friends. The joyful rainbow colors stand out beautifully against the calming sky blue background. To create this vibrant look, you can either paint little rainbow arcs on each nail or focus the design on one accent nail. A fine brush or nail art pens will help you achieve precision. Tips: Allow each color to dry before applying the next to avoid any smudging. Ingredients: – Sky blue nail polish – Various colors for the rainbow (red, orange, yellow, green, blue, purple) – Top coat Step-by-Step Instructions: 1. Start with a base coat and allow to dry. 2. Apply sky blue polish on all nails. 3. On one or two nails, use a fine brush to create rainbow arcs. 4. Finish with a top coat for lasting vibrancy. Frequently Asked Questions: – How do I keep the rainbow colors bright? Use a top-quality nail polish for vivid colors.
📹 Related Video: How to do Rainbow sky nails, rainbow clouds nail art trend. Clouds nail art. Sponging nail art
6. Sky Blue Marble Effect
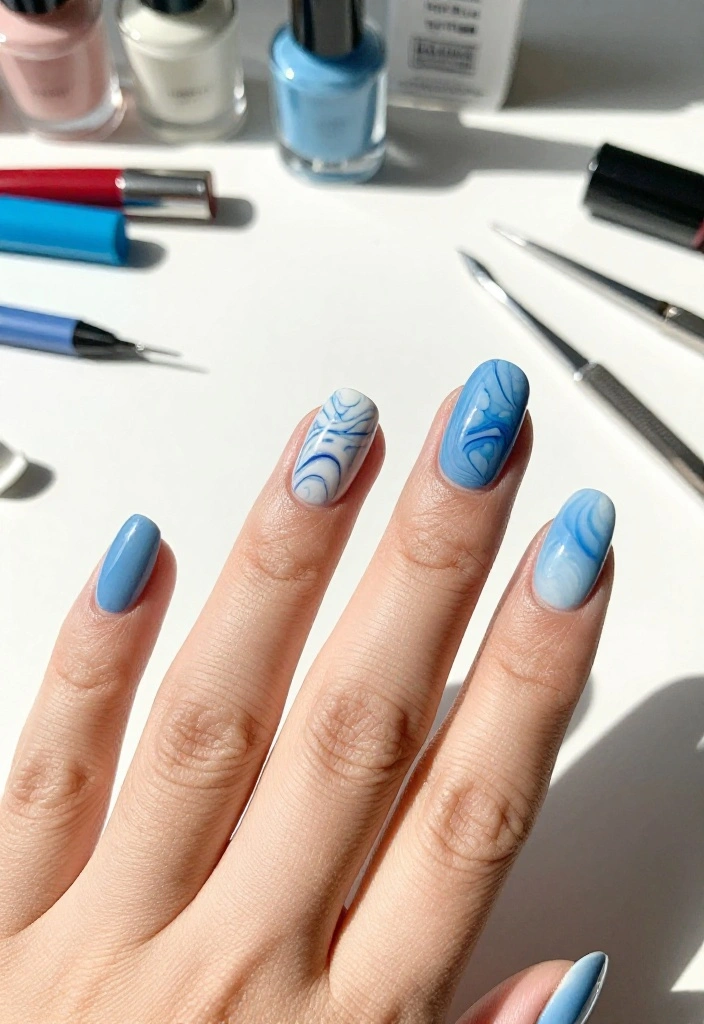
The marble effect is a chic and sophisticated nail art style that looks stunning with sky blue. This design mimics the elegance of marble stone, creating a unique and eye-catching look. It’s perfect for elegant events or a day out, sure to turn heads wherever you go. To create this artistic effect, you can use a water marbling technique or a dry marbling method with a fine brush. Combining shades of blue with a touch of white results in a striking marble finish. Tips: Be patient with the marbling process; practice will enhance your skills! Allow your nails to dry completely to achieve a clean finish. Ingredients: – Various shades of sky blue nail polish – White nail polish – Top coat Step-by-Step Instructions: 1. Apply a base coat and let it dry. 2. Use a combination of blue and white polishes. For water marbling, drop colors into water and swirl with a toothpick; for dry marbling, use a brush to create swirls. 3. Finish with a top coat to protect the design. Frequently Asked Questions: – Is the water marbling technique hard to do? It requires practice but can be very rewarding!
Fun fact: Water marbling can create countless unique marble patterns—no two nails are the same. In sky blue nail art, you can expect about 3–5 distinct looks per set, making each manicure one-of-a-kind and elegant for events.
7. Sky Blue French Tips
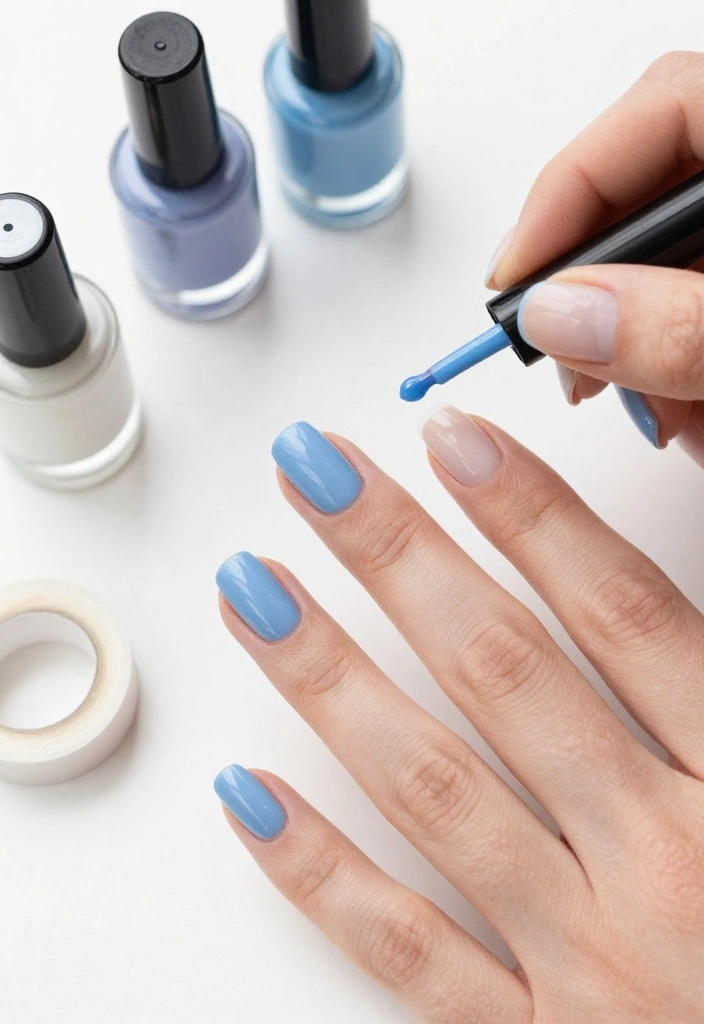
Put a fun twist on the classic French manicure with sky blue tips! This updated style adds a pop of color while maintaining the elegance of the traditional look. Sky blue French tips are perfect for any occasion, whether it’s a bridal shower or a romantic date night. To create this chic design, start with a neutral base coat, such as nude or light pink, and then apply sky blue to the tips. For an extra glam touch, consider adding a bit of sparkle to the tips. Tips: Use tape for clean lines during application, or invest in a French tip guide for better precision. Ingredients: – Neutral base color nail polish – Sky blue nail polish – Glitter polish (optional) – Top coat Step-by-Step Instructions: 1. Start with a clean base coat of neutral polish. 2. Once dry, use tape to cover the nail and paint the tips in sky blue. 3. For added glam, apply glitter at the tips. 4. Seal with a top coat for longevity. Frequently Asked Questions: – Can I do this with any color tips? Yes, feel free to experiment with different shades!
8. Sky Blue Tie-Dye Nails
Celebrate the carefree vibes of summer with sky blue tie-dye nails! This fun and creative design captures the essence of festivals and sunny days. The blend of shades creates a vibrant and playful look that expresses your artistic side. To achieve this unique style, use a sponge or brush to apply various shades of blue in a tie-dye pattern. You can even mix in some white or pastel colors for a cool touch! Tips: Don’t be afraid to experiment; mixing colors can lead to a truly unique effect! Ingredients: – Various shades of sky blue and other blue polishes – White polish (optional) – Top coat Step-by-Step Instructions: 1. Begin with a base coat and let it dry. 2. Apply multiple shades of blue using a sponge to create the tie-dye effect. 3. Use a fine brush to enhance the design by adding more colors if desired. 4. Finish with a top coat for protection. Frequently Asked Questions: – Can I use a tie-dye kit for nail art? Yes, it can be a fun way to achieve unique patterns!
Sky Blue Tie-Dye Nails
Editor’s Choice


You might also like
9. Delicate Sky Blue Lace
Lace nail art adds a touch of elegance, making it perfect for special occasions! This design features intricate lace patterns against a lovely sky blue background, ideal for weddings or anniversaries. The delicate contrast creates a sophisticated charm that elevates your manicure. To create this elegant look, start with a base of sky blue and use a fine brush or lace stamping plate to apply the lace design. The intricate details against the blue backdrop add a refined touch to your nails. Tips: Don’t hesitate to experiment with different lace patterns until you find your favorite! Ingredients: – Sky blue nail polish – White or cream nail polish for lace – Top coat Step-by-Step Instructions: 1. Apply a base coat and let it dry. 2. Paint your nails with sky blue polish. 3. Use a lace stamping plate or fine brush to apply lace designs with contrasting polish. 4. Finish with a top coat to seal the design. Frequently Asked Questions: – How can I make the lace appear more detailed? Use a fine brush for intricate designs to get the best results.
10. Sky Blue Holographic Shine
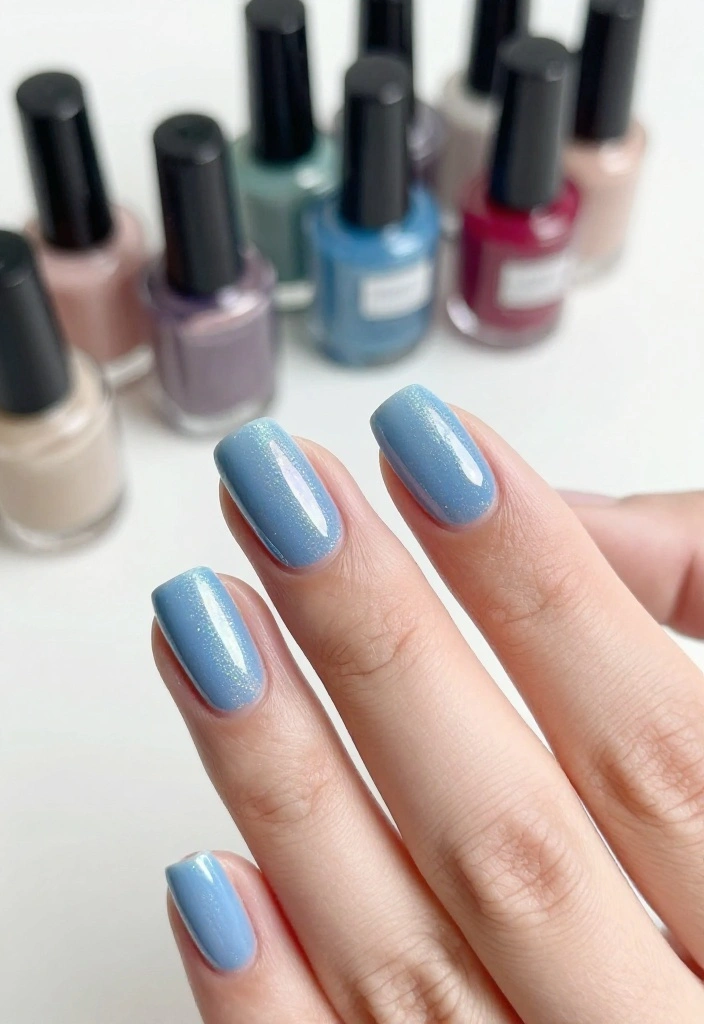
For those who crave a bit of flair, sky blue holographic nails are the way to go! This captivating design catches the light and shifts colors, making your nails look stunning from all angles. It’s ideal for parties or nights out, ensuring you stand out effortlessly. To achieve this dazzling look, layer a holographic top coat over your sky blue base. Alternatively, you can use holographic polish directly for a more intense sparkle. Tips: Always use a high-quality holographic polish for the best results, and seal with a top coat to maintain that radiant shine! Ingredients: – Sky blue nail polish – Holographic nail polish or holographic top coat – Top coat Step-by-Step Instructions: 1. Start with a base coat and let it dry. 2. Apply sky blue nail polish as your base. 3. Add holographic polish or top coat for the shiny effect. 4. Seal with a top coat for durability. Frequently Asked Questions: – Is holographic polish hard to apply? Not at all! Just follow the same steps as regular polish for a stunning finish.
11. Sky Blue and Metallic Copper
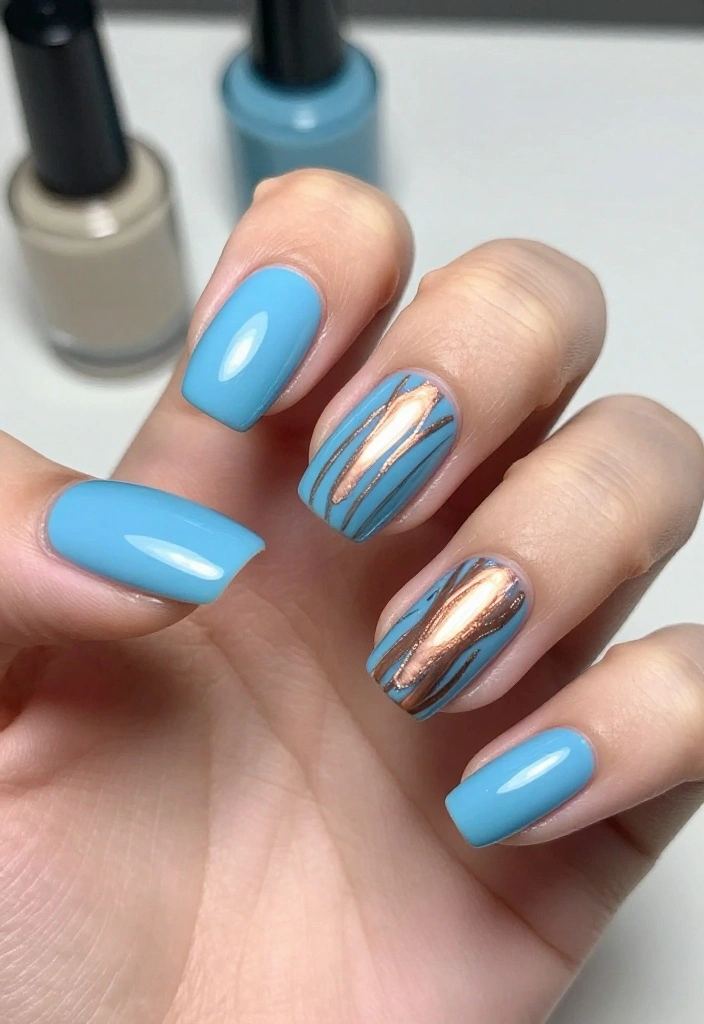
Combine the coolness of sky blue with the warmth of metallic copper for a striking contrast! This unique mix creates a modern and chic look, perfect for anyone wanting to step outside the norms of traditional nail colors. To create this stunning design, paint a base of sky blue and add metallic copper accents using a fine brush or nail tape. This combination is perfect for special events, capturing attention without being overwhelming. Tips: Make sure both colors are completely dry before adding accents to avoid smudging. Ingredients: – Sky blue nail polish – Metallic copper polish – Top coat Step-by-Step Instructions: 1. Start with a base coat and let it dry. 2. Apply sky blue polish as the base color. 3. Once dry, use a brush or tape to apply copper accents. 4. Finish with a top coat for a polished look. Frequently Asked Questions: – Can I use other metallic colors? Absolutely! Gold or silver also work beautifully with sky blue.
12. Sky Blue Animal Print
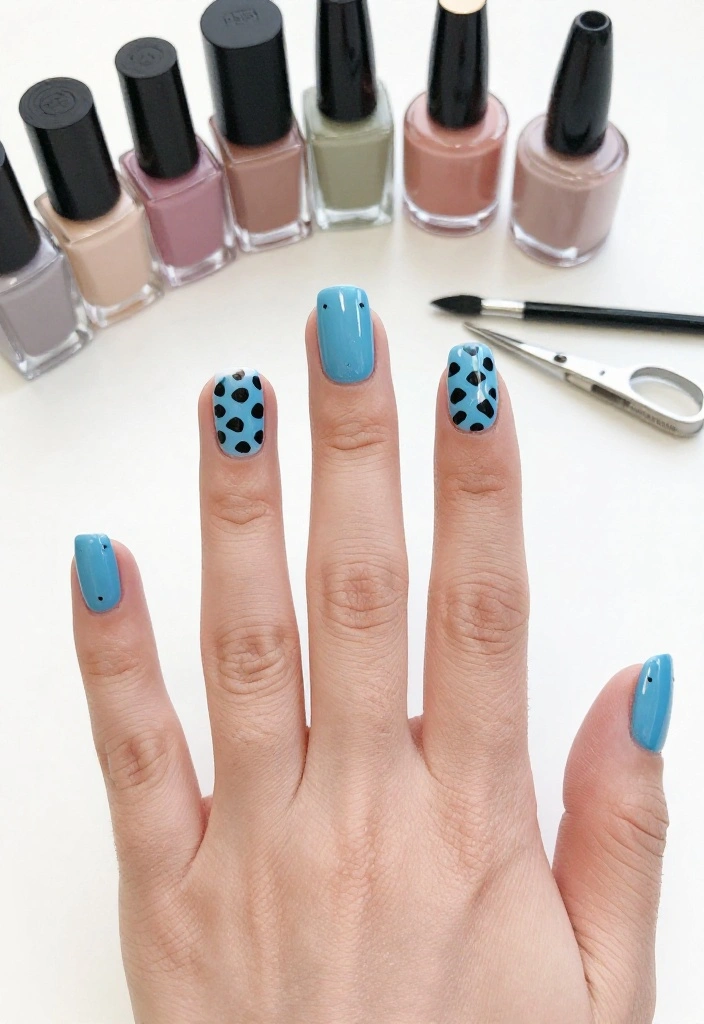
Animal print nails are a fun way to express your personality! Sky blue animal print designs add a whimsical touch, perfect for casual outings or themed parties. Pairing soft blue with classic animal patterns like leopard or zebra creates a playful yet stylish look. To achieve this fun design, start with a sky blue base and use a fine brush to add animal print patterns in black or white. This adds an eye-catching element while keeping the design chic. Tips: Practice your animal print strokes on paper before applying them to your nails for better control! Ingredients: – Sky blue nail polish – Black or white nail polish for print – Top coat Step-by-Step Instructions: 1. Begin with a base coat and let it dry. 2. Apply sky blue polish for the base color. 3. Use a brush to create animal print patterns in black or white. 4. Seal the design with a top coat for durability. Frequently Asked Questions: – Can I mix different animal prints? Definitely! Feel free to experiment with various patterns for a unique look.
13. Sky Blue and Floral Designs
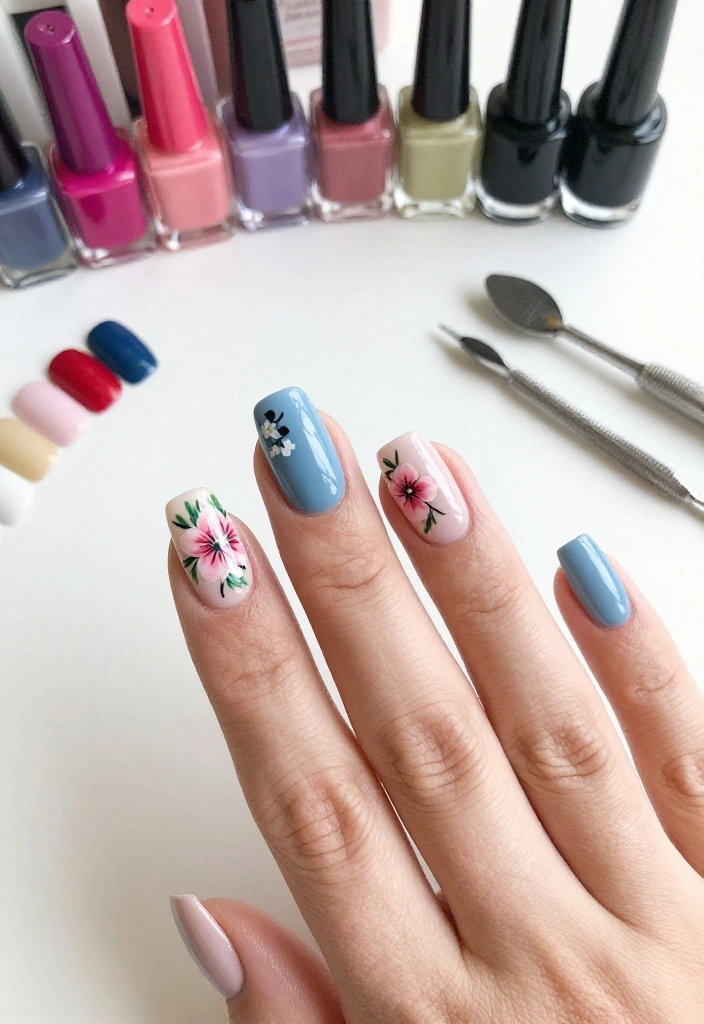
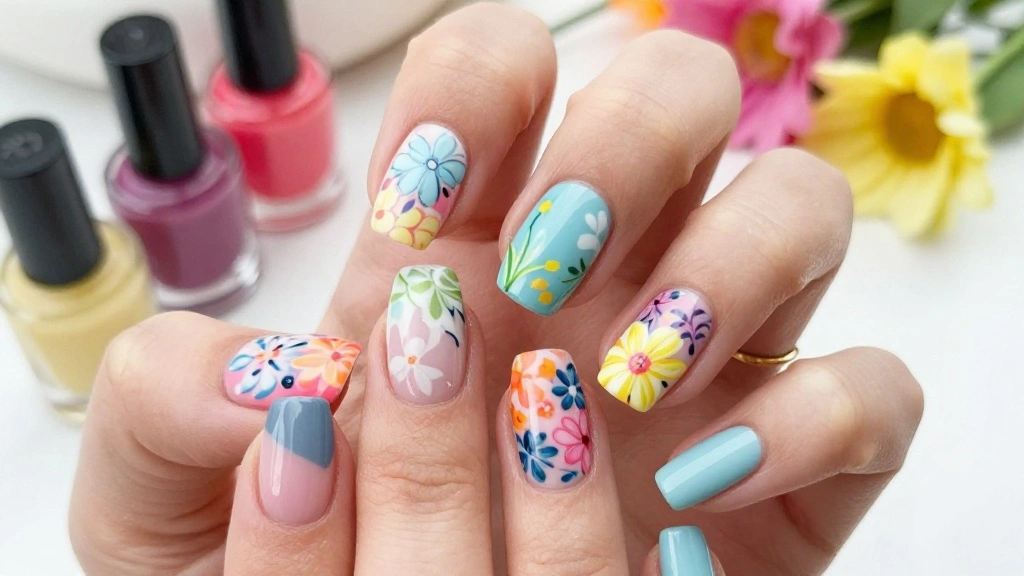
Floral nail art is a timeless classic, and combining it with sky blue elevates it to a whole new level! This design is perfect for spring and summer weddings, baby showers, or any occasion where you want to feel feminine and fresh. The soft backdrop of sky blue beautifully complements floral patterns in colors like pink, yellow, or white. To create floral designs, use nail art pens or brushes to apply flowers over a sky blue base. This design adds charm and makes your nails look polished and pretty. Tips: Consider using stickers or decals for easier application if you’re not confident with freehand designs. Ingredients: – Sky blue nail polish – Various colors for flowers (pink, yellow, green) – Top coat Step-by-Step Instructions: 1. Start with a base coat and allow it to dry. 2. Paint your nails with sky blue polish. 3. Add flowers using a nail art pen or brush. 4. Finalize with a top coat for protection. Frequently Asked Questions: – Can I use floral stickers? Yes! They can make the process quicker and easier.
14. Sky Blue Drip Nails
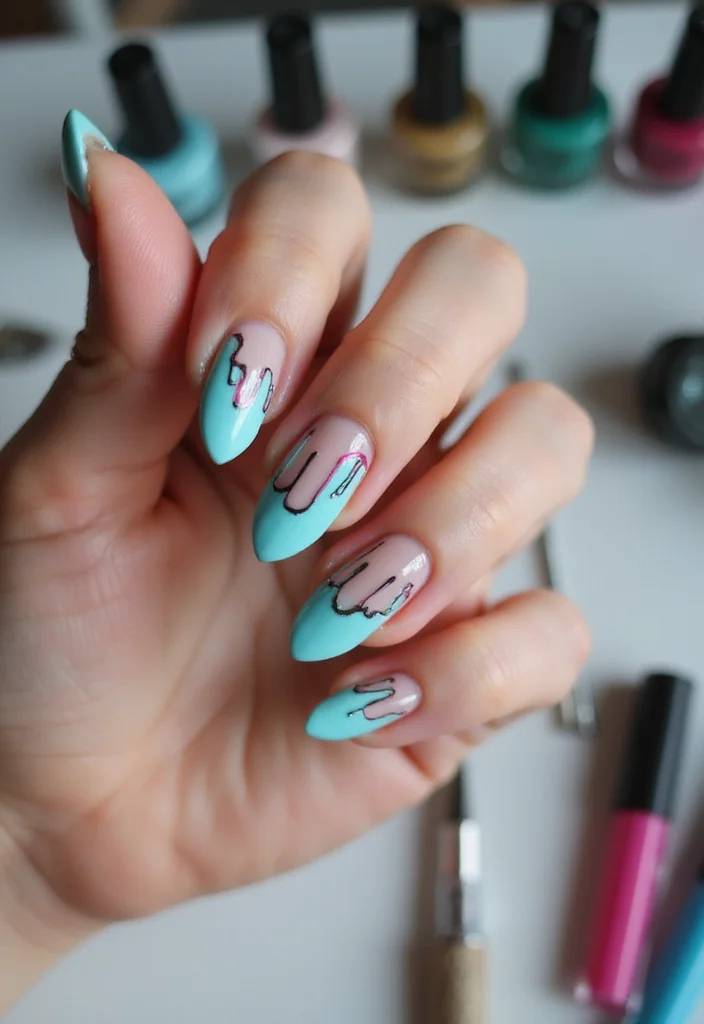
Drip nails offer a playful and trendy look that can add a fun edge to your sky blue manicure. This design is perfect for those who want to showcase their creativity and enjoy a whimsical nail art style. To achieve this unique look, start with a sky blue base and create drip patterns using white or contrasting colors at the tips, mimicking melted ice cream or paint. This design not only catches the eye but also serves as a great conversation starter! Tips: Use a thin brush for precise drip shapes and ensure each layer is dry before applying the next. Ingredients: – Sky blue nail polish – White or contrasting polish for drip – Top coat Step-by-Step Instructions: 1. Begin with a base coat and let it dry. 2. Apply a sky blue polish on all nails. 3. Create drip shapes at the tips with white or contrasting polish. 4. Seal the design with a top coat for durability. Frequently Asked Questions: – Can I use multiple colors for the drips? Yes! Get creative and mix different colors for a unique look.
You Might Also Like
15. Sky Blue Bubbles and Dots
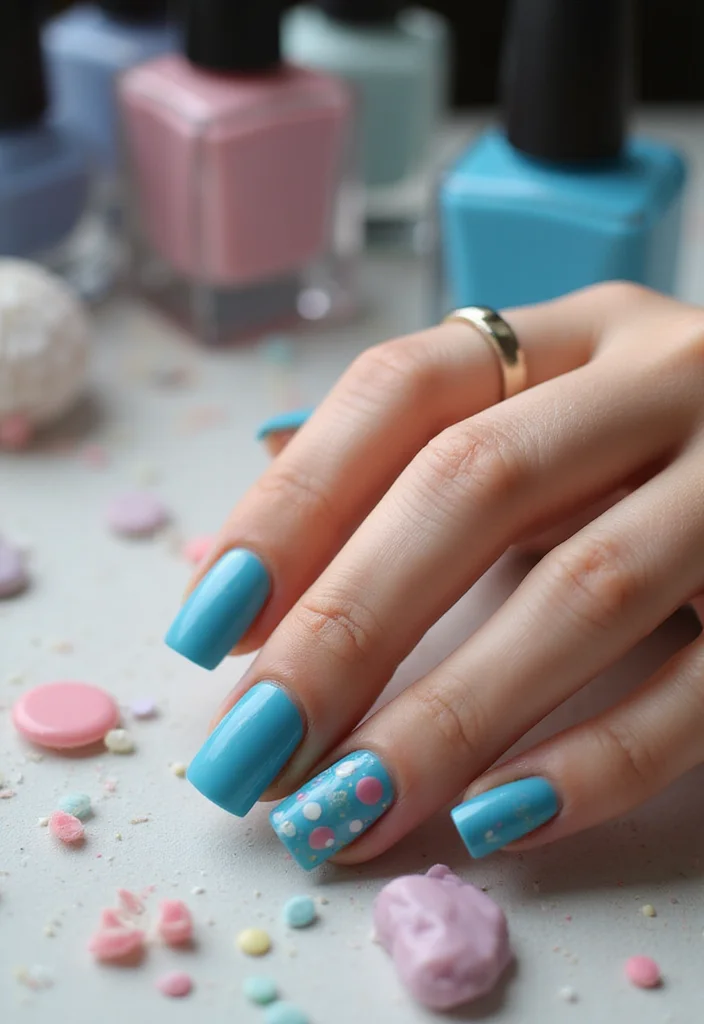
For a playful and modern look, try adding bubbles and dots to your sky blue nail art. This design is quirky, fun, and perfect for casual outings or summer days. It’s a simple yet eye-catching style that allows for plenty of creativity. To create this look, begin with a sky blue base and use a dotting tool to add contrasting colored dots or bubble designs on top. You can mix and match colors for a vibrant effect or keep it minimal with just a few accent dots. Tips: Vary the sizes of the dots for a more dynamic look! Ingredients: – Sky blue nail polish – Various colors for dots – Dotting tool or brush – Top coat Step-by-Step Instructions: 1. Apply a base coat and let it dry. 2. Paint your nails with sky blue polish. 3. Use a dotting tool to apply contrasting dots on each nail. 4. Finish with a top coat to seal the design. Frequently Asked Questions: – Can I use stickers for bubbles? Yes! Stickers can easily enhance the design without needing to paint them by hand.
16. Sky Blue and Neon Accents
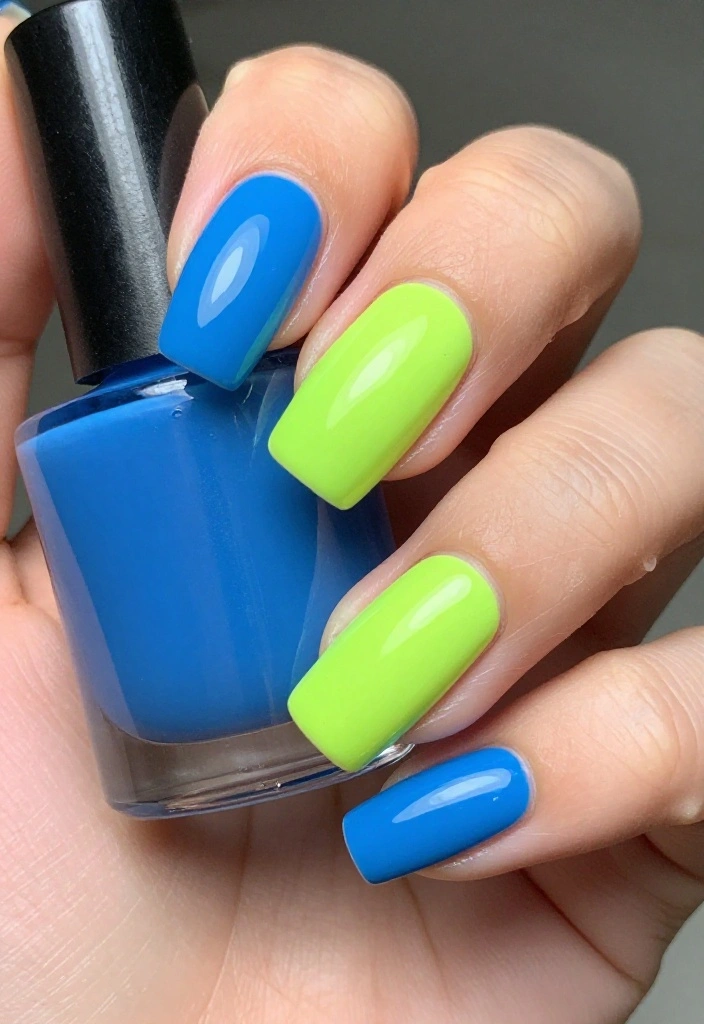
For a bold and daring look, consider pairing neon accents with your sky blue nails! This design is perfect for parties or summer festivals, offering a unique pop of color that’s sure to stand out. Start with a sky blue base and incorporate neon stripes or shapes for a dynamic effect. You can use nail tape for clean lines or freehand for a more artistic approach. This design showcases your creativity and is perfect for making a statement! Tips: Experiment with different neon colors to find combinations that resonate with your style. Ingredients: – Sky blue nail polish – Neon nail polishes (pink, green, yellow, etc.) – Top coat Step-by-Step Instructions: 1. Apply a base coat and let dry. 2. Paint nails with sky blue polish. 3. Add neon accents using tape or a fine brush. 4. Finish with a top coat for longevity. Frequently Asked Questions: – Can I use glittery neon colors? Yes! Glitter adds an extra fun factor to your neon accents.
17. Sky Blue and Color Block
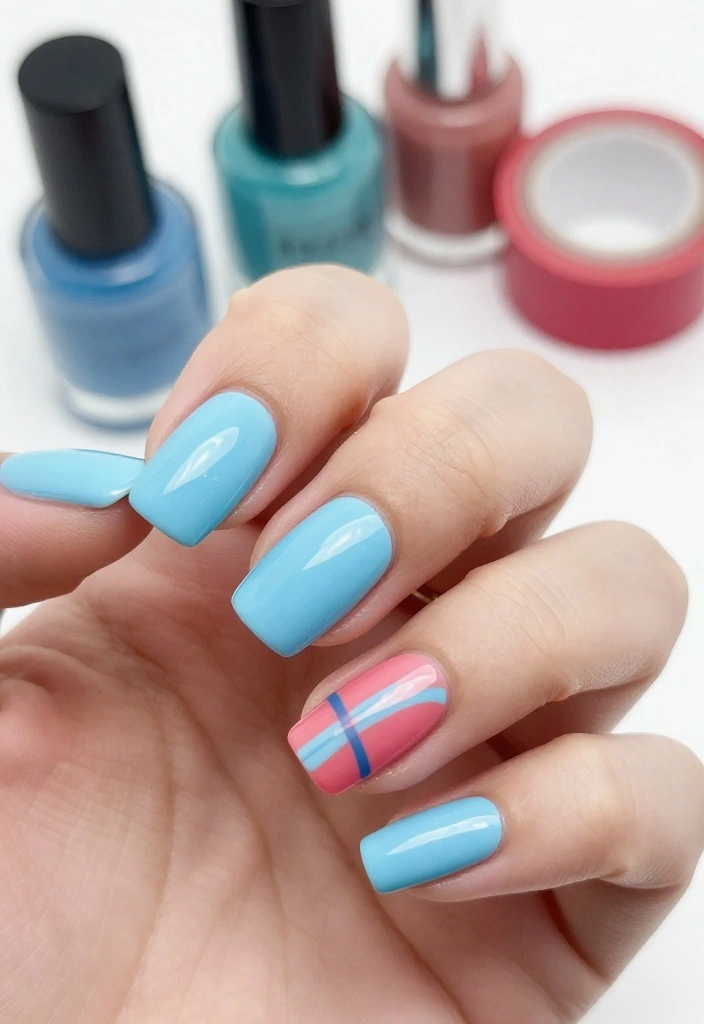
Color blocking is a fun way to incorporate multiple colors into your nail art while keeping a sleek style. Pairing sky blue with bold colors like orange, pink, or yellow creates a vibrant and youthful feel. Apply sky blue as your base and use tape to create clean lines for the color blocks. This design is perfect for making a bold statement and works well for casual outings or playful summer events. Tips: Use nail tape for precision and ensure that each color layer dries before moving on to the next. Ingredients: – Sky blue nail polish – Various accent colors (orange, pink, yellow) – Top coat Step-by-Step Instructions: 1. Start with a base coat and let it dry. 2. Apply sky blue polish and let it dry. 3. Use tape to create sections for different colors and fill them in. 4. Seal with a top coat for a shiny finish. Frequently Asked Questions: – Can I use more than three colors? Absolutely! Mix and match as you like to create unique patterns.
Sky Blue and Color Block
Editor’s Choice

18. Sky Blue Stained Glass Nails
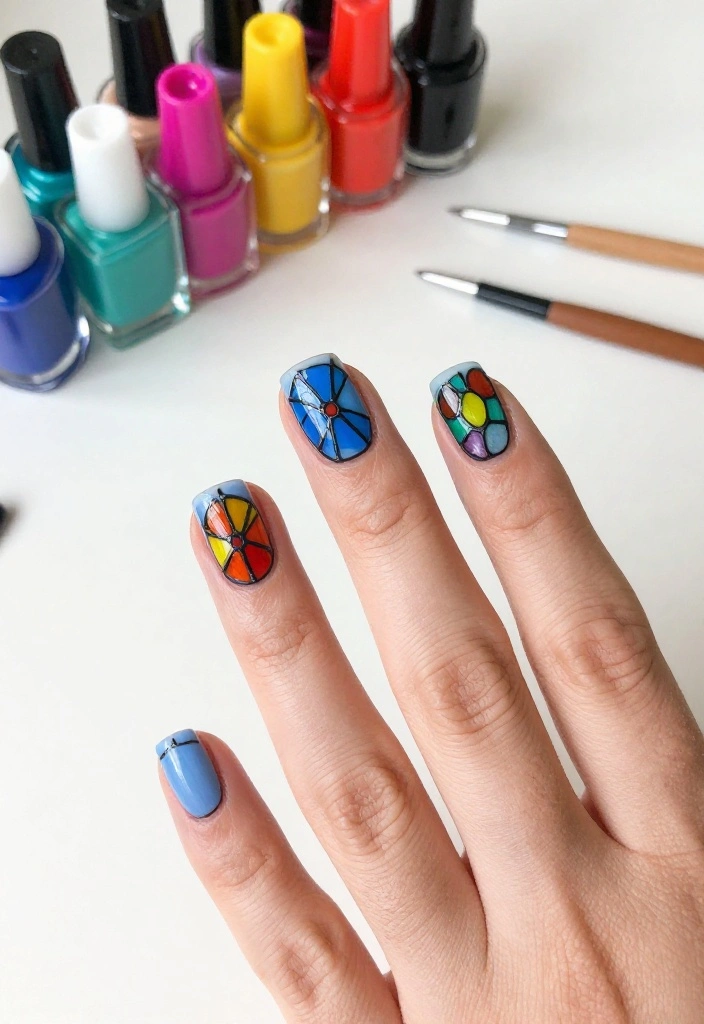
Stained glass nails offer an artistic twist on traditional nail designs. With sky blue as your base, you can create a stunning stained glass effect, customizable with various colors to mimic the vibrant hues of stained glass windows. This captivating design is perfect for special events when you want your nails to make a statement. To achieve this look, combine a sheer top coat with colored polishes to create the stained glass appearance. Tips: Use a top coat that adds shine for the best finish, ensuring your nails look polished and professional. Ingredients: – Sky blue nail polish – Various colored polishes (for the stained glass effect) – Top coat Step-by-Step Instructions: 1. Start with a base coat and let it dry. 2. Apply sky blue polish as your base. 3. Use multiple colors to create stained glass shapes and designs. 4. Seal with a top coat for a glossy finish. Frequently Asked Questions: – How intricate can the designs get? You can certainly get creative – the more detail, the more stunning the effect!
Conclusion
Sky blue nail art is a fantastic way to express your style, whether you’re going for an elegant look or something playful and fun. With so many creative ideas, you can easily adapt them to suit any occasion, from casual outings to special events.
Experimenting with these designs not only enhances your beauty routine but also allows you to enjoy the creative process.
Which sky blue design are you excited to try first?
Note: We aim to provide accurate product links, but some may occasionally expire or become unavailable. If this happens, please search directly on Amazon for the product or a suitable alternative.
This post contains Amazon affiliate links, meaning we may earn a small commission if you purchase through our links, at no extra cost to you.
Frequently Asked Questions
What are some beginner-friendly sky blue nail art ideas for different occasions?
Here are beginner-friendly sky blue nail art ideas you can try for any occasion. For everyday chic, start with a soft gradient from pale sky blue to white with a hint of silver glitter. For festive vibes, add one accent nail with metallic foil or rhinestones. For work-appropriate style, keep a solid sky blue base with delicate white stitching using tape or a fine brush. For a beachy look, layer a slightly darker denim shade with thin white thread lines. For date night, try tiny cloud decals or a subtle lace pattern. Quick steps: prep nails, apply base coat, paint 2 coats of sky blue, add accents with striping tape or decals, seal with a durable top coat. The article’s 18 Creative Sky Blue Nail Art Ideas has more creative options to copy—especially idea #9 you’ll want to copy.
How can I recreate a washed denim blue look at home without fancy tools?
You can nail the washed denim vibe with simple tools. Start with a base of sky blue nail art and a slightly darker denim shade. Use a makeup sponge or nail sponge to dab the darker color onto random patches for texture. Draw fine white lines with a tiny brush or toothpick to mimic stitching, or use striping tape to guide lines. A sheer top coat helps blur edges for that denim finish. Decals or stickers with denim patterns are a quick, mess-free option. This approach gives you a authentic denim-inspired look without needing expensive tools.
Which sky blue nail art designs are the most festive for holidays and parties?
Festive sky blue nail art pops with sparkle and statement accents. Try a full sky blue base with one accent nail featuring gold foil or rhinestones for celebration vibes. Add tiny white star decals or cloud motifs for a playful, festive touch. Use metallic tape to create bold stripes or chevrons for a party-ready look. For a simpler option, keep the rest of the nails solid and let the accent nail do the talking. These ideas stay creative and festive without overwhelming your manicure.
How do I choose the best topcoat and nail polish shades to nail sky blue nail art?
Choosing the right shades and topcoat is key for lasting sky blue nail art. Pick a true or slightly pastel sky blue base, and consider layering with a slightly deeper blue for depth. Opt for a durable, glossy topcoat—fast-drying or gel-like works well for long wear. Use a base coat to protect nails and cap the free edge with each coat to reduce chipping. If you’re adding glitter or foil, a clear base under the embellishments helps with smooth application. Finish with a quality topcoat and reapply every 2–3 days to keep the color looking fresh.
How long does sky blue nail art last with proper care?
With proper care, sky blue nail art typically lasts about 5–7 days on standard polish, and 2 weeks or more with gel or a strong topcoat. To extend wear: prep nails well, apply a solid base coat, seal each layer’s edge, and minimize water exposure. Reapply the topcoat every 2–3 days, wear gloves for chores, and use gentle remover when it’s time to switch looks. Quick fixes for minor chips include touching up small areas with matching polish and topping with more topcoat for a seamless finish.
Related Topics
sky blue nail art
festive designs
creative nail ideas
denim blue nails
beginner friendly
minimalist nail art
easy nail techniques
trendy nail styles
seasonal nail art
advanced nail designs
nail art inspiration
party ready nails
I loved all these sky blue nail art ideas! They are so pretty and perfect for spring. Do you think these designs would work well with other colors too?
Did you know that the color blue is often associated with calmness and peace? I think these nail art ideas definitely capture that vibe!