
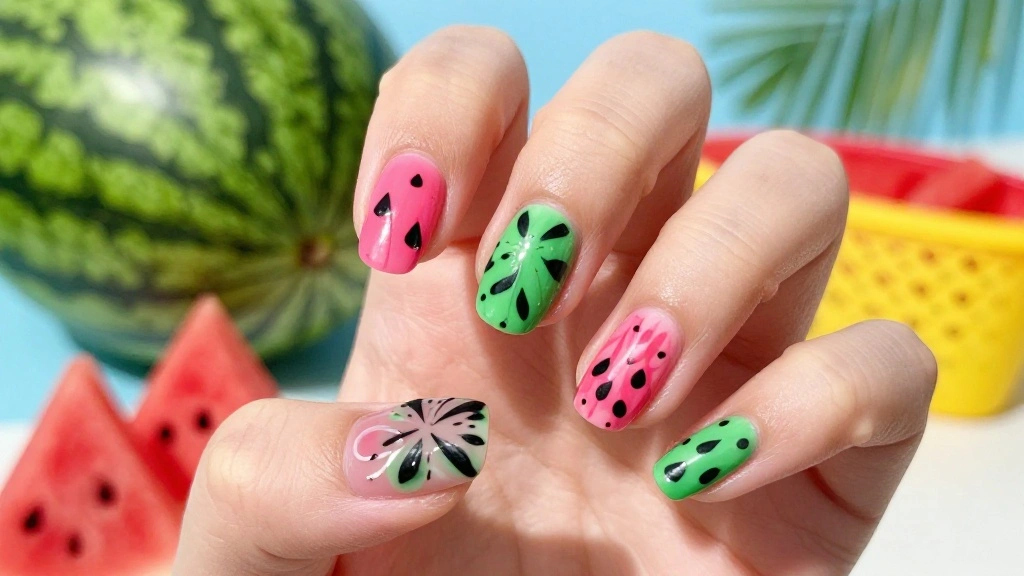
Summer is here, and that means it’s time to indulge in all things bright, fun, and fruity! If you’ve been scrolling through your feed, you might have noticed that watermelon nail art is trending everywhere. With its vibrant colors and playful designs, it’s hard to resist the charm of those juicy, summery vibes. I created this post because I know just how much a fresh nail design can lift your spirits and add a splash of joy to your day.
If you love expressing your personality through nail art or simply want to add a pop of color to your summer look, this one’s for you. Whether you’re a nail art newbie or a seasoned pro, there’s something here for everyone. I’ve pulled together 15 fruity watermelon nail art ideas that are fun, easy to create, and perfect for making a statement this season. Get ready to turn heads with these trendy designs that scream summer!
From classic watermelon slices to creative ombre styles and sparkling glitter accents, you’ll discover unique nail designs that you can try at home or show to your nail technician. So grab your nail polish, and let’s dive into the world of watermelon nail art that will have you feeling fresh and fabulous all summer long!
Key Takeaways
– Explore 15 unique watermelon nail art designs to elevate your summer style and express your creativity.
– Each design ranges from simple to intricate, making it easy for everyone to find something that fits their skill level.
– Nail art not only enhances your look but also provides a fun way to embrace the summer season with vibrant colors.
– Get inspired to add your personal touch to your nails, whether through glitter, ombre, or geometric patterns.
– Enjoy the process of creating these fruity nails, as they are sure to be a conversation starter at any summer gathering.
1. Classic Watermelon Slice
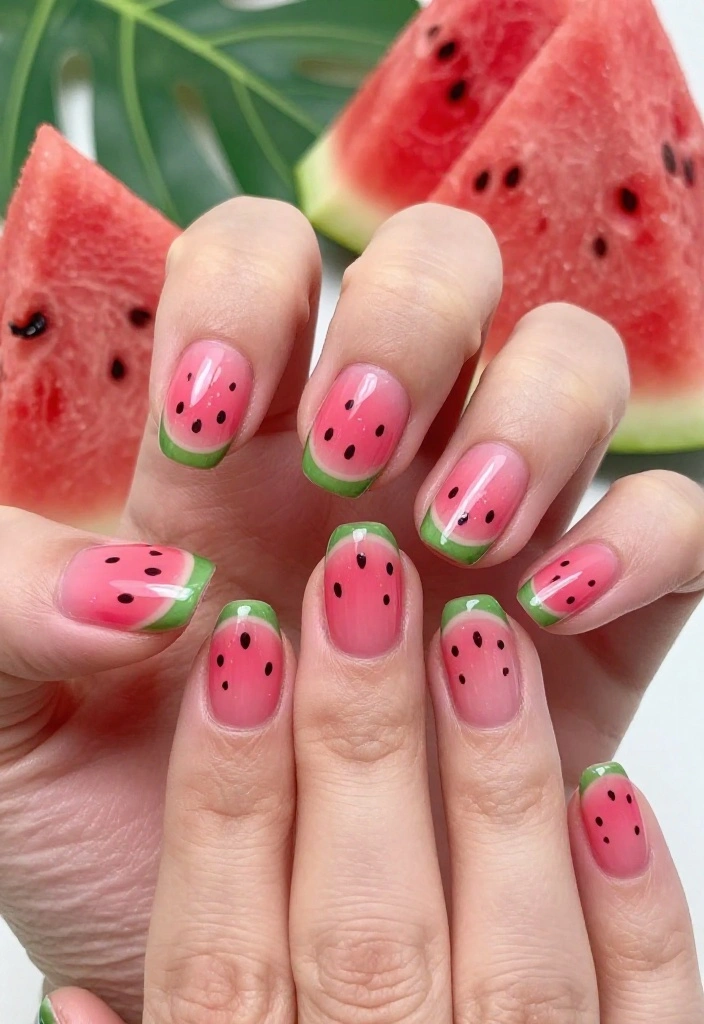
Are you ready to embrace summer with a classic watermelon slice design? This timeless nail art features a vibrant pink base with playful green tips, capturing the juicy essence of watermelons. The addition of black dots mimics the seeds, making your nails look fresh and fun for sunny days ahead!
To nail this look, start by applying a protective base coat. Use a fine brush to create clean green edges on your tips. A matte topcoat can add an unexpected twist, giving your nails a unique finish.
Key steps to create the classic watermelon slice:
– Apply a protective base coat to shield your nails
– Use a thin brush for precise green tips
– Finish with a matte topcoat for a different look
This design is versatile for any nail shape or length, making it a perfect addition to your summer wardrobe. Get ready to show off your fruity flair wherever you go!
Classic Watermelon Slice
Editor’s Choice




2. Watermelon Ombre
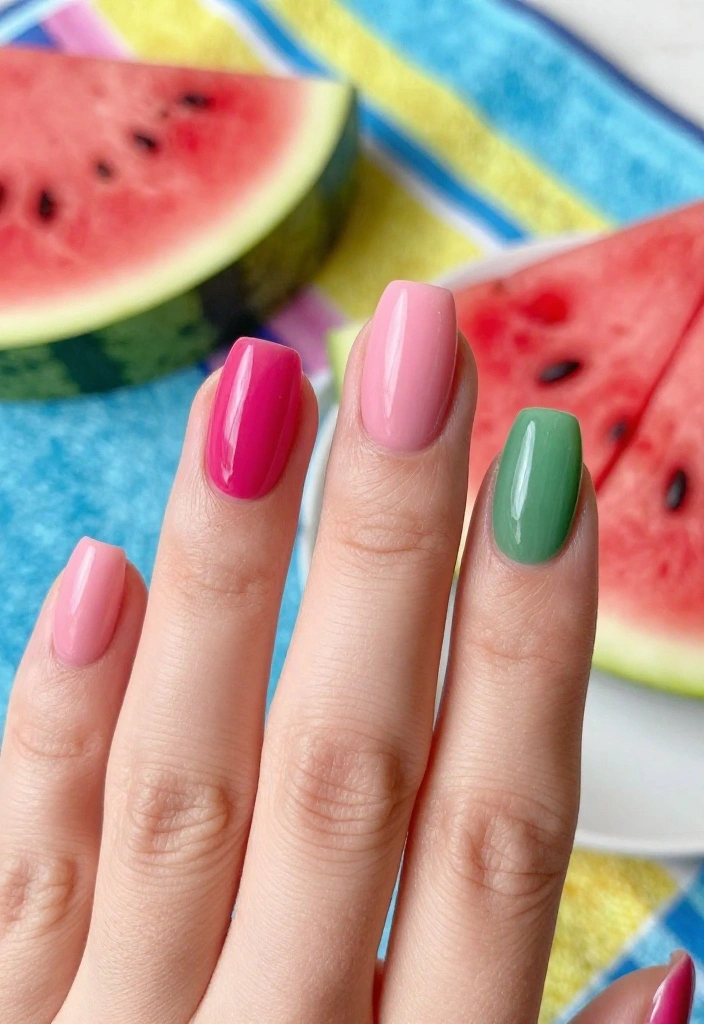
Transform your nails with a stunning watermelon ombre design that beautifully blends pink and green shades. This gradient effect is reminiscent of a refreshing slice of watermelon, perfect for those hot summer days! The seamless transition between colors creates an eye-catching look.
For the best results, start with a light pink base coat. Use a makeup sponge to gently dab darker pink and green polishes onto your nails, creating a lovely gradient. A glossy topcoat will give it that extra shine and make the colors pop.
Steps to achieve the watermelon ombre:
– Apply a light pink base coat for a smooth start
– Use a makeup sponge to blend darker pink and green
– Seal with a glossy topcoat for vibrant shine
This design not only looks fabulous but also adds depth to your nails. Ideal for summer festivals or beach outings, it’s a chic way to showcase your fruity style!
3. Watermelon Tips
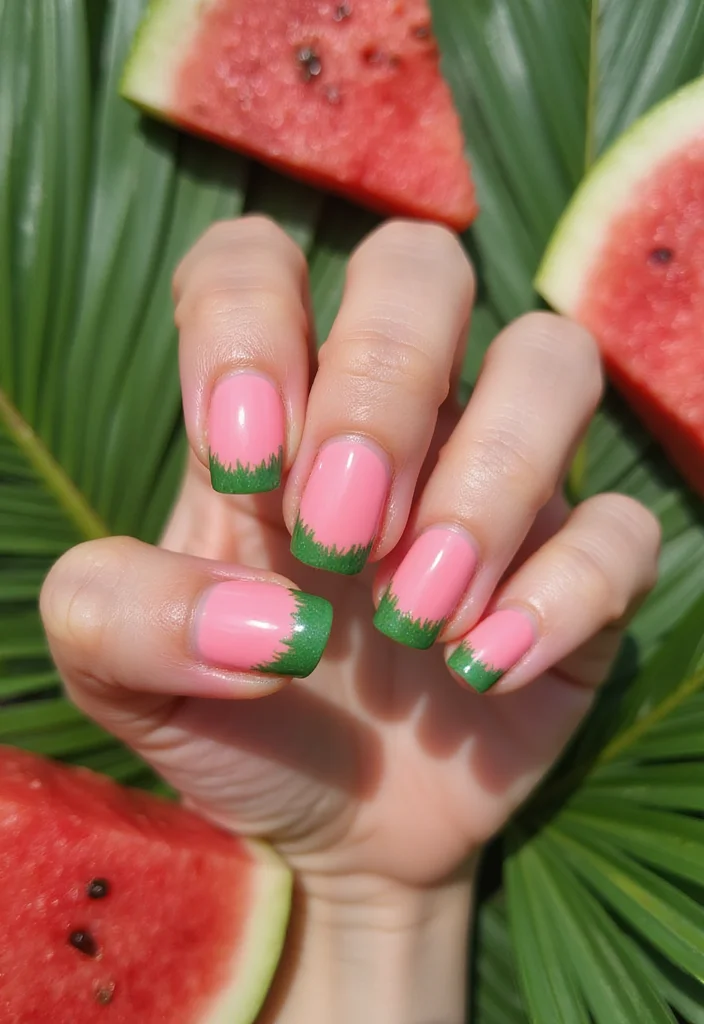
Put a fun twist on the classic French manicure with watermelon tips! This playful design features a pale pink or nude base, topped with bright pink tips that mimic the delicious fruit. It’s a delightful way to add some fruity flair to your nails.
To create watermelon tips, start with a nude base coat. Shape the tips into a gentle curve with bright pink polish, then finish off with a touch of green at the edge for the rind effect. Tiny black dots can complete the look, resembling watermelon seeds.
Steps for crafting watermelon tips:
– Begin with a nude or pale pink base for elegance
– Curve the tips with bright pink polish for a fruity feel
– Add green edges and black dots for detail
This design strikes the perfect balance between sleek and playful. It’s suitable for any occasion, allowing you to embrace summer vibes without going overboard!
4. Watermelon Nail Dots
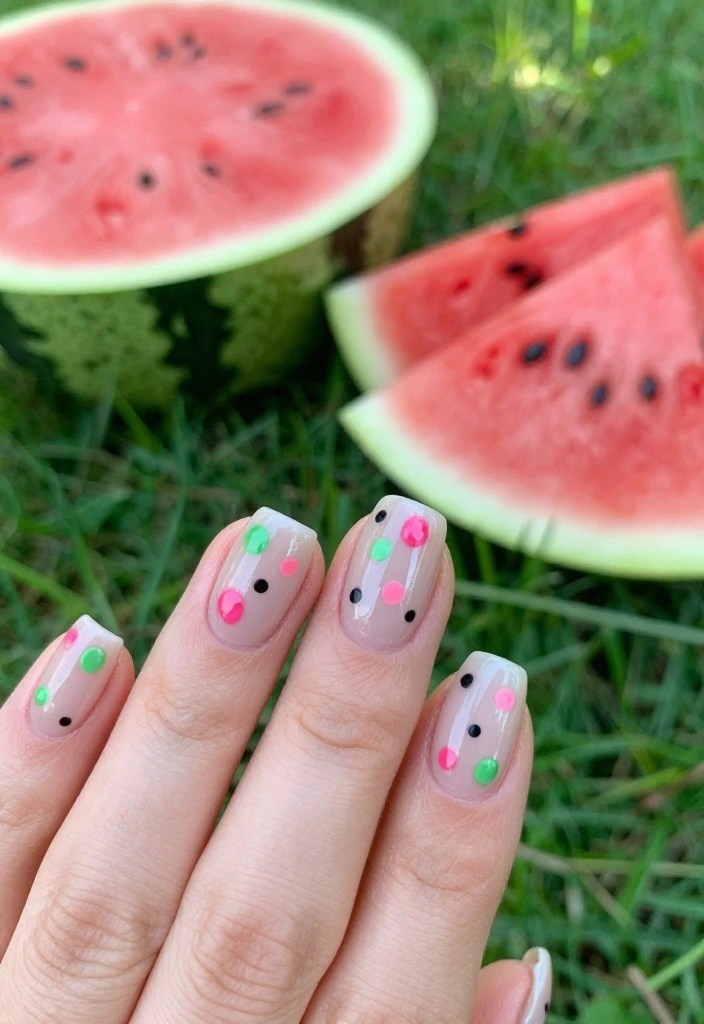
If you prefer a minimalist approach, watermelon nail dots offer a fun and easy option. This design features a simple base adorned with various-sized dots in watermelon colors, creating a playful and artistic look.
To achieve this design, start with a neutral base color. Use a dotting tool to create small pink and green dots on your nails, and add a few black dots to represent seeds for that authentic touch.
Steps to create watermelon nail dots:
– Choose a neutral base color for simplicity
– Dot pink and green accents onto each nail
– Add black dots for seeds to enhance the design
This design is not only simple to create but also allows for a lot of creativity. You can customize the colors and sizes, making it a unique expression of your summer spirit!
📹 Related Video: 🍉Vettsy Watermelon Nail Art (TUTORIAL)💦💅
5. Watermelon Geometric Art
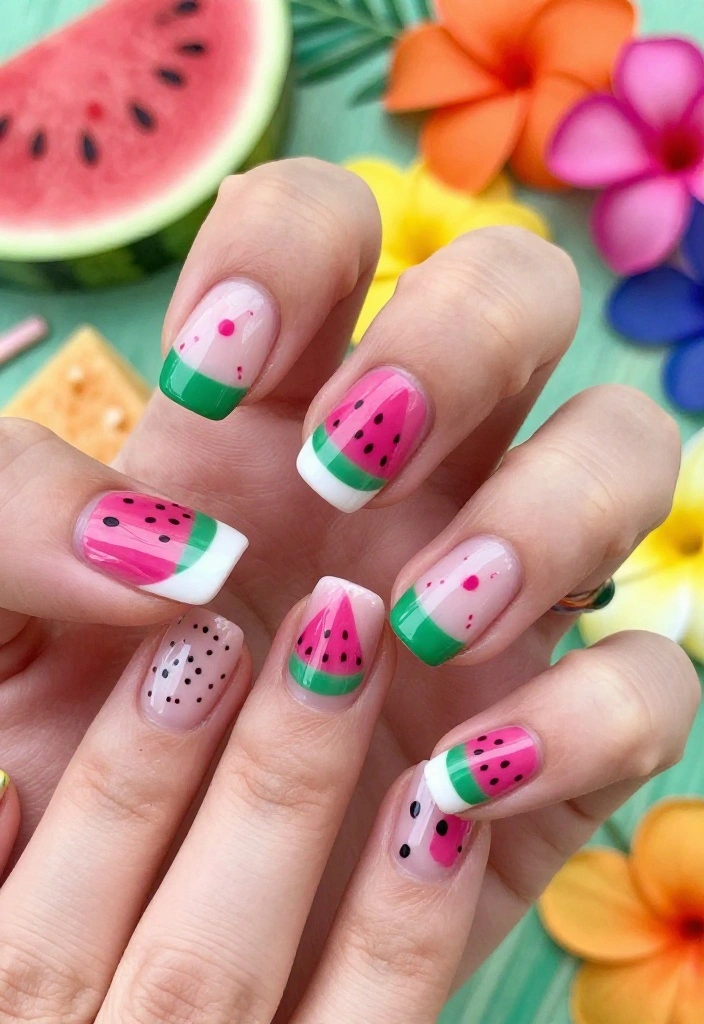
For a modern twist, consider watermelon geometric art! This style combines bold lines and vibrant colors, resulting in an edgy and artistic look that stands out. It’s perfect for those who love unique and abstract designs.
To create this look, start with a white or light base coat. Use striping tape to form geometric shapes, alternating between pink and green colors for a striking effect. Fill in the shapes and add black dots for added detail.
Steps to design watermelon geometric art:
– Apply a white or light base coat for contrast
– Use striping tape to create sharp geometric shapes
– Fill with pink and green, then add black dots for flair
This nail art is sure to turn heads and spark conversations. Embrace your artistic side this summer with a design that’s both playful and sophisticated!
6. Watermelon Drip Nails
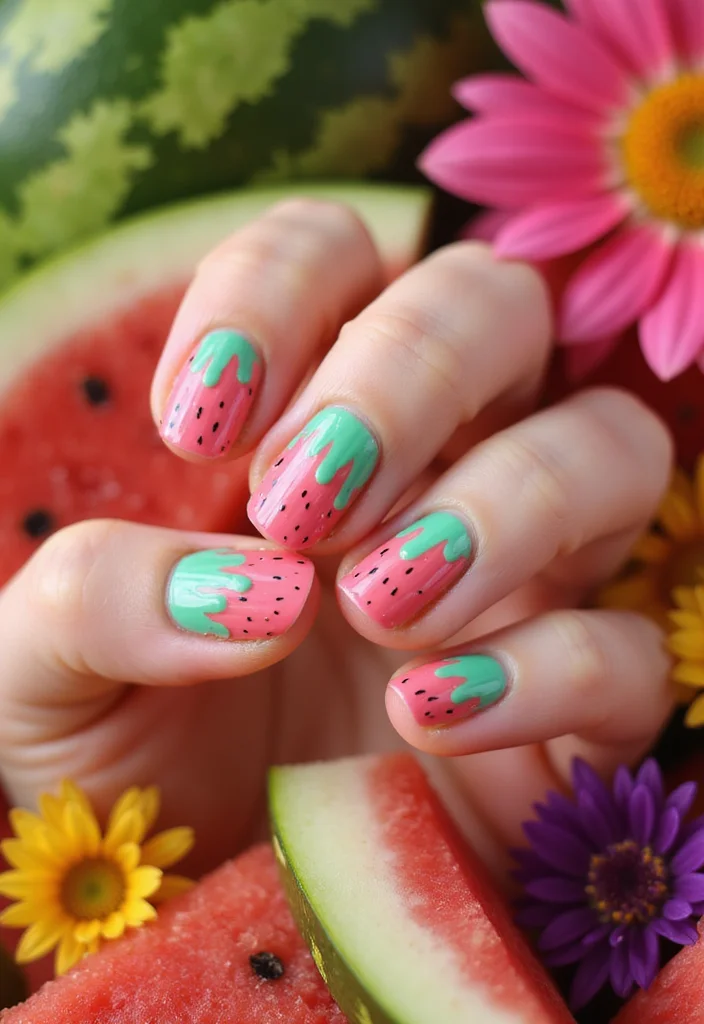
Get playful with watermelon drip nails that mimic the fun of biting into a juicy slice! This design features a bright base with a drip effect at the edges, creating a deliciously whimsical look.
To start, apply a bright pink base coat. Create the drip effect using green polish at the tips, dragging it down slightly for a realistic touch. Small black dots can represent seeds, adding that finishing touch.
Steps for watermelon drip nails:
– Begin with a bold pink base coat for vibrancy
– Create green drips at the tips for a fun effect
– Add small black dots or seeds for detail
This design is full of personality and perfect for those wanting to showcase their fun-loving spirit this summer. Your nails will surely be the center of attention!
Did you know watermelon nail art swung up 42% in popularity this summer? Watermelon drip nails are a playful, bite-sized trend—pink base with green drips and tiny seeds that nail the vibe. DIY in under 15 minutes for a juicy look.
7. Watermelon Glitter Accents
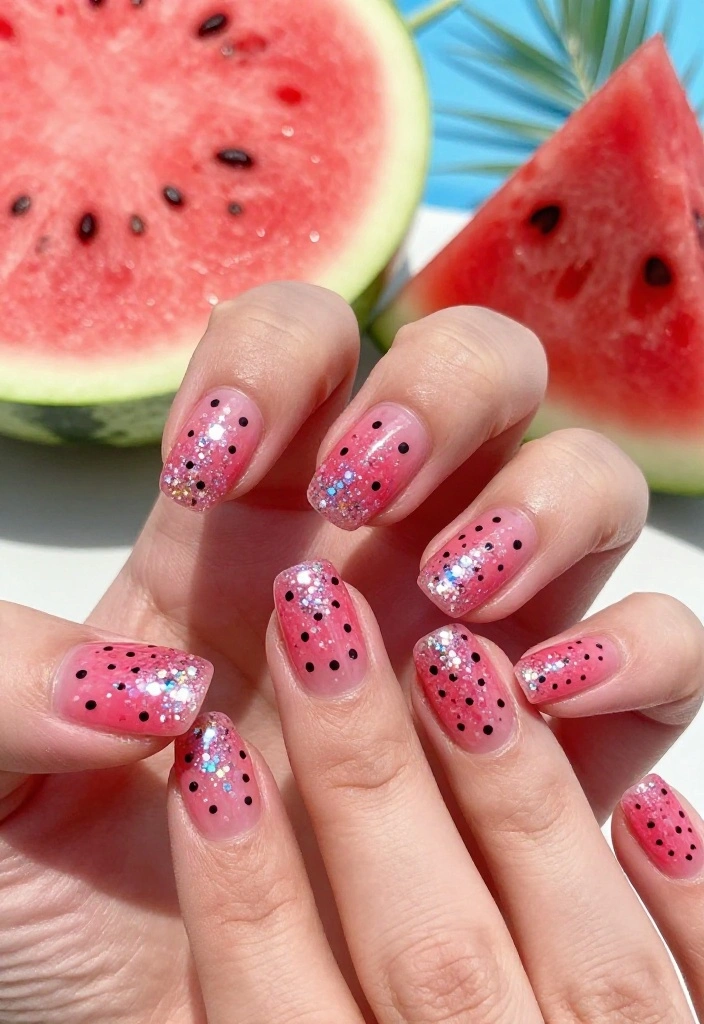
Add some sparkle to your summer with watermelon glitter accents! This design enhances the fruity theme while making your nails shine just right. It’s perfect for those who love a little glam alongside their playful nail art.
To incorporate glitter, start with a watermelon-inspired base color, like pink or green. Apply glitter polish to the tips or as an accent on select nails. Don’t forget to add black dots to mimic seeds.
Steps for watermelon glitter accents:
– Choose a pink or green base for a fruity feel
– Apply glitter to tips or select nails for sparkle
– Add black dots to represent seeds for detail
This design shines brightly at summer parties or special events, ensuring your nails stand out. Enjoy the glam while keeping that fun watermelon vibe alive!
You might also like
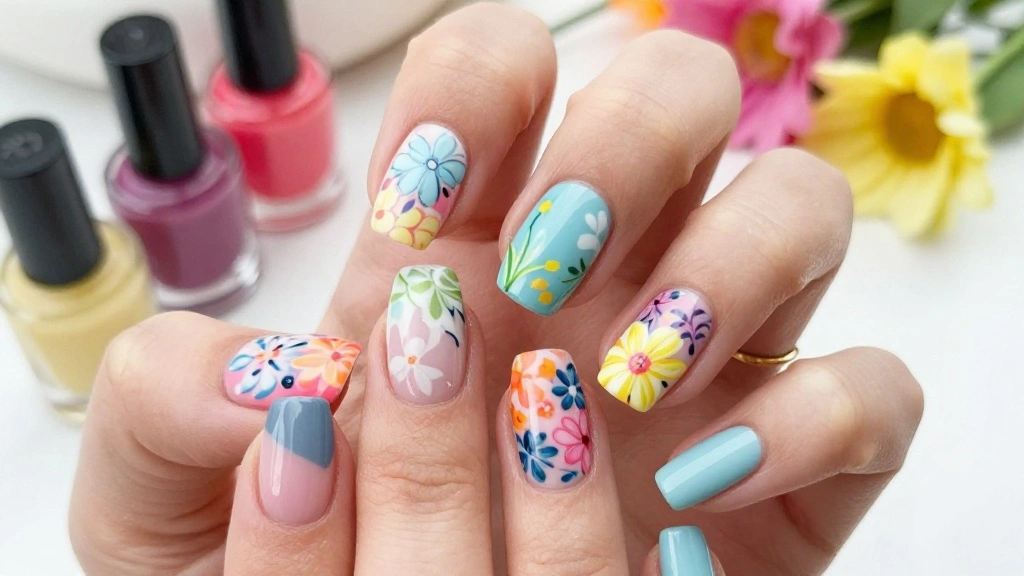

How To Choose the Right Watermelon Nail Art Design
When it comes to watermelon nail art, choosing the right design can be a fun yet overwhelming task. With so many trendy designs available, you want to find one that not only reflects your personal style but also fits the occasion. Here’s how to narrow down your options:
1. Consider Your Skill Level
Think about your nail art skills. If you’re a beginner, opt for simpler designs like classic watermelon slices or watercolor tips. More advanced artists can try intricate styles like watermelon mosaic or negative space for a bold look. Start with what you’re comfortable with, and build your skills from there!
2. Pick the Right Colors
Watermelon-inspired nail art is all about bright, summery colors! Think pinks, greens, and reds. Consider your skin tone when choosing shades. Light skin tones often look great with pastel versions, while deeper tones can rock brighter, bolder hues. A good color choice can make even a simple design pop!
3. Match the Occasion
Are you preparing for a special event, or just looking to brighten up your everyday look? For casual days, try fun designs like watermelon dots or confetti. For parties, go for something eye-catching like watermelon drip nails or glitter accents. Your occasion will help guide your design choice.
4. Think About Your Nail Length and Shape
Your nail length and shape can affect how a design looks. Long nails can handle more intricate art, like lines and details. If your nails are short, consider designs that use color blocking or negative space to keep it chic without feeling overcrowded. Choose a design that complements your nails.
5. Look for Inspiration
Browse social media, nail art blogs, and Pinterest for trendy designs. Save the ones that catch your eye. Use these as a starting point to customize your own look. You can mix elements from different designs to create something uniquely yours.
6. Assess Your Tools and Products
Do you have the necessary nail art tools and polishes? Fine brushes work great for intricate designs, while dotting tools are perfect for easy dots and details. Make sure you have the right tools before diving into a design. This ensures you can execute it well and enjoy the process.
Pro Tip: Always practice your design on a piece of paper or a practice nail before applying it to your nails. This helps you visualize the final result and build confidence in your technique!
Now that you know how to choose the perfect watermelon nail art design, it’s time to get creative! Whether you want cute and simple or bold and intricate, there’s a watermelon style that fits your vibe. Happy painting! 🍉💅
8. Watermelon Floral Fusion
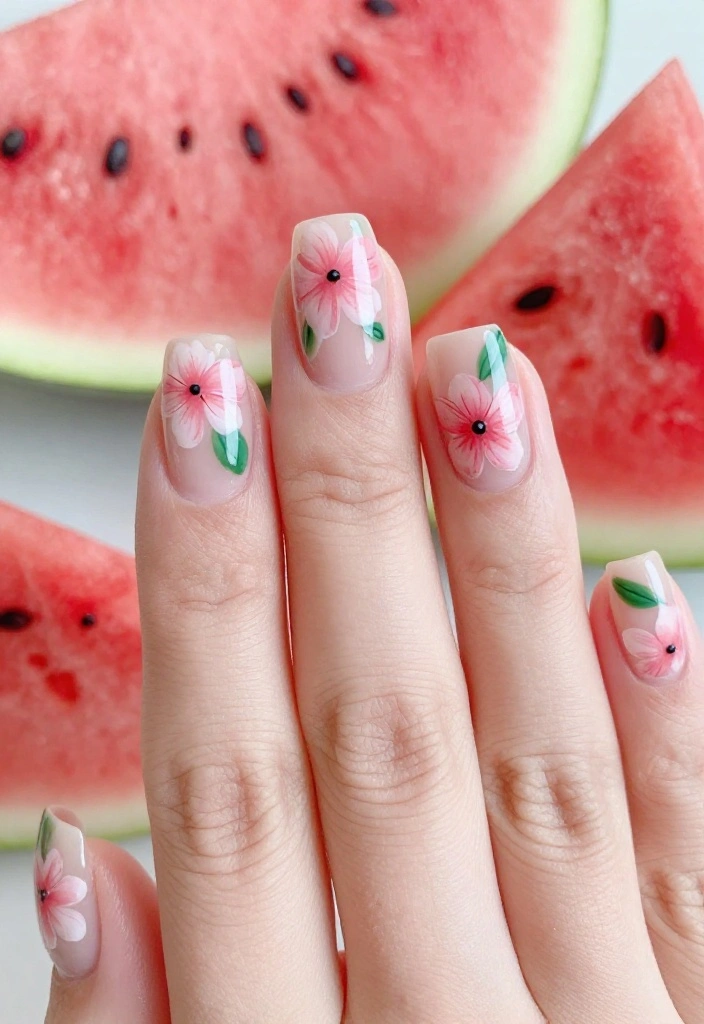
Combine the freshness of floral designs with watermelon art for a unique and refreshing nail look. Watermelon floral fusion merges the vibrant colors of watermelons with lovely floral patterns, creating a delightful summer aesthetic.
To create this design, start with a light pink or nude base. Use a small brush to paint delicate flowers in shades of pink and green. Tiny seeds or dots can add that finishing touch to bring everything together.
Steps for watermelon floral fusion:
– Apply a light pink or nude base for a clean start
– Paint delicate flowers in pink and green for a fresh look
– Add tiny dots or seeds for a playful finish
This design is perfect for those who appreciate a feminine touch while embracing fruity elements. It embodies the light and airy essence of summer!
Watermelon Floral Fusion
Editor’s Choice




9. Watermelon Negative Space
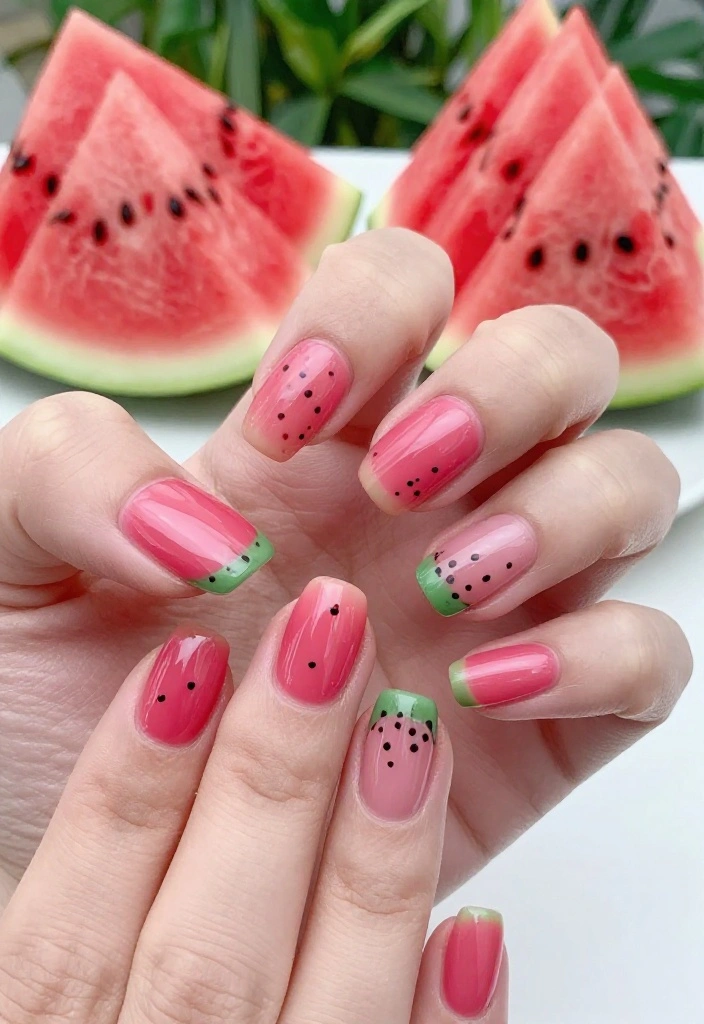
Explore the trendy negative space nail art combined with playful watermelon designs! This style uses the natural nail as part of the artwork, enhancing the overall visual appeal while keeping it modern.
To create this design, paint a portion of your nail with bright pink polish. Leave a section bare and add a green tip at the edge. Small black dots can mimic seeds to complete this fun look.
Steps for watermelon negative space:
– Apply bright pink polish to part of your nail for contrast
– Leave a section bare and add green tips for unique flair
– Add tiny black dots for seeds to finish the design
This minimalist approach is perfect for those who want to make a statement while keeping it simple. Embrace the playful watermelon theme without overdoing it!
10. Watermelon Marble Nails
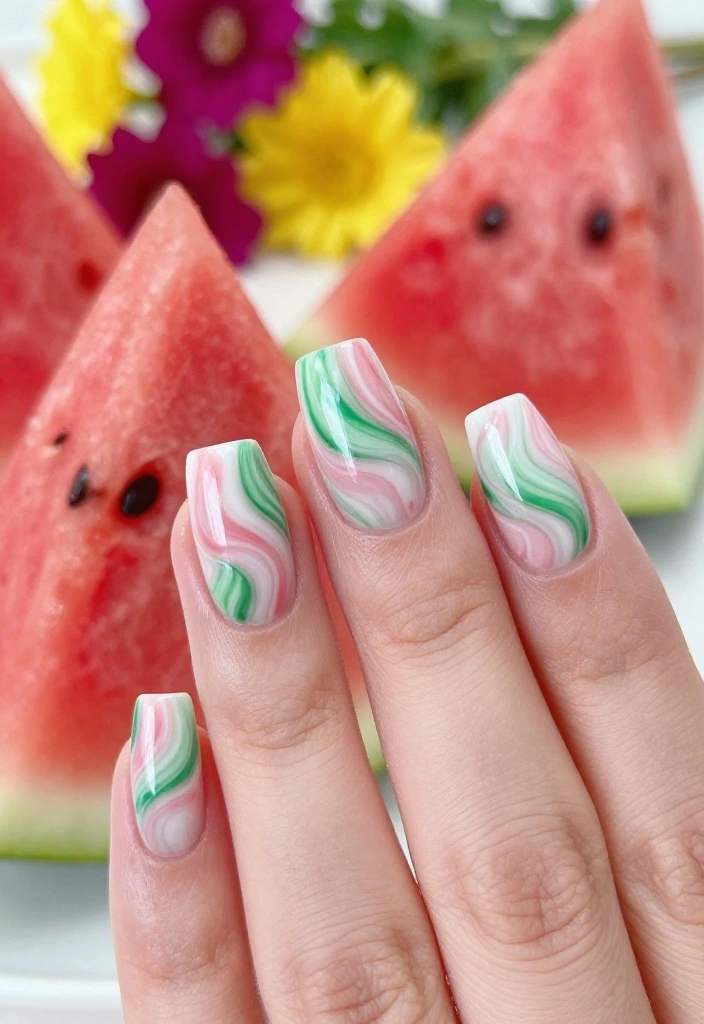
Elevate your nail art game with watermelon marble nails that add a touch of sophistication. Swirling pink and green colors creates a stunning marbled effect, reminiscent of the inside of a watermelon.
To achieve this design, start with a white base coat. Use a toothpick to swirl together pink and green polish, creating beautiful patterns. Finish with a top coat to seal in your creation.
Steps to create watermelon marbled nails:
– Begin with a white base coat for a fresh start
– Swirl pink and green polish for a marbled effect
– Seal with a top coat to finish the look
This design is perfect for those who want a chic yet playful look while celebrating summer vibes. The marble effect adds elegance, making your nails suitable for both casual outings and formal gatherings!
11. Watermelon Hearts
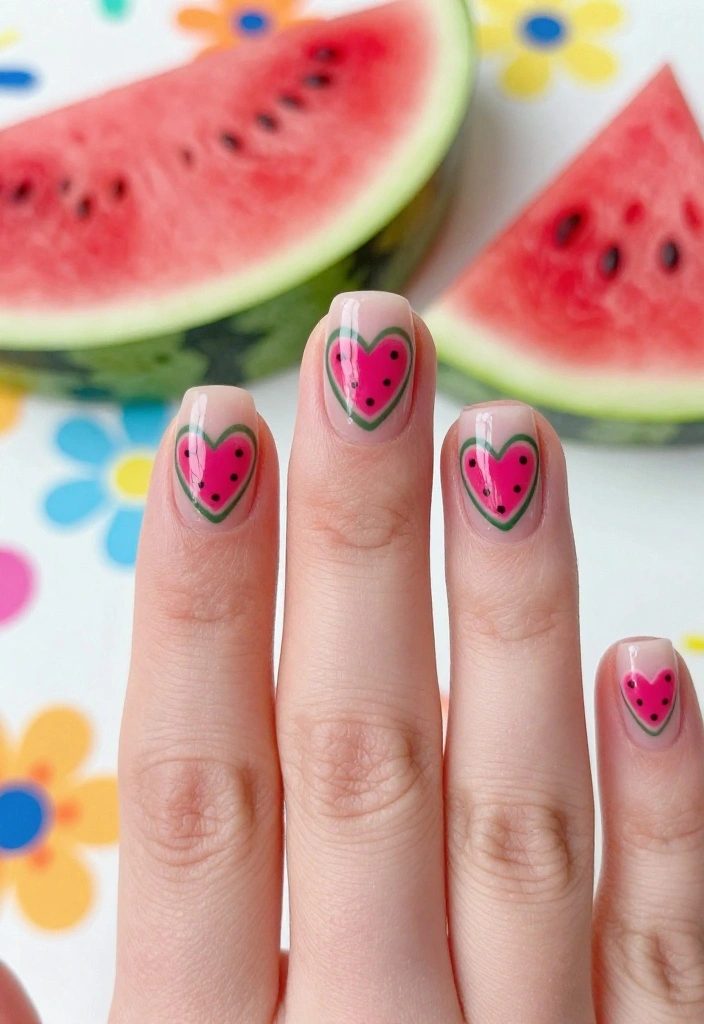
Spread some summer love with adorable heart-shaped watermelon nails! This fun design incorporates hearts painted in vibrant watermelon colors, blending cute and playful perfectly.
To create watermelon hearts, start with a nude or pale pink base. Use a bright pink polish to paint small hearts, outlining them with green to mimic the rind. Tiny black dots can add detail for an adorable finish.
Steps for creating watermelon hearts:
– Start with a nude or pale pink base for elegance
– Paint small hearts with bright pink and outline with green
– Add tiny black dots for detail and charm
This playful design is ideal for romantic occasions or just to bring a smile to your face. Celebrate summer with these cute nails that are sure to brighten your day!
Watermelon hearts prove that tiny details make big vibes. Start with a pale base, paint bright pink hearts, then outline with green for a rind—add tiny black dots for charm. This watermelon nail art is a quick, doable summer print that always pops.
12. Watermelon Confetti
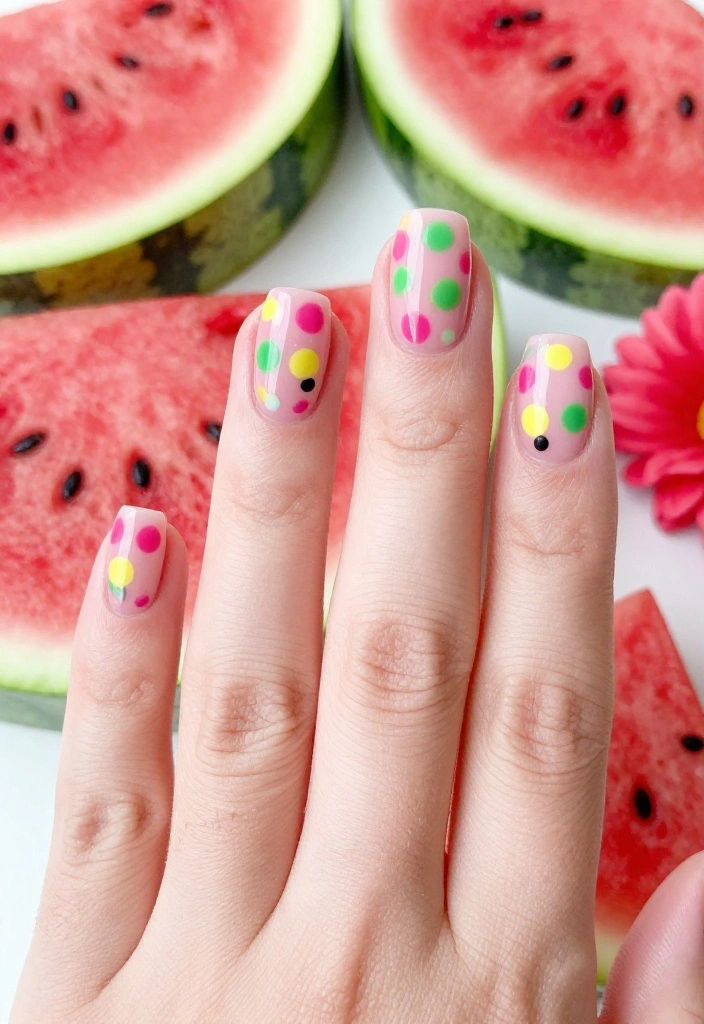
Bring a festive touch to your nails with watermelon confetti designs! This style bursts with fun colors and patterns, combining vibrant splashes that emulate confetti alongside watermelon elements.
To create watermelon confetti nails, start with a white or light pink base. Use a dotting tool to create colorful confetti spots in pink, green, and yellow. Add watermelon details like slices or seeds for a cohesive look.
Steps for watermelon confetti nails:
– Start with a white or light pink base for brightness
– Use a dotting tool for colorful confetti spots
– Add watermelon details like slices or seeds for fun
This design is perfect for parties and celebrations, allowing your nails to shine with vibrant energy. Showcase your creativity while embracing the summer spirit!
Fun fact: watermelon confetti nails pop with 3 bright colors—pink, green, and yellow—so your fingertips look instantly festive. Start with a white base and dot on 4–6 confetti spots per nail for a playful splash. Finish with tiny watermelon seeds for a cohesive vibe.
You Might Also Like

13. Watermelon Neon Glow
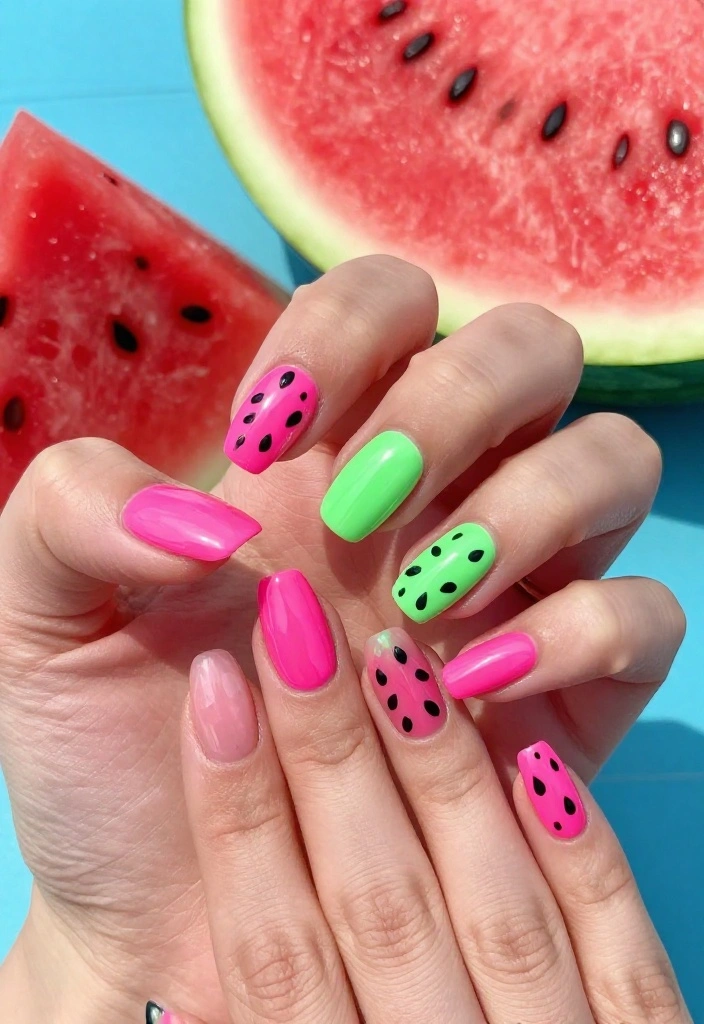
Make your nails pop with neon watermelon designs that bring the party vibe! Neon colors add an electrifying twist to the classic watermelon theme, ensuring your nails stand out in any setting.
To create neon watermelon nails, start with a neon pink base coat for a bold look. Add neon green tips or accents to resemble the rind. Incorporate black seeds for that perfect finishing touch.
Steps for creating neon watermelon nails:
– Use a neon pink base coat for a bright start
– Add neon green tips for a striking contrast
– Include black seeds for detail and authenticity
This nail art is fantastic for summer festivals, beach parties, or any event where you want to shine. The bright colors will ensure your nails catch everyone’s eye!
Watermelon Neon Glow
Editor’s Choice


14. Watermelon Candy Stripes
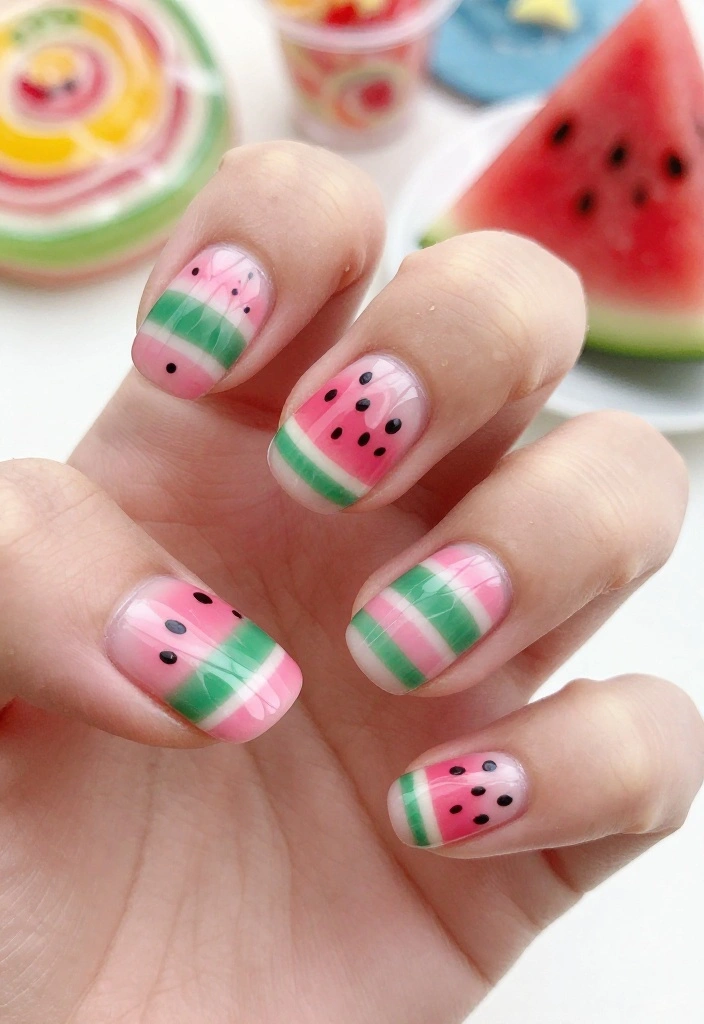
Candy stripes are a playful way to showcase watermelon inspiration on your nails! This striped design mimics the colorful layers of a watermelon, adding a fun touch to your summer style.
To create watermelon candy stripes, start with a white or light pink base coat. Use striping tape to create diagonal lines on your nails. Fill in alternating stripes with pink and green polishes, adding black dots for seeds.
Steps for watermelon candy stripes:
– Begin with a white or light pink base for contrast
– Use striping tape for diagonal lines
– Fill in stripes with pink and green, adding black dots for fun
This design is both fun and chic, making it ideal for casual outings or vibrant summer events. The candy stripe effect adds a whimsical twist that everyone will adore!
Watermelon Candy Stripes
Editor’s Choice


15. Watermelon Mosaic
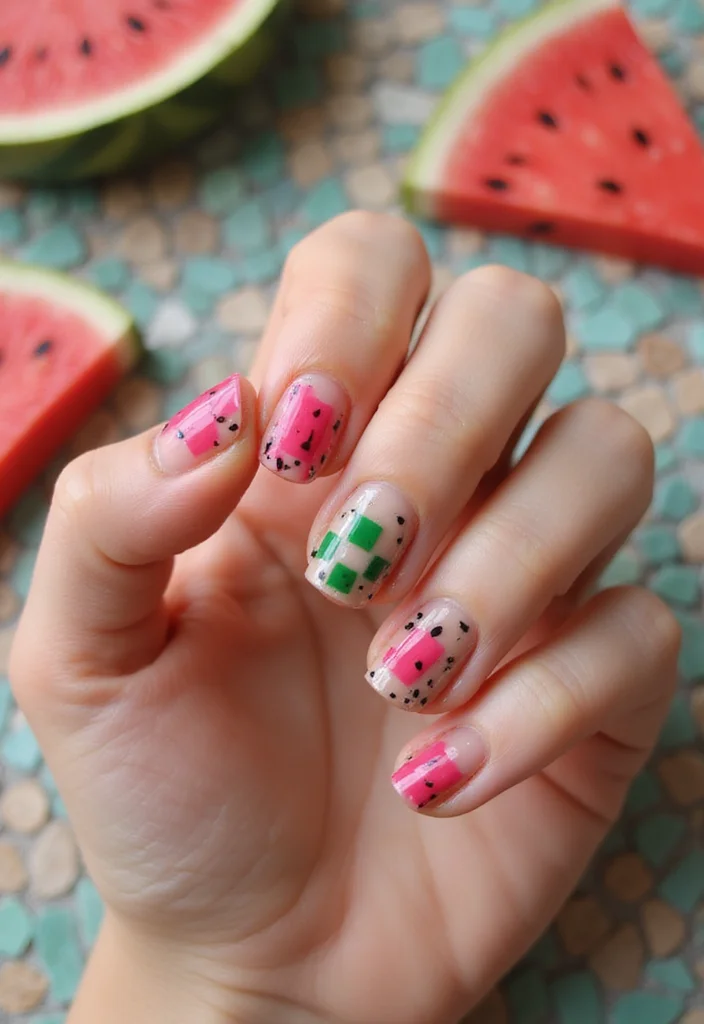
Mosaic nails offer an artistic choice that combines different watermelon-inspired colors and shapes for a standout design. This style mimics the appearance of a mosaic tile pattern, perfect for creative nail art lovers.
To create watermelon mosaic nails, start with a nude base coat. Use a thin brush to create small squares in pink and green, leaving gaps in between. Fill in some squares with black dots to represent seeds.
Steps for crafting watermelon mosaic nails:
– Start with a nude base coat for a clean slate
– Use a thin brush to create colorful squares
– Fill in squares with black dots for a unique touch
This design is perfect for those who love to express their creativity through their nails. It’s a bold statement that’s sure to turn heads, making it absolutely perfect for summer!
Watermelon Mosaic
Editor’s Choice


Conclusion
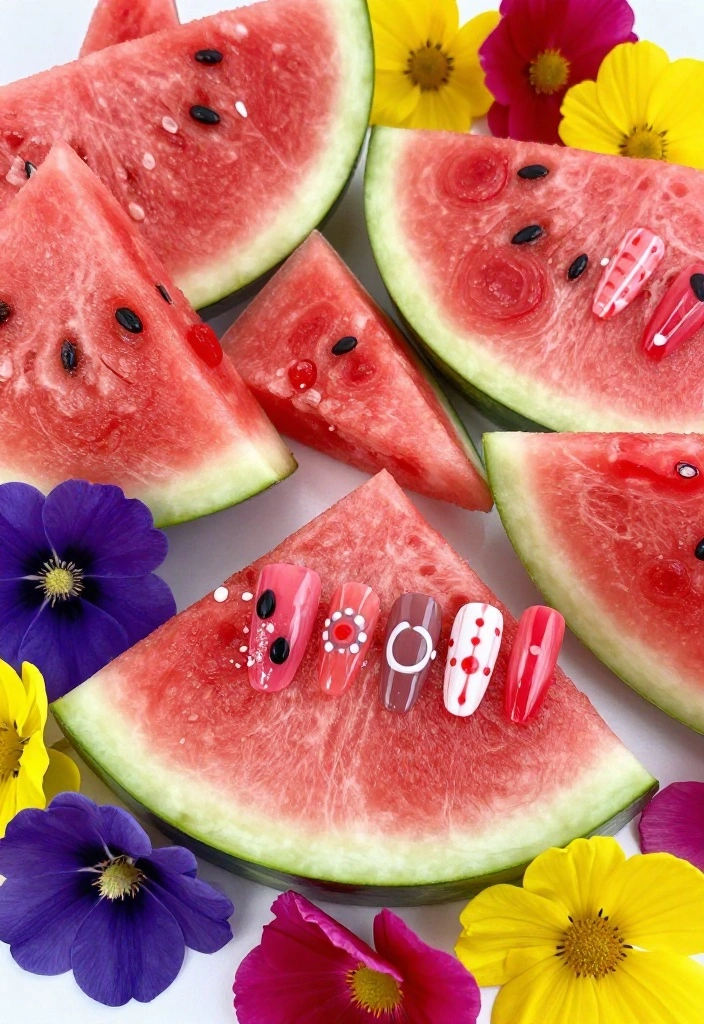
These 15 fruity watermelon nail art ideas are just what you need to embrace the summer vibes! Whether you prefer classic designs, modern twists, or sparkling accents, there’s a watermelon-inspired nail art style for everyone. Each design celebrates the freshness and joy of summer, making your nails a fun canvas for creativity.
So go ahead, pick your favorites, gather your nail art supplies, and let your nails shine bright this season. Share your watermelon nail art creations with friends and family, and enjoy the compliments that come your way!
Note: We aim to provide accurate product links, but some may occasionally expire or become unavailable. If this happens, please search directly on Amazon for the product or a suitable alternative.
This post contains Amazon affiliate links, meaning we may earn a small commission if you purchase through our links, at no extra cost to you.
Frequently Asked Questions
What are the most eye-catching watermelon nail art ideas for summer?
Here are some of the most eye-catching watermelon nail art ideas you can try this summer, blending the classic red-green rind with white accents.
These ideas pair watermelon nail art with trendy designs and fruity nails vibes. Try a diagonal rind with a seed-dotted slice, a full-nail watermelon slice as a sticker, a watermelon confetti gradient, or a minimalist rind tip on each nail. For extra pop, mix matte and gloss finishes, add tiny seeds, or use dotting tools to create seeds.
Feel free to adapt them to short nails or long nails, and mix up the colors to fit your personal style.
How can I recreate watermelon nails at home with step-by-step instructions?
Want to recreate watermelon nail art at home? Here’s a simple, step-by-step look you can try today.
Step 1: Prep the nails with a clean base and apply a base coat to protect your nails.
Step 2: Paint the nails with a white base on the inner area and a pink/red shade on the rest to mimic the fruit’s interior.
Step 3: Add a green rind along the tip using striping tape to keep lines crisp.
Step 4: Use a dotting tool to create black seeds scattered across the red area.
Step 5: Finish with a glossy top coat for a long-lasting finish.
Tip: Play with finishes—matte rind and shiny seeds can look super chic. This watermelon nail art look is perfect for fruity nails and summer vibes.
What tools and polishes do I need for watermelon nail art and fruity nails?
Essential tools and polishes for watermelon nail art and fruity nails include: base coat, white polish, pink/red polish, green polish for the rind, black polish or gel for seeds, striping tape, a dotting tool, a fine nail brush, a nail file, a buffer, and a fast-drying top coat. For gradients, a small sponge helps; if you’re using gel, have a UV/LED lamp handy. With these, you can nail trendy designs and keep your fruity nails looking fresh all summer.
Can watermelon nail art work on short nails or with a French manicure?
Absolutely. Watermelon nail art shines on all nail lengths. For short nails, focus on a single watermelon wedge or a few seeds on one accent nail to keep it readable. For a French manicure, paint a thin green rind tip or place a tiny watermelon slice on the white tip for a playful twist. You can also use negative-space designs to maintain a chic look while staying on-trend.
How can I make watermelon nail art last longer and avoid chipping?
To make watermelon nail art last longer, follow these tips: start with a clean, filed base; apply thin, even coats of base color and top coat; seal the tips to prevent peeling; cure properly if using gel; reapply top coat every 2-3 days; wear gloves when doing dishes; avoid prolonged exposure to water; keep nails hydrated with cuticle oil. These practical steps help your fruity nails stay vibrant through sun and sand.
Related Topics
watermelon nail art
fruity nails
summer vibes
trendy designs
nail art ideas
beginner friendly
easy nail art
colorful nails
seasonal designs
DIY nail art
cute nail art
creative nails
Did you know that watermelon is actually 92% water? Perfect for summer hydration and nail inspiration! I can totally see how that translates into nail art.
I once painted my nails like a watermelon for a picnic, and everyone loved it! It was such a hit that I ended up giving out mini manicures to my friends. Have you ever done something like that?