
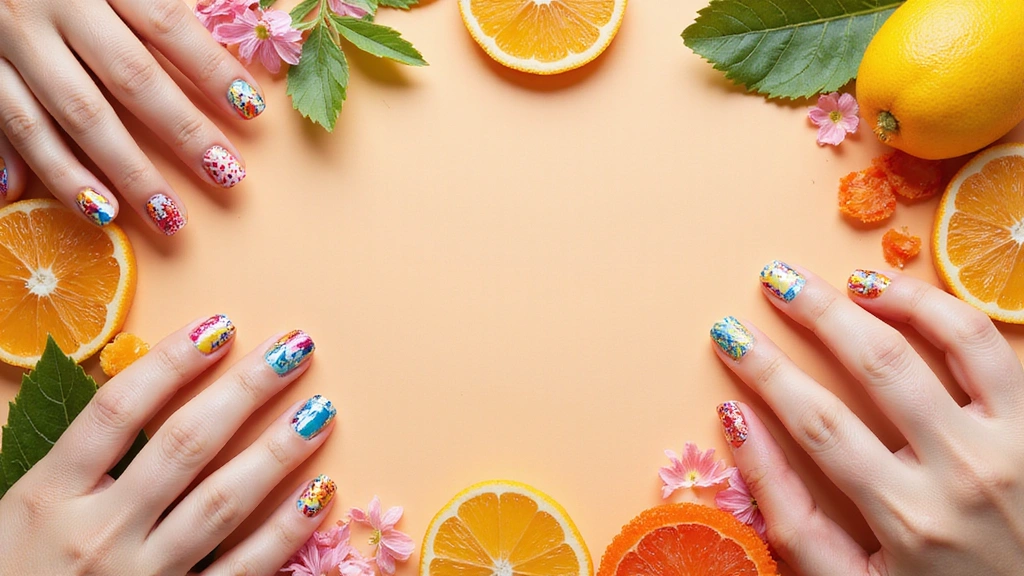
Here is why I put this together: glam rhinestone nails keep popping up in my feeds, and I want to share ideas you can actually pull off at home. You won’t need a pricey kit, just a few simple supplies and a steady hand.
If you love sparkly nails and party vibes, this post is for you. You might want a mani that shines for a night out, a wedding, or a big brunch. It helps to know how to place stones so they stay put.
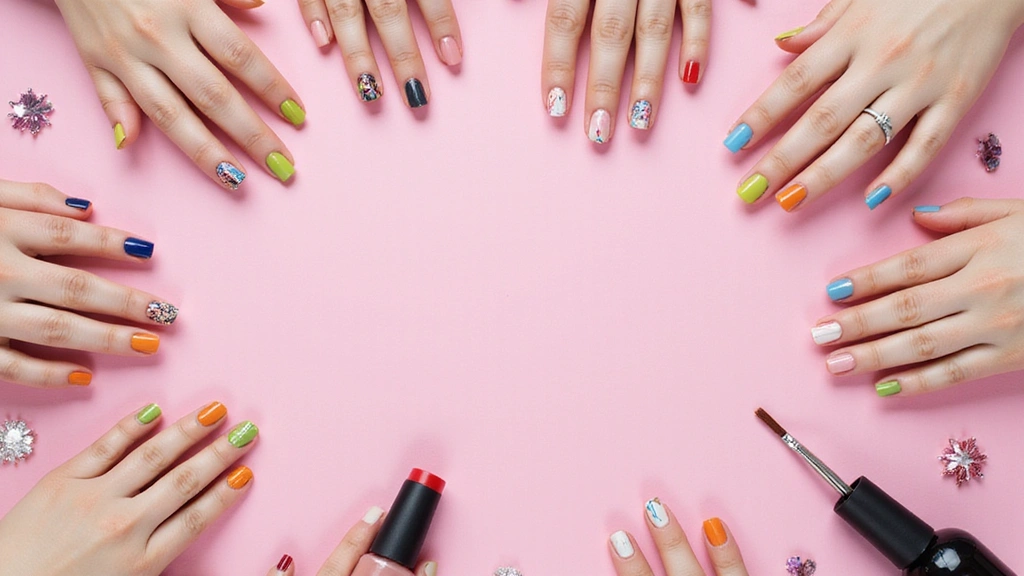
Here you get five looks that blend glam with ease. Each look lists the materials and steps in a simple way. And yes, there is a wink to a look fans call design #8 because it is beyond gorgeous.
I cover the basics you need to know. Choose good quality rhinestones, small flat-back crystals, and a strong nail glue or gel adhesive. Use a pair of tweezers or a dotting tool to place stones with precision. Seal the design with a thick top coat to keep stones from snagging.
The looks work on short or long nails. You can adapt them to square, oval, or almond shapes. One look uses a delicate line of stones along the cuticle for a subtle glow. Another stacks crystals near the tip for a bold wedge of shine. A third approach adds a single big stone as a focal point.
Next steps: practice on a single nail, let glue dry, then move to a full set. Start with a clean canvas, wipe nails, push back cuticles, buff lightly. If you want long wear, use a gel base and top coat and cure under a lamp. Experiment with different shapes and colors to fit your mood.
I hope you try these and make them your own. If you post photos, tag me and tell me which look you tried. I love seeing how you style them and what you learn.
1. Classic French with a Dazzling Twist

Want a nail look that stays classy but feels bold? The classic French manicure is timeless. Add rhinestones at the corners and you get glam without going over the top.
Why it works: clean white tips meet tiny stones. The contrast makes nails look neat and eye catching. It fits weddings, parties, or a date night.
Here is how to do it:
– Start with a nude base coat. Let it dry completely.
– Paint the tips white with a crisp line.
– Place small rhinestones at the outer edge of each nail. Use tweezers and a dab of clear nail glue.
– Seal with a durable top coat to lock in the sparkle.
Tips to level up:
– Mix different stone sizes for depth.
– Add a clear layer beneath the stones for extra shine.
– Change the base shade under the tips to soft pink or champagne.
Care after wear:
– Recoat every few days to keep the stones secure.
– Be gentle with your nails when you type or do chores.
Final thought: This design is easy to recreate at home or with a pro. It blends classic style with a touch of glam you can wear anytime.
Try it on short nails for a crisp, everyday chic.
Elevate your classic French manicure with a sprinkle of rhinestones! This timeless look gets a dazzling twist that’s perfect for any occasion, turning ordinary nails into eye-catching glam.
2. Ombre Glam with Rhinestone Accents

Ombre nails with rhinestone accents give you a chic glow that stands out. You get a smooth color fade plus a touch of sparkle. This is a great way to dress up any outfit for a party or date night.
– Choose colors that blend well Start with a soft pastel on one end and a bolder shade on the other. Keep the tones close so the gradient stays cohesive.
– Use a makeup sponge to apply the gradient Tap gently to blend the colors into a seamless sweep. Let the polish dry before adding stones.
– Place rhinestones where they look best for you Try along the cuticle line for a delicate shimmer, or pile them at the tips for a bold finish. Use a dotting tool or tweezers for accuracy.
– Seal your work with a strong top coat This locks in the stones and keeps the shimmer bright.
– Add a touch of glitter Mix in a little glitter polish with your colors. It adds sparkle without overpowering the gradient.
This style works well for parties, photo shoots, or any time you want a glamorous touch. Next steps are easy. Try it at home.
Ombre glam with rhinestone accents is your secret weapon for a dazzling look! Blend soft pastels and bold shades for a chic glow that turns heads on any occasion. Shine bright, gorgeous!
@media (max-width: 600px) {
.normal-quiz-iframe { min-height: 570px !important; height: 570px !important; }
}
3. Geometric Designs with Rhinestone Detailing

Geometric Designs with Rhinestone Detailing
If you want a nail look that feels crisp and bold, try geometric designs with rhinestones. Sharp lines, triangles, and squares pair with sparkle to catch the eye. The magic happens with negative space and smart rhinestone placement.
For color ideas, start with nude bases and black lines. Or go bold with a white base and metallic lines. This style works on many nail shapes and colors.
How to create it
– Start with a neutral base coat so the shapes pop.
– Use striping tape to carve out sections on each nail.
– Paint the sections in your chosen colors.
– Peel the tape while the polish is still a bit wet to keep edges clean.
– Place rhinestones at key spots where lines meet or at triangle tips.
– Seal everything with a shiny top coat.
Long nails look great with wider shapes at the tips. Short nails stay balanced when you keep the lines compact.
Pro tips for a polished look
– Matte polish on the geometric shapes makes the rhinestones shine even more.
– Metallic polishes add a glam touch without extra clutter.
– Keep stones small on most nails and reserve a few larger stones for accent nails.
Why you’ll love it
This design suits fashion fans who want structure with flair. It works on short or long nails and adapts to many color palettes. It looks neat, modern, and easy to refresh with new color combos.@media (max-width: 768px) { .internal-links-flex { flex-direction: column !important; } .internal-links-flex > div { flex: none !important; } }
You might also like
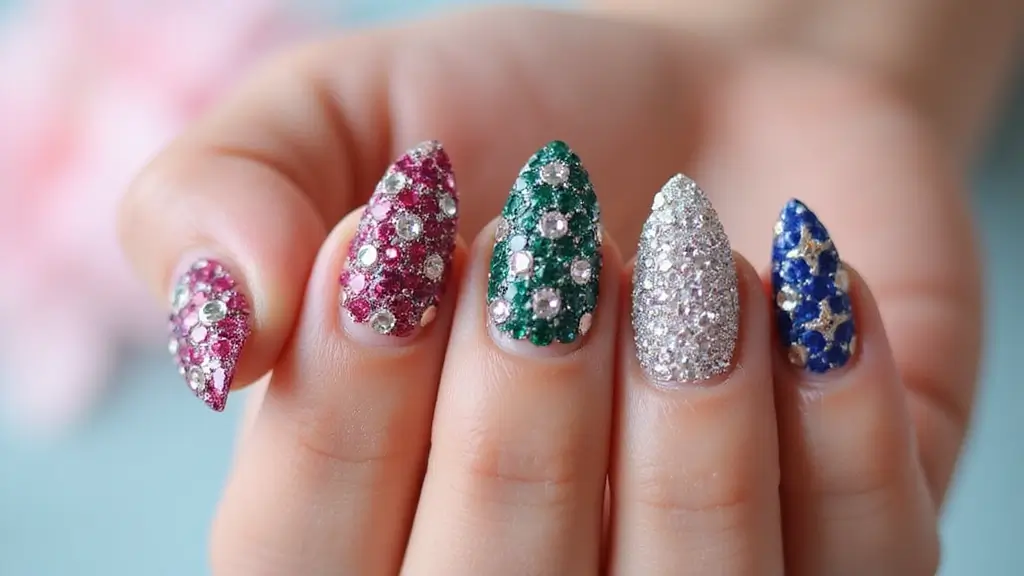
4. Full Bling Sparkle

Full Bling Sparkle: nails that grab the room
Looking for nails that steal the show? Full Bling Sparkle nails offer a bold, all-out shine. This design coats the entire nail with rhinestones, so every finger catches light. It’s a perfect pick for parties or when you want to feel like you own the red carpet.
Why you’ll love it
This look adds instant drama. Stones reflect light from every angle. You can pick a single color for a clean, chic vibe or mix stones for a playful mosaic.
What you’ll need
– Strong base coat
– Bold nail color
– Rhinestones in different sizes and shapes
– Nail glue
– A sturdy top coat
How to apply it
1) Prep nails by pushing back cuticles, filing smooth, and applying base coat. Let it dry.
2) Paint with the bold color and let it dry completely.
3) Apply glue and place rhinestones across the entire nail. Use patterns or fill in for maximum sparkle.
4) Seal with a thick top coat to lock stones in place. Let it dry fully.
Tips for long wear
– Work in good light and use tweezers for placement.
– Mix sizes and shapes to create a 3D look.
– Press stones gently as the top coat goes on.
– Keep the rest of your outfit simple so nails stay the star.
Care and removal
When you want a new look, soak off carefully or use the foil method to lift the stones without pulling skin.
Dare to dazzle! Full Bling Sparkle rhinestone nail designs are your ticket to turning heads and lighting up any room. Shine bright and embrace the drama—because bold is beautiful!
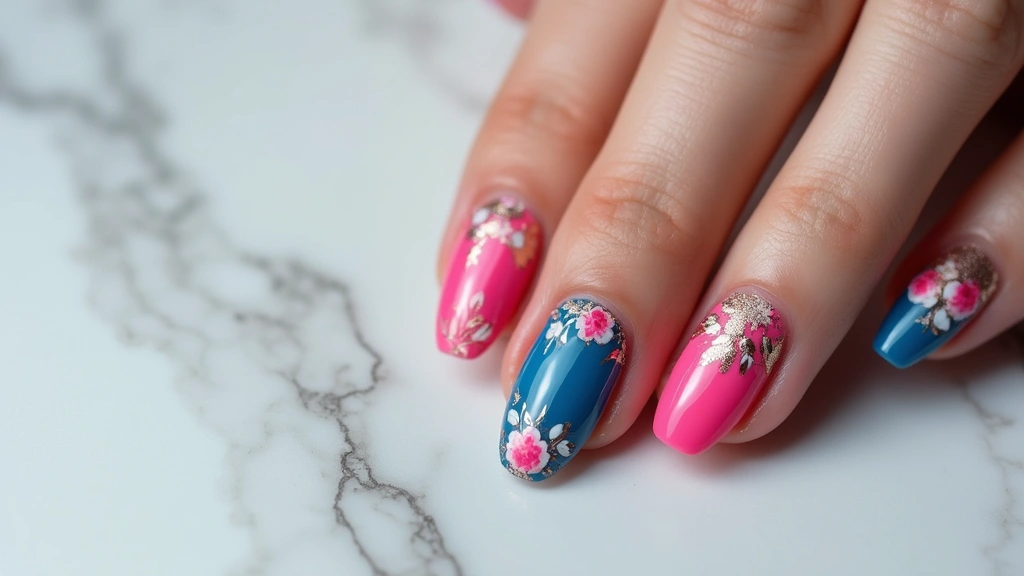
5. Elegant Floral Designs with Rhinestone Touch

Why this look helps you You want nails that feel soft yet chic. Elegant floral designs with rhinestones can give you that mix.
Here is why it works: pastel colors make a calm backdrop. Tiny rhinestones add just enough sparkle without shouting.
– Prep the nail with a light base coat. Let it dry before you move on.
– Paint simple flowers with a fine brush on a pastel background. Keep petals small so the design stays neat.
– Place stones Add a tiny rhinestone at the center of each bloom. Use tweezers or a gem wand and a dab of clear top coat or nail glue to hold it.
– Finish with style. A matte top coat makes the flowers stand out against the shine of the rhinestones. If you want more glow, use a glossy top coat.
– Tip Mix flower shapes. Daisies and little blossoms look sweet. Try different rhinestone colors for a playful vibe: pearl, pink, or clear.
Next steps: practice on a few nails first. Keep the size of the stones small so the art stays wearable. This design shines in daylight and indoors, and it pairs with many outfits.
For longer wear, cap the tips with a clear coat and avoid soaking hands. Keep nails dry after showers to protect the stones.@media (max-width: 768px) { .internal-links-flex { flex-direction: column !important; } .internal-links-flex > div { flex: none !important; } }
You Might Also Like
@media (max-width: 600px) {
.visual-quiz-iframe { min-height: 995px !important; height: 1100px !important; }
}
Conclusion

Rhinestone nail designs are the perfect way to express your unique style and add a touch of glamour to any outfit.
From classic designs to bold, full-blown bling, there’s a rhinestone look for everyone. Don’t hesitate to experiment with these ideas, mixing and matching to find your signature style! Your nails deserve to shine as bright as you do.
Frequently Asked Questions
What Supplies Do I Need to Create Glam Rhinestone Nail Designs at Home?
Creating stunning glam rhinestone nail designs at home doesn’t require a pricey kit! All you need are a few simple supplies like nail polish, rhinestones, a dotting tool or tweezers, and a good top coat to secure the rhinestones in place. These items are often easily found at your local beauty supply store or online.
How Long Do Rhinestone Nail Designs Last?
The longevity of your glam rhinestone nail designs depends on a few factors, including how well you apply them and your daily activities. Typically, if you properly secure the rhinestones with a quality top coat, they can last anywhere from 5 to 10 days. To extend their life, avoid using your nails as tools and be gentle with your hands!
Can I Customize My Rhinestone Nail Designs for Different Occasions?
Absolutely! One of the best things about rhinestone nail designs is their versatility. You can customize them based on the occasion—elegant florals for weddings, bold geometric patterns for parties, or a classic French twist for everyday wear. Use different colors and sizes of rhinestones to match your outfit or event theme!
Are Rhinestone Nail Designs Safe for My Natural Nails?
Yes, rhinestone nail designs can be safe for your natural nails if applied correctly. The key is to avoid harsh chemicals and excessive filing when removing them. Always ensure you’re using quality products and give your nails a break between applications to keep them healthy and strong.
What Are Some Tips for Beginners Trying Rhinestone Nail Designs?
If you’re new to rhinestone nail designs, start simple! Try adding rhinestones to just one nail as an accent rather than all ten. Use a dotting tool or tweezers to place the rhinestones precisely. And don’t forget to seal everything with a top coat for durability! Most importantly, have fun and let your creativity shine!
Related Topics
rhinestone nail designs
glam nails
nail art inspiration
French manicure
ombre nails
geometric nail art
full bling nails
floral nail designs
DIY nail art
beginner friendly nails
trending nail styles
easy glam nails
I love how blingy these nails are! They remind me of the time I wore glittery shoes and tripped at my friend’s wedding…talk about a fashion statement! What’s your favorite color for nails?
Did you know that rhinestone nails became popular in the 1970s? It’s fun to see how trends come back around! Which design do you think will be the next big thing?