
Why I made this I put this together because nail trends are changing fast, and I want you to keep up without the guesswork. I keep seeing tiny details pop up in feeds and salons—glitter flecks, tiny studs, bold shapes—that make nails feel fresh in an instant. This post rounds up 25 trendy nail details you can actually try at home or with your tech. And yes, the #15 detail is a real eye-catcher.


Last update on 2025-10-31 / Affiliate links / Images from Amazon Product Advertising API
Who it’s for If you love nails, fashion, and little details that lift your look, this one’s for you. It fits busy students, working pros, and DIY lovers who want ideas that work in real life. You care about nails that last, look good in photos, and fit your style, whether you keep it simple or go bold.
What you’ll get You’ll discover 25 trends explained in plain language. You’ll find quick tips to recreate each look, plus notes on tools and colors that do the job. I share simple steps from base coat to top coat and ideas for short nails or long nails. You’ll get practical tweaks so you can pull off the looks with confidence.
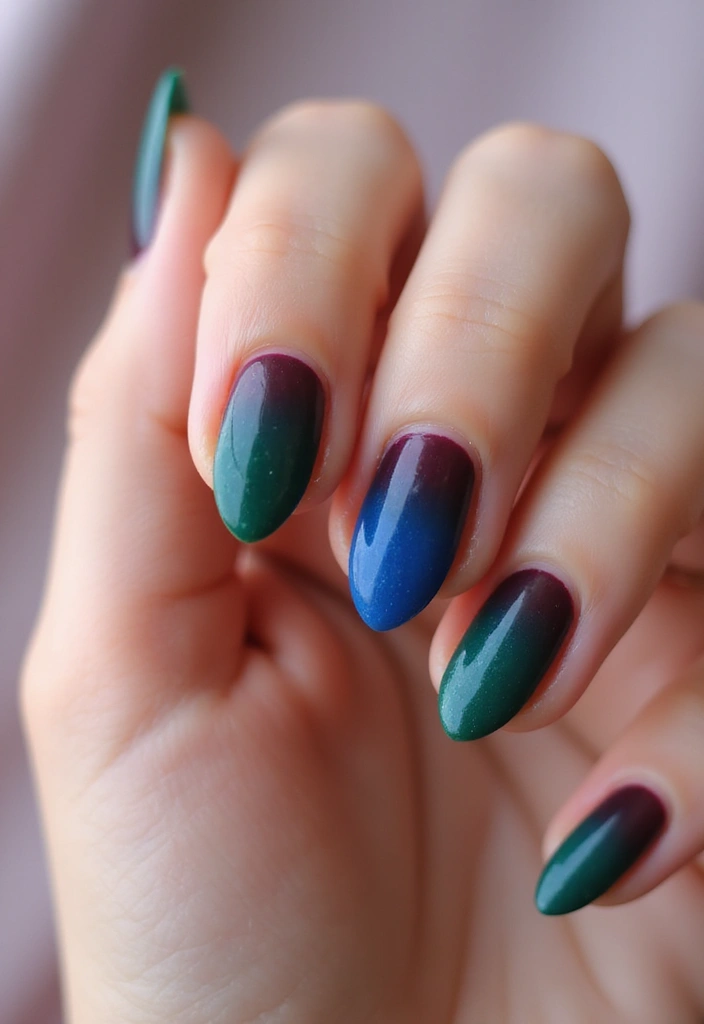
Details you’ll see Look for chrome edges and mirror flecks, negative space silhouettes, velvet matte finishes, tiny 3D charms, glassy flecks, foil shards, and clean line art. You’ll also see color-block combos, holographic flakes, marbled swirls, and subtle jewel accents. Each detail comes with how it reads in real life and how lighting changes the glow. It all looks different on bold nails versus a quiet everyday set.
What you’ll do with this guide Start with a clean base. Pick one detail to begin with. Use tape or a dotting tool for crisp lines. Build from a soft base before you add shine. I mention tools like gel polish, top coat, striping tape, and a dotting tool. Finishing with cuticle oil helps keep everything smooth and tidy.
Why #15 stands out It blends glam with wearability. It catches light from every angle and stays comfy on the nail. It’s simple enough to pull off on a weeknight but flashy enough for a party. Read on to see all 25 looks and pick your next go-to style.
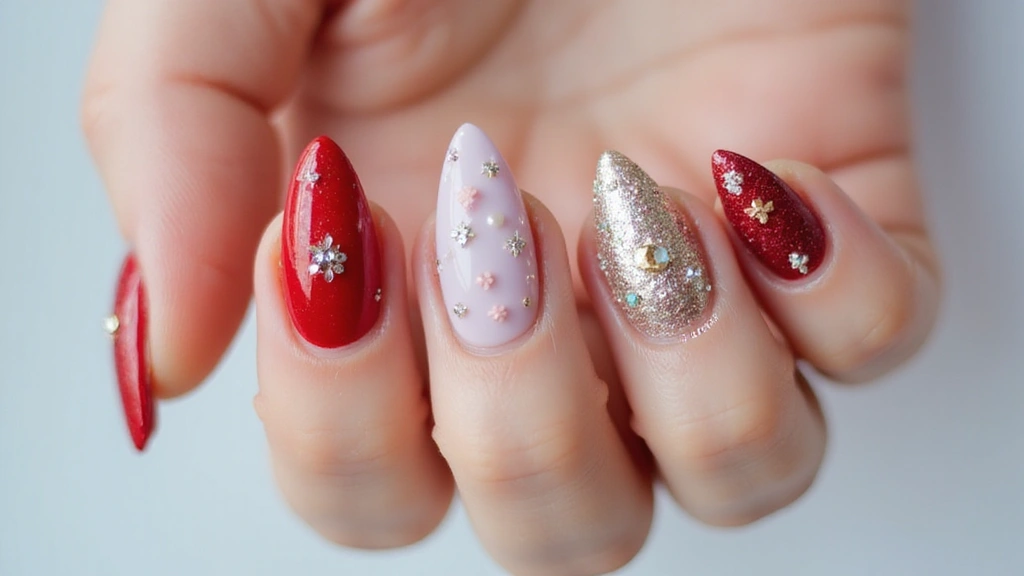
1. Gemstone Accents
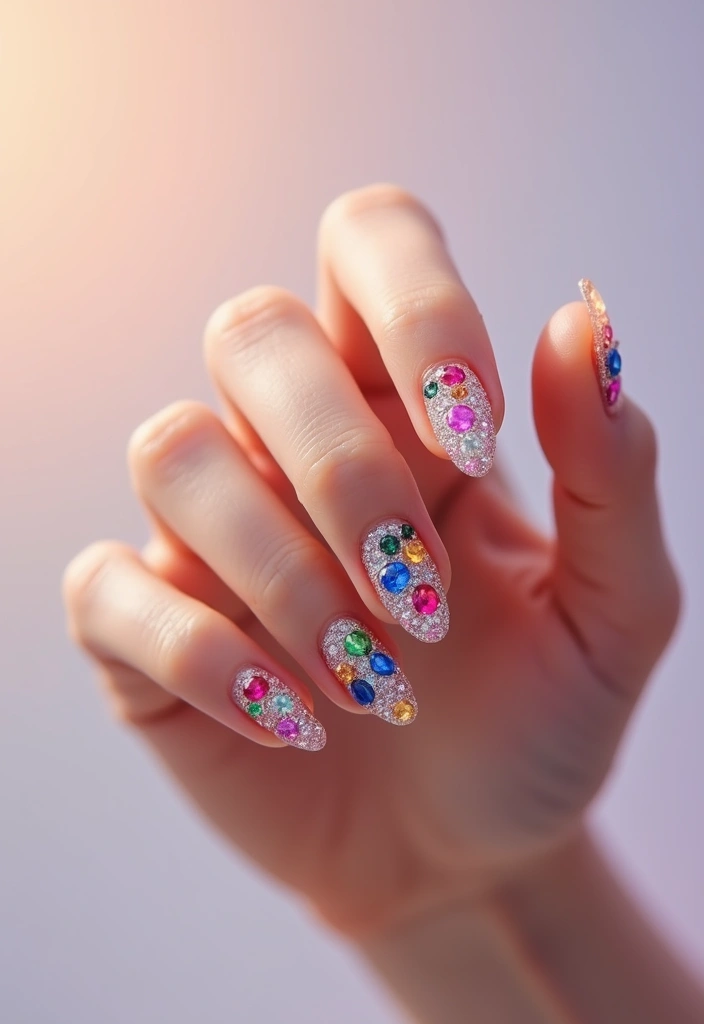
Want nails that sparkle without a full art session? Gemstone accents add instant luxe with simple steps. Tiny gems catch light from every angle, so you can match your outfit or the mood of the day. It’s easy to switch from a quiet shine to a bold, showy look.
– Placement: Place gems near the cuticle for a clean, classy line, or scatter them across a nail for a playful vibe. Start with 1–3 stones on a feature nail, then add more if you want extra sparkle.
– Colors: Pick stones that fit what you’re wearing or your mood. Deep emeralds read grown-up and chic; bright aquas feel fun and fresh; a mix of colors can read bold and fashion-forward.
– Texture: Try pairing gems with a matte base for contrast, or keep everything glossy for a high-shine finish. You can add a thin layer of glitter on the nail for extra depth.


Last update on 2025-10-31 / Affiliate links / Images from Amazon Product Advertising API
– Maintenance: Seal the gems with a strong topcoat so they stay put. If you use gel or acrylic, consider a gem-setting gel or glue for extra hold, and reapply topcoat every few days to keep the shine.
Gemstone accents bring a chic sparkle to any nail design, helping your hands steal the spotlight. You can keep it simple or build a tiny constellation of gems on one nail for a true focal point.
Product Recommendations:
• Nail Rhinestones Assortment Set
2. Rhinestone Lines
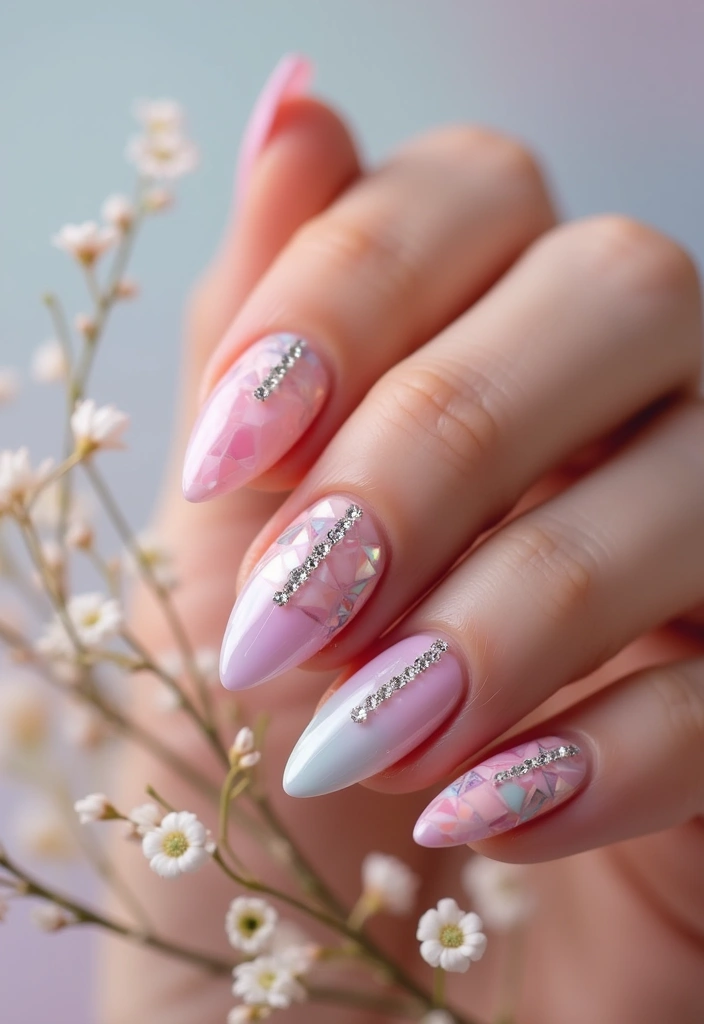
You want nails that glow but stay easy to wear. Rhinestone lines give you fast sparkle with little fuss. They can be a neat stripe or a small border along the tip.
– Design Inspiration: Try a modern French tip by lining the smile line with rhinestones instead of white polish. A thin row along the edge looks clean and smart.
– Application: Start with your base color. When you’re ready for the line, place a dab of nail glue or clear top coat where you want it. Use tweezers or a small brush to set each stone. Press gently to secure, then seal with a top coat.
– Mix and Match: Use different sizes. A line of tiny stones with a few bigger ones adds texture without crowding the nail.
– Occasions: Great for weddings, parties, photos, or any day you want a touch more shine without a loud design.
Tips you can use: a thin top coat over the stones helps them stay put. If you don’t have tweezers, use a clean fingertip to nudge stones into place. Keep a few spare stones handy for quick fixes.
Rhinestone lines offer a fast glam upgrade that stays comfy on the nail. They’re easy to remove if you want a simpler look.
Product Recommendations:
3. Studded Designs
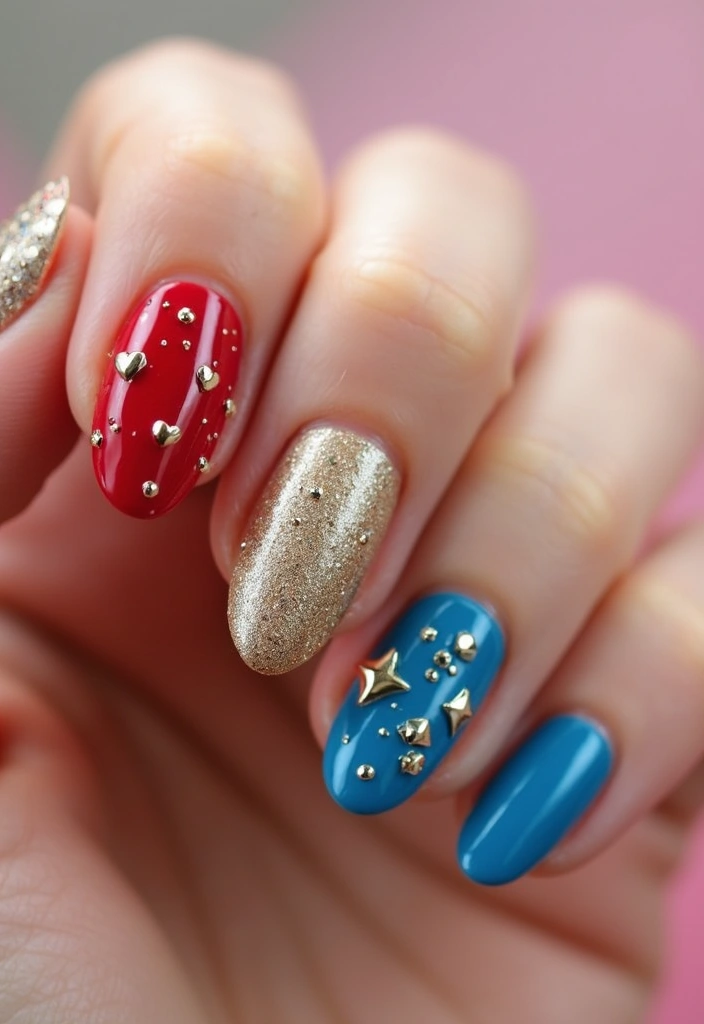
You want nails that pop. Studs give a bold, edgy vibe with a clean finish. Tiny metal pieces come in rounds, squares, and sharp spikes. They turn a plain polish into something you notice.
– Placement: Arrange studs in neat patterns. Try a row, a small square, or a cluster in one corner.
– Color coordination: Gold or silver studs glow against black, deep red, or navy blue.
– Accessibility: Home nail kits often include easy-to-use studs and glue or a clear top coat to seal them.
– Occasions: Great for festivals, parties, or any time you want your nails to stand out.
How to apply (quick steps)
1) Prep nails with a base coat.
2) Paint your color and let it dry.
3) Put a small dab of glue or a clear top coat at the spot where the stud will sit.
4) Pick up the stud with tweezers and press it on.
5) Hold for 10–15 seconds, then let it set.
6) Brush a finishing top coat over the whole nail to seal the design.
Tip to last longer: avoid soaking hands for a few hours after application. Use a gentle hand cream to keep the edges smooth.
If your nails are long or curved, place studs in the center of the nail for the best hold. With proper prep and sealing, studded designs stay sharp and shiny longer.
Product Recommendations:
• tweezers for nail art application
4. Pearl Embellishments
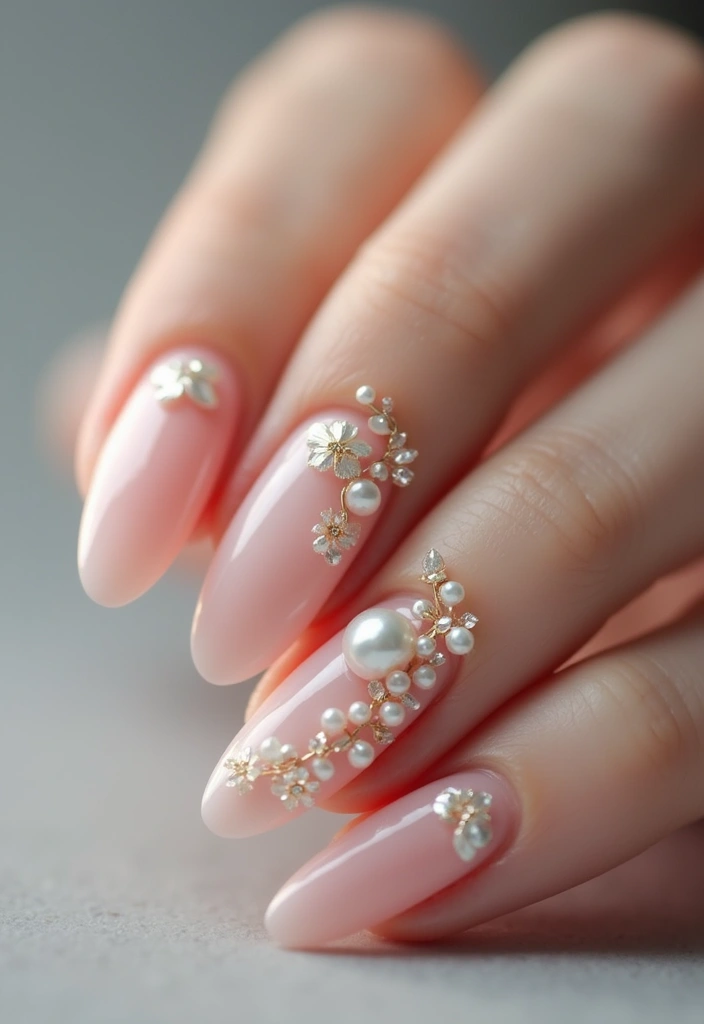
You want nails that feel classy without slowing you down. Pearl embellishments give you that refined touch with little fuss.
Pearls shine softly in pearl nail art and stay wearable. They turn a simple manicure into a chic moment.
Design ideas
– Use tiny pearls to make a delicate flower on one nail.
– Create a slim pearl border along the cuticle of an accent nail.
– Mix different sizes of pearls for a textured, dimensional look.
– Combine pearls with tiny rhinestones for a modern twist.
Color pairings
– Combine pearls with soft pastels for a romantic feel.
– Match them with deep jewel tones for a bold contrast.
– Try mixed finishes—white pearls with iridescent ones for shimmer.
Application tips
– Fix pearls with a strong topcoat or nail glue.
– Press gently for a few seconds, then seal with topcoat.
Care and wear
– Avoid acetone or harsh removers near the pearls.
– Reapply a clear topcoat every 2–3 days to keep them secure.
Occasions
– Perfect for bridal looks.
– Great for date nights or any event where you want a star touch.
Quick at-home steps
1. Prep nails and push back cuticles.
2. Apply base color and let it dry.
3. Place pearls on the nail where you want the accent.
4. Seal with a thick topcoat and cure.
5. Wipe away excess glue and let it set.
You can adjust the design as you go.
Product Recommendations:
• Nail Glue for Rhinestones and Pearls
5. Sculptural Nail Art
You want nails that stand out without breaking easy. Sculptural nail art does that by turning nails into tiny art pieces that stay sturdy on your fingertips.
– Materials: Use builder gel or acrylic to form raised shapes. A fine brush helps you pull petals, leaves, or abstract lines. Have a strong top coat ready to seal the texture.
– Design Inspiration: Nature is your friend. Flowers, ferns, waves, and geometric shapes all work. Start with one focal element to learn height and balance.
– Color and Depth: Add gradients across the 3D parts. Light colors near the top with darker shades underneath give your sculpture more punch.
– Techniques: Practice on a nail wheel before trying a real set. Build in layers, curing between gel steps or letting acrylic set. Use a dotting tool to place tiny beads and a brush to smooth edges.
– Application Tips: Keep the base smooth and the 3D piece tucked away from the cuticle for comfort. Don’t overfill; less is more for a clean, wearable sculpture.
Care and wear: File edges gently, and finish with a sturdy top coat. Protect the design with daily care—avoid poking or picking at the raised parts.
You can start small.
Product Recommendations:
6. Metallic Accents
You want nails that pop without long work? Metallic accents are perfect. They catch light and add depth, making simple designs feel luxe. You get wow with small touches that stay easy to wear.
– Application tips: Pick metallic polish for a full shine, or press foil pieces onto a sticky layer for bold accents. Cut foil into lines, chevrons, or tiny shapes. Press gently with a silicone tool so edges stay neat. Finish with a clear top coat to seal everything in.
– Layering: Mix metals with a matte finish to create contrast. Paint one nail with a matte top coat, or matte a section of each nail. The combo of shiny metal and flat surface makes designs pop without shouting.
– Color pairings: Metals love bold colors. Try navy or royal blue with gold, or ruby red with silver. Classic gold or chrome works well with black or white for a clean, modern look.
– Everyday glam: These details aren’t just for parties. A slim metallic line at the cuticle or a single metal nail can carry you from desk to dinner. Subtle, classy, versatile.
Metallic accents bring a refined touch that turns heads. They’re easy to try, affordable, and great for quick experiments.
Product Recommendations:
• Gel Nail Polish Set with Metallic Colors
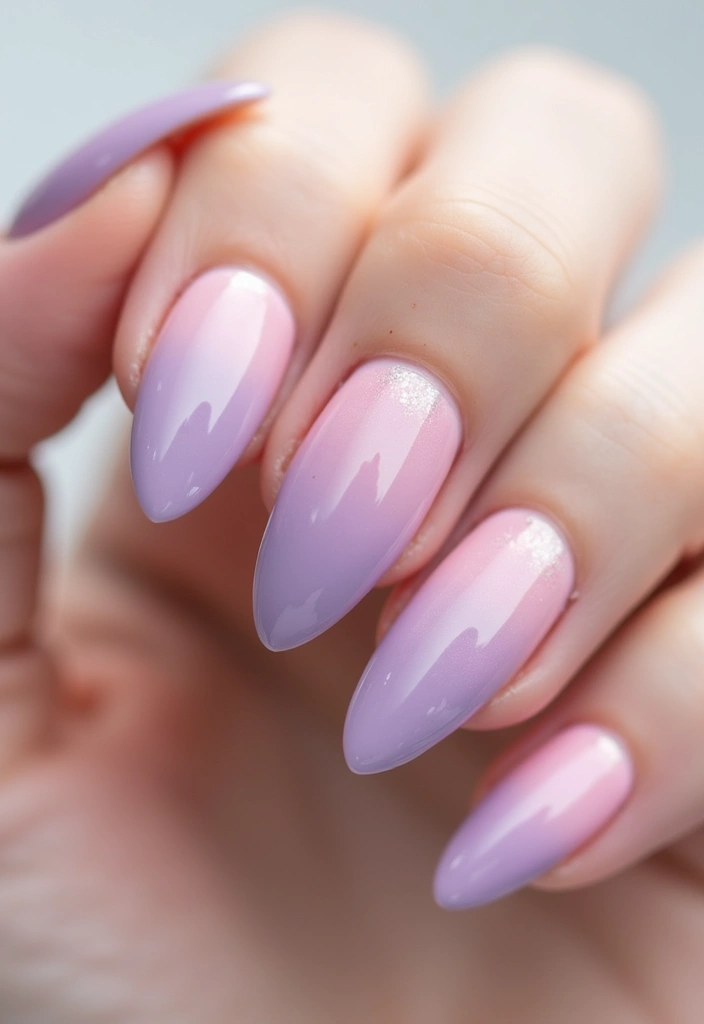
7. Ombre Gems
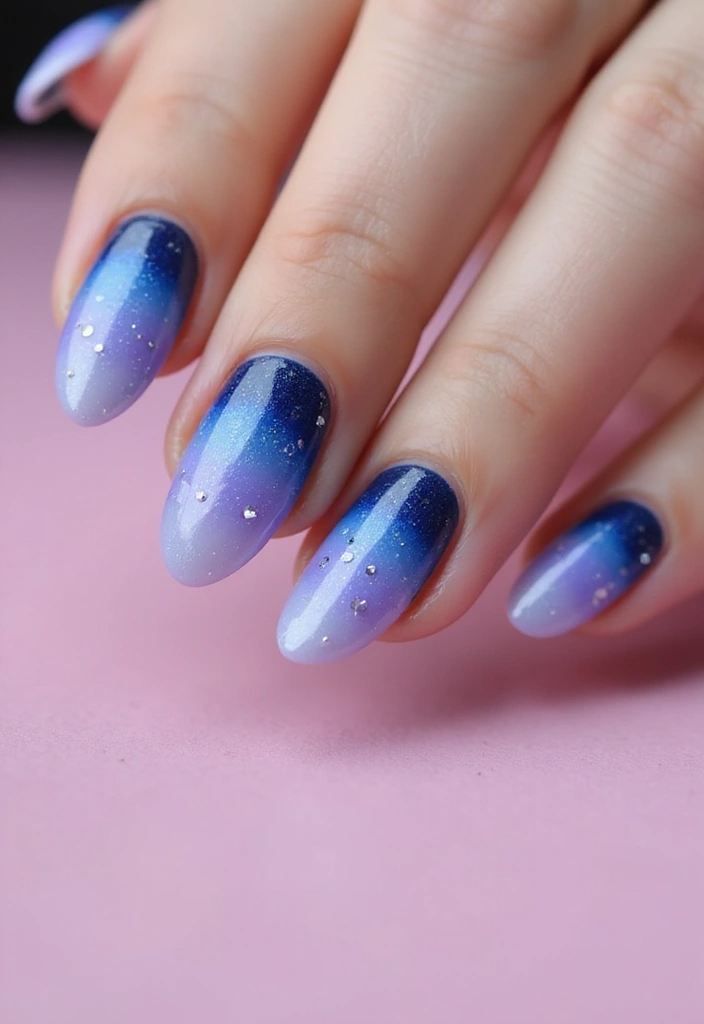
You want nails that glow and stay chic. Ombre gems blend color fades with tiny gems for a soft sparkle. It feels like a starry night on your fingertips.
1. Gradient ideas You can choose hues that blend smoothly, like sunset oranges fading to pinks, so the fade looks natural.
2. Gem placement Place small gems where the color shifts to add depth and catch the light from every angle.
3. Nail shapes This design shines on both long and short nails, so you can try it on your natural nails or a stylish manicure.
4. Occasions It fits weddings, parties, or any event that calls for a glow, without being too loud.
Here’s how to pull it off.
– Step 1: Prep your nails with a clean base coat.
– Step 2: Paint the ombre gradient using a sponge for a soft fade.
– Step 3: Seal the gradient with a clear top coat.
– Step 4: Attach tiny gems with nail glue and cap with another top coat.
Care tips to keep it looking fresh:
– Let the glue dry fully before you move.
– Reapply the top coat every few days to protect the gems.
Ombre gems blend elegance with a touch of glam, making every hand move feel special.
Product Recommendations:
• Nail art sponge for ombre effects
• tiny adhesive gems for nail decor
• high-shine clear top coat for nail protection
8. Glitter Placement
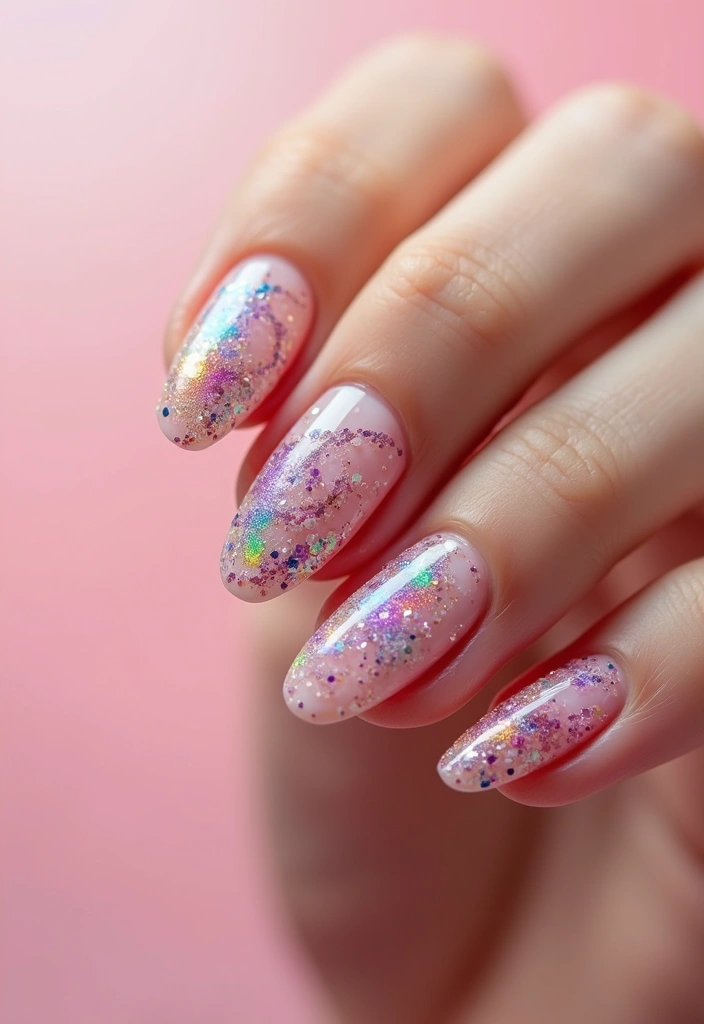
You want nails that sparkle without looking loud. Glitter placement makes that balance easy.
What you need
– Clear polish as a glue for glitter.
– A small glitter assortment.
– A fine brush, dotting tool, or tweezers.
– A top coat for lasting shine.
Strong color ideas start in your head. Think about what you wear and where you’ll show your nails.
How to do it
Paint your nails with your base color and let it dry.
Dab a tiny amount of clear polish where you want the glitter.
Use tweezers or a brush to place the glitter pieces exactly.
Gently press the glitter so it sticks and won’t snag.
Finish with a thin top coat over the glitter to seal edges.
If glitter sticks to skin, wipe away with tape.
Design ideas
Try glitter stripes on a solid base for a clean look.
Create a glitter gradient that fades to the tips.
Place small shapes or lines to form patterns like stars or chevrons.
Go full glitter on an accent nail for a bold twist.
Try diagonal glitter lines for movement.
Color choices
Match the glitter to the base for a cohesive feel.
Go bold with contrasting tones for a strong statement.
Pair metallics with neutral shades for balance.
Tips and tricks
Choose fine glitter for subtle shine or chunky glitter for drama.
Keep layers light and let each dry before the next.
Seal the tips to prevent chipping and lift.
Set a gentle hand with tweezers to avoid crowding.
Product Recommendations:
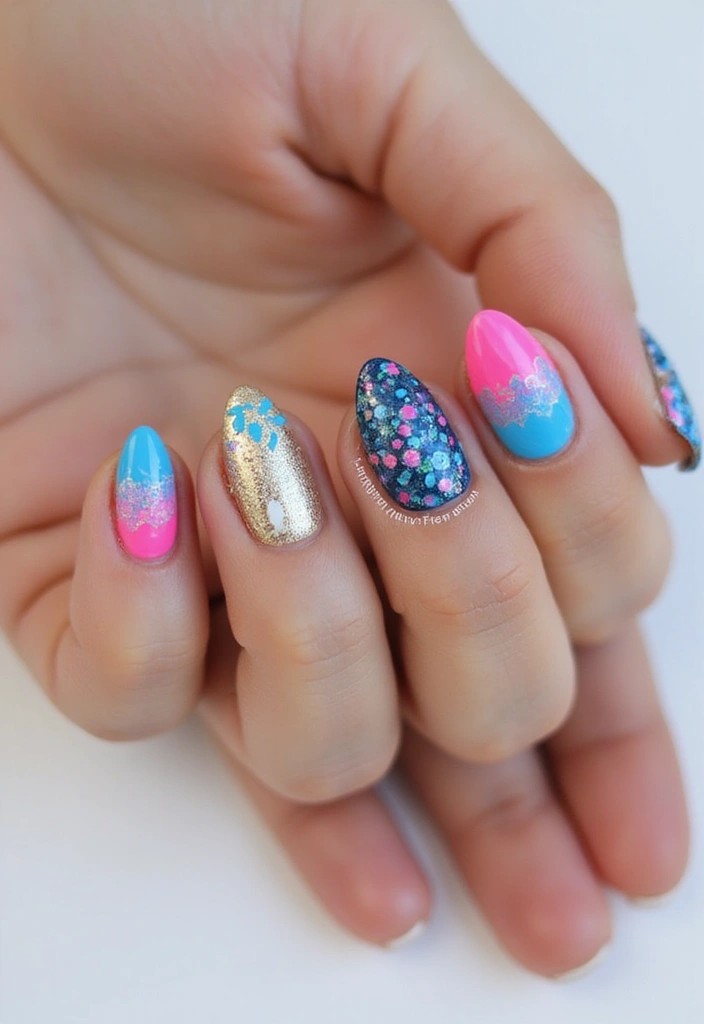
9. Mosaic Designs
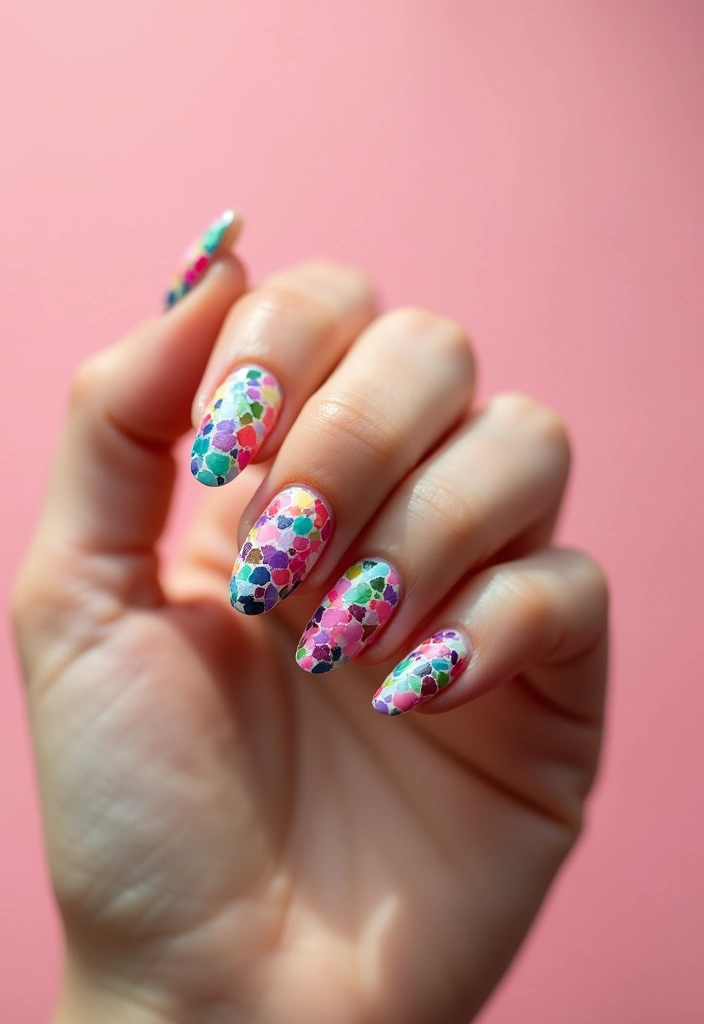
You crave nails that look like tiny art pieces. Mosaic designs deliver color, shape, and texture in one bold look.
How to build the mosaic: use gel paint or nail stickers to create small, tile-like sections on your nails. Outline each tile with a thin line to separate colors and give a sharper mosaic effect.
Color tricks: Go for high-contrast combos to make every piece pop. Or choose harmonious analog hues for a subtle, boutique vibe. Add a touch of metal or glitter on a couple of tiles for a spark.
Finish and texture: mix matte tiles with glossy edges. The different textures catch light and add depth to the design.
Ideal occasions: artsy parties, photo shoots, or days when you want your nails to tell a story.
Practical steps:
– Prep nails: file smooth and push back cuticles.
– Plan your mosaic: sketch a simple layout on paper or use nail guides.
– Apply tiles: place gel-painted blocks or stickers, leaving small gaps.
– Seal the look: top coat for shine, or a satin top coat for a softer feel.
– Clean edges: wipe overflow with a fine brush.
Care tips:
– Be gentle with your hands in the first 24 hours.
– Reapply top coat every 2–3 days to extend wear.
Product Recommendations:
• nail art stickers assortment
10. Velvet Nails
Velvet nails give you a soft, plush look that feels as good as it looks. They add warmth to any manicure and stay eye-catching in photos. You can try this at home, or book time with a pro. Here’s how to get the look.
– What velvet nails are: Velvet nails use a plush powder that clings to a tacky polish to create a fuzzy surface. The finish is warm and rich.
– How to apply: Paint a base color and let it dry. Gently press velvet powder onto the nail so it sticks. Tap away the excess with a soft brush. For more texture, dab a second time. Finish with a light matte top coat to seal.
– Color ideas: Deep burgundy, royal blue, forest green, or charcoal gray work best. These shades maximize the plush effect.
– Care and maintenance: Avoid long water exposure for the first day. Wear gloves for chores. If fuzz flattens, re-dust a bit of powder and brush smooth.
– Best occasions: Velvet nails suit fall events, cozy nights, or days when you want a warm, chic vibe.
– Smart tips: Keep a small velvet-dusting brush for quick touch-ups. For removal, use a gentle acetone pad and a light wipe.
Velvet nails add warmth and style to your nail game.
Product Recommendations:
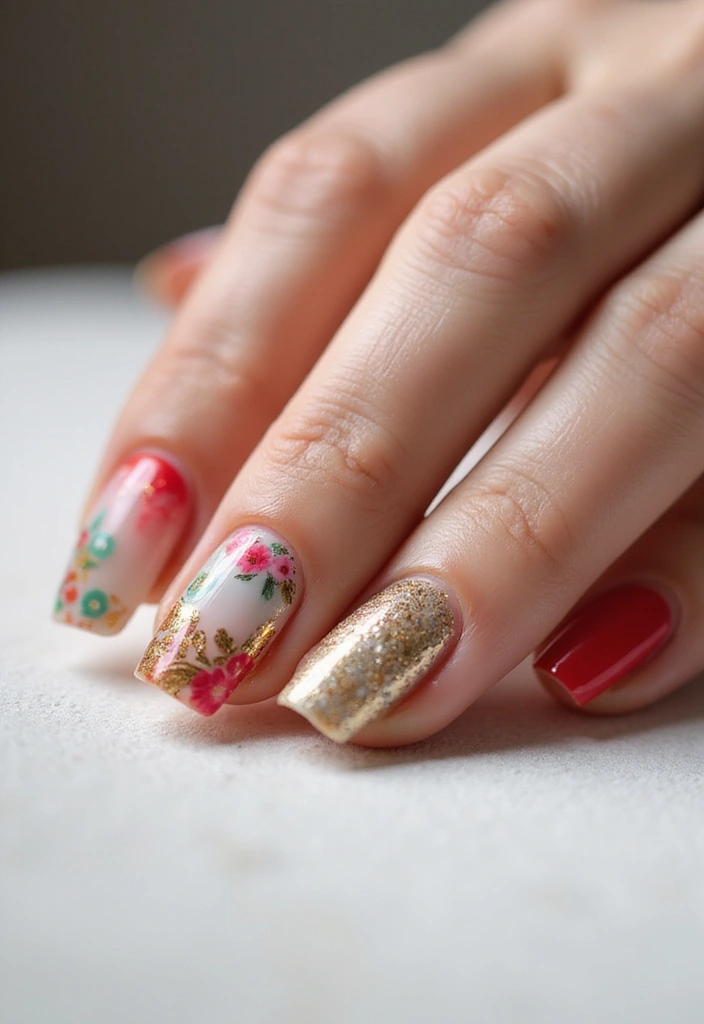
11. 3D Floral Accents
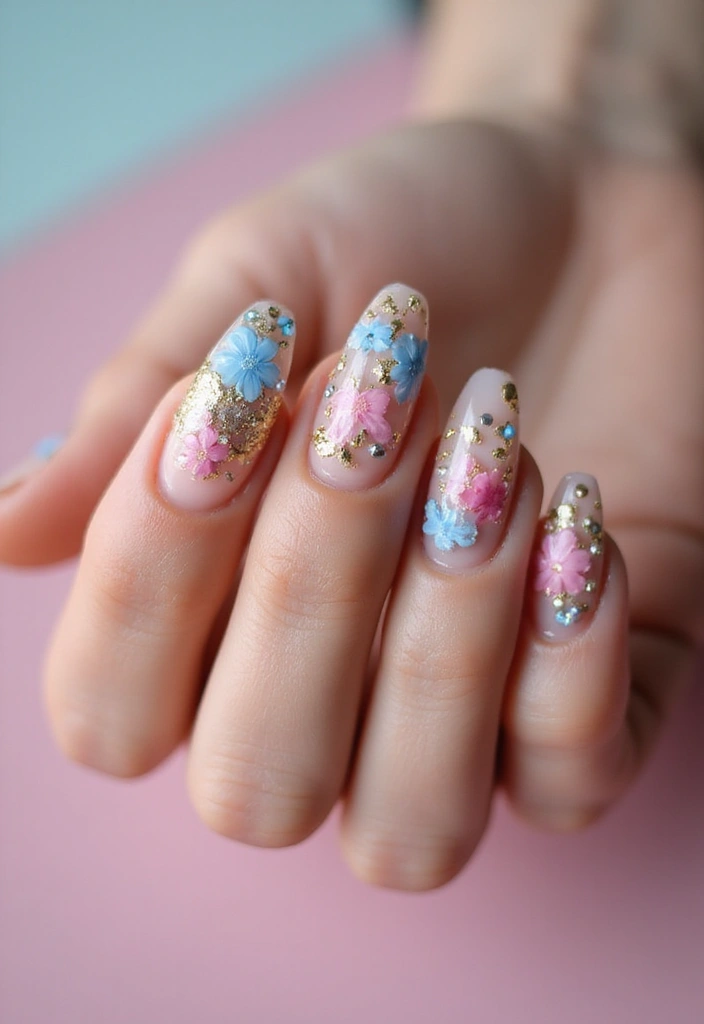
Looking for a nail look that feels romantic without shouting for attention? 3D floral accents lift petals off the surface, catching light as you move.
They add whimsy and elegance to any style, from everyday wear to special occasions.
– What they are: Raised flowers sculpted with gel or acrylic that stand off the nail bed.
– How to make them:
– Start with a clean nail and a solid base.
– Apply a thin base coat and cure.
– Create petals with gel or acrylic, building one petal at a time.
– Let each layer cure to prevent smudging.
– Add a center dot or tiny beads for realism.
– Finish with a soft top coat and cure again.
– Color and style ideas:
– Classic, soft pinks and whites create a delicate look.
– Bold colors like coral, lavender, or emerald make the design pop.
– Finish options include gloss for shine or a matte top coat for modern contrast.
– Placement ideas:
– One bloom on an accent nail draws the eye.
– A small bouquet across all nails creates a coordinated floral scene.
– Occasions and care:
– They work well for weddings, spring parties, or everyday femininity.
– Protect the art by sealing edges and avoiding rough tasks for the first day after application.
@media (max-width: 600px) {
.visual-quiz-iframe { min-height: 995px !important; height: 1100px !important; }
}
Product Recommendations:
• Nail Gel Builder for Sculpting
• Nail Art Rhinestones and Beads Set
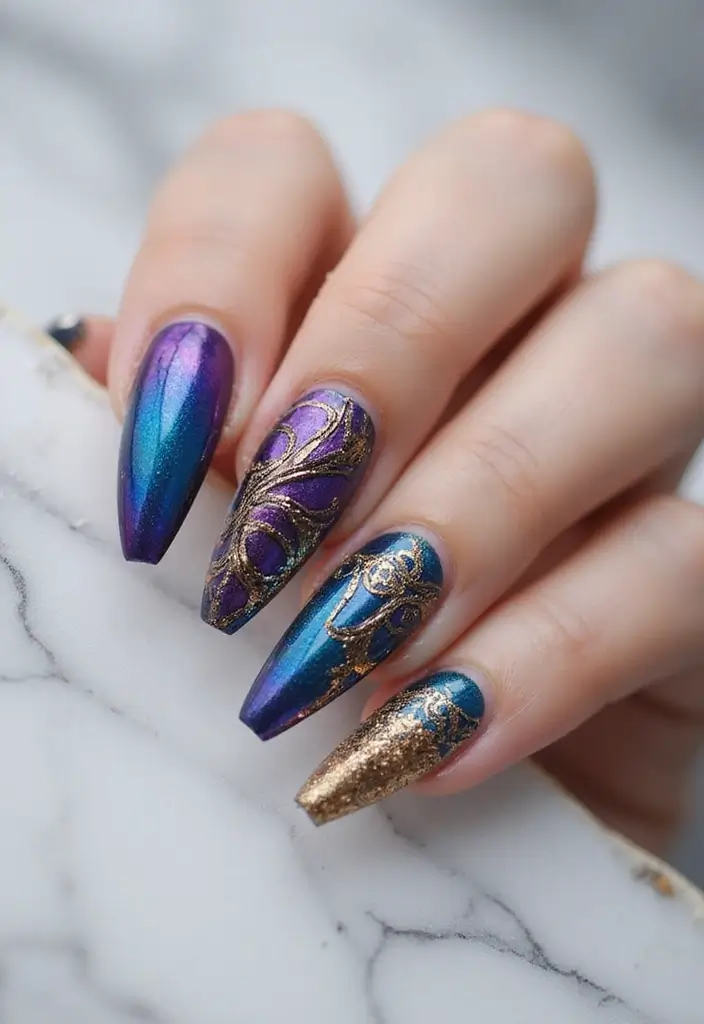
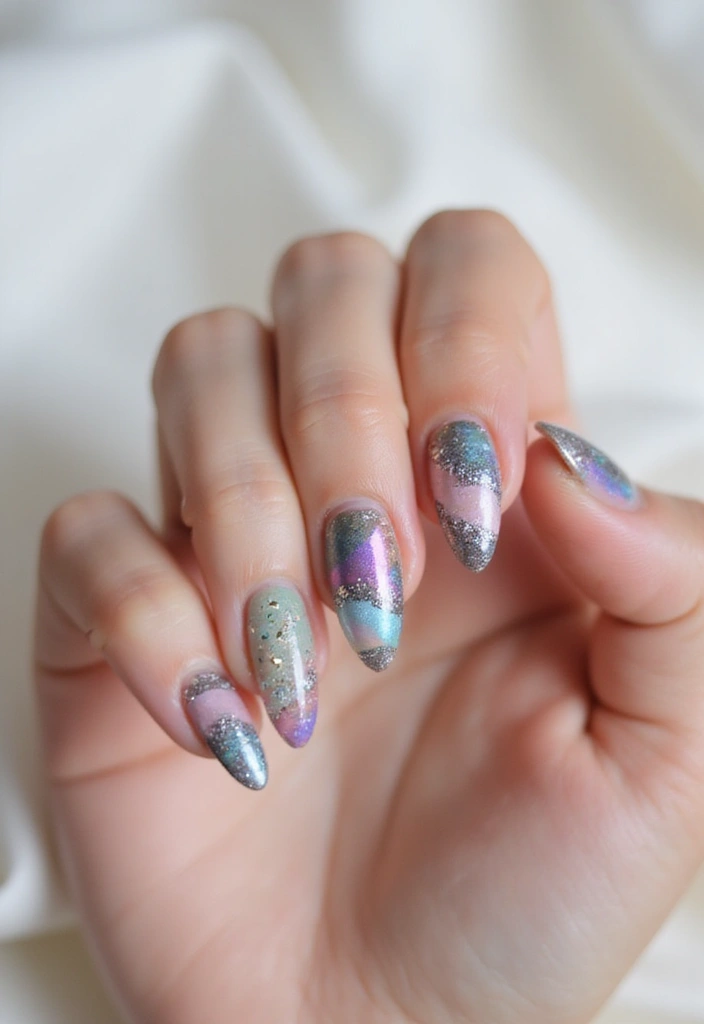
12. Marble Patterns
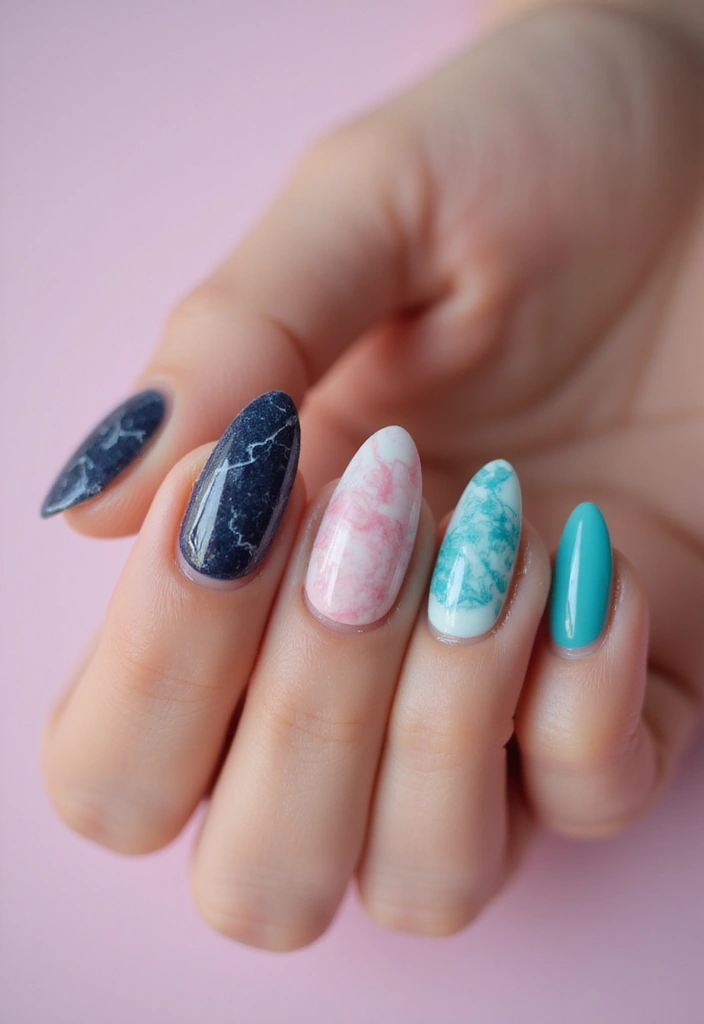
You want nails that look luxurious but aren’t a full DIY project. Marble patterns give you that balance. They mimic natural stone with soft lines and a rich feel.
– Techniques: Water marbling creates thin, branching veins. Drop a few shades into a cup of water, swirl lightly, then dip your nail. If you’d rather avoid mess, swipe two or three colors directly on the nail and blend with a fine brush for a veined look.
– Color Pairings: Soft whites and light greys give a classic marble. For a bold twist, try deep blues, greens, or rosy pinks mixed with a pale base. Keep one color light so the veins show.
– Enhancements: Add tiny gold or silver foil specks to lift the design. A shiny top coat makes the veins pop; a matte finish gives a chic, modern vibe.
– Versatility: Marble nails work for everyday wear, nights out, or formal events. They look calm and classy in a meeting, yet striking at a party.
A few practical tips: prep nails well, use a liner brush for veins, seal with a strong top coat, and clean edges with a small brush dipped in remover. Marble nails stay stylish and timeless.
Product Recommendations:
• Nail art brush set for detailed designs
• water marbling kit for easy patterns
• gel top coat for a glossy finish.
13. Watercolor Effects
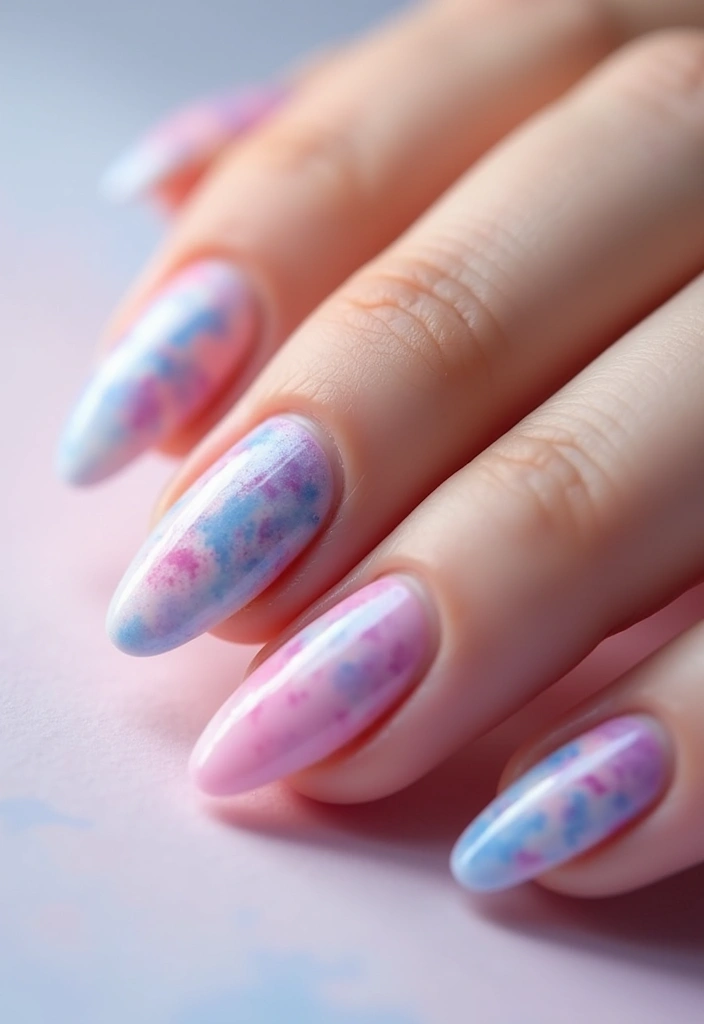
Want nails that look like a soft watercolor painting? Watercolor effects give a dreamy, blended look on your fingertips.
– Technique: You create it with thin brushes or small sponges and diluted polish.
– Blending: The key is gentle blending, not solid blocks of color.
– Color choices: Choose colors that match your mood, from soft pastels to bold hues.
– Pastels vs brights: Pastels give a delicate vibe, while vibrant shades feel playful and modern.
– Layering: Layer in light coats to add depth, or keep it airy.
– Drying: Let each layer dry before you add the next one.
– Edges: Keep the edges soft by dabbing rather than brushing in straight lines.
– Finish: Seal the look with a clear top coat for shine and protection.
– Finish options: A matte top coat can mute the colors for a subtler finish.
– Who it suits: This style works for art lovers and for anyone who wants a relaxed, stylish vibe.
– Tips: Clean tools often, blot edges to avoid streaks, and practice on a nail wheel.
– Results: Your nails become tiny canvases where colors flow together in a soft gradient.
– Practice: With a little practice, you can recreate watercolor nails at home and wow friends.
– Quick-start: If you want faster results, start with a pale base and one blended layer.
– Practice run: Practice on practice nails first.
Product Recommendations:
• Nail Art Brushes for Watercolor Techniques
• Clear Top Coat for Nail Protection
14. Geometric Patterns
You want nails that feel fresh and sharp without looking busy. Geometric patterns give you clean lines and bold shapes that stand out. They use straight lines, triangles, and squares to build modern nail art.
– Design ideas: Mix straight lines, triangles, and squares to build bold patterns on one nail or across several.
– Accent nails: Choose one nail to host a striking geometric motif while the others stay solid.
– Color schemes: Try contrasting colors for a sharp edge, or go monochrome for a calm, chic vibe.
– Tools and techniques: Use striping tape to mark clean lines, and choose a thin brush if you prefer freehand work.
– Application tips: Press the tape firmly to prevent paint seepage, paint in light coats, and peel away while the polish is still tacky for crisp edges.
– Finishing options: Seal your look with a top coat and decide between glossy for modern shine or matte for a graphic feel.
– Care and longevity: Finish by cleaning the edges with a small brush dipped in remover after peeling.
Geometric nails suit fans of modern art who want a practical, wearable design. With tape, shapes, and careful timing, you can achieve a clean, professional look at home. Practice a few times and save the exact pattern you love. Soon you’ll nail the look for any event.
Product Recommendations:
• fine detail nail art brush set
• geometric nail stamping plates.
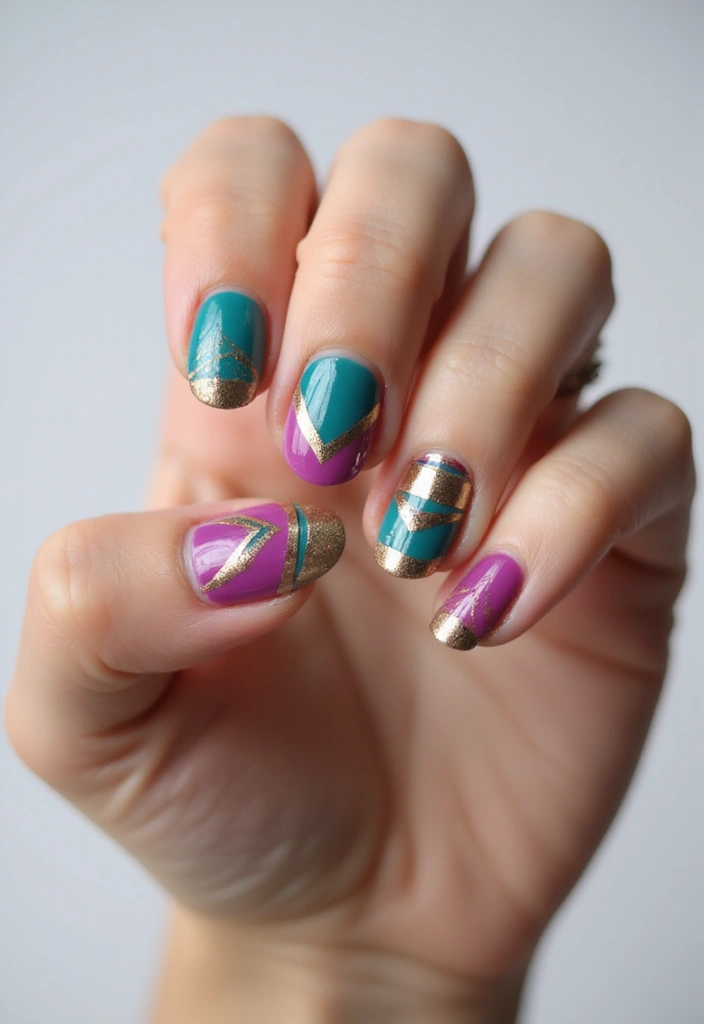
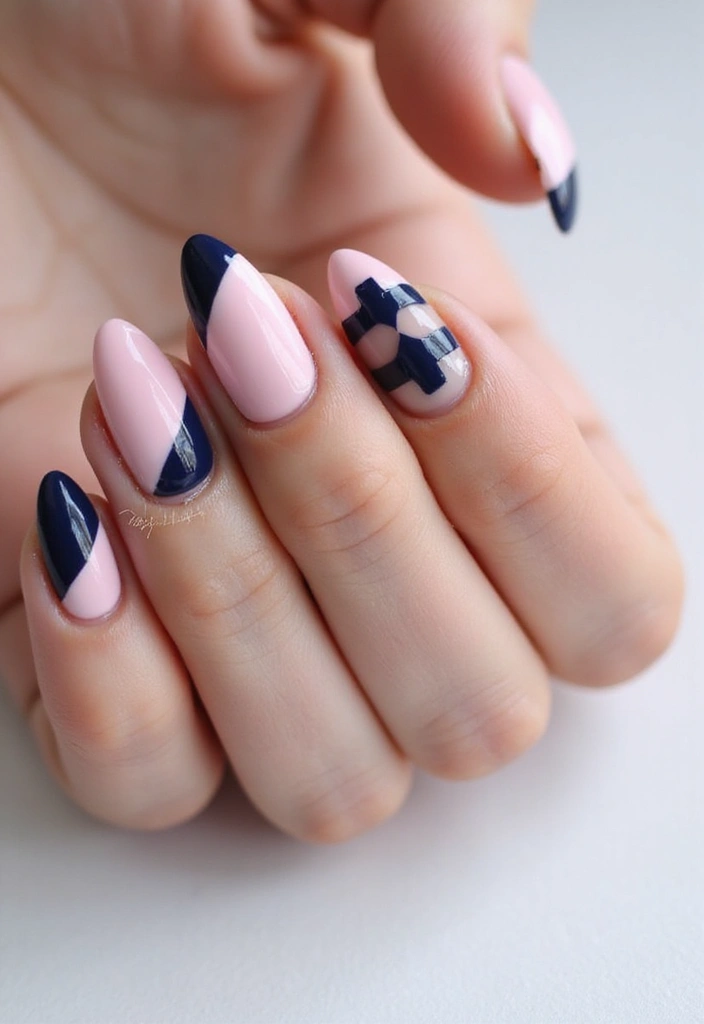
15. Color-Blocking
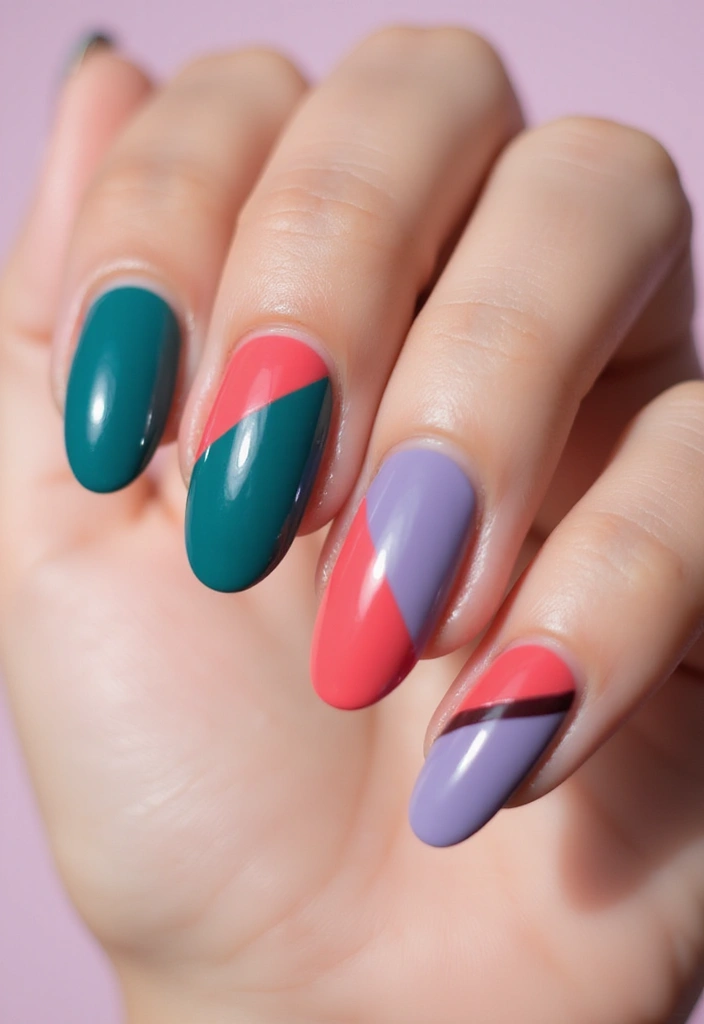
Are you after nails that pop but stay chic? Color-blocking nails offer bold blocks and clean lines you can wear any day. You get a striking look without a fussy vibe.
What color-blocking is
It places solid color blocks on parts of the nail. You can block different nails the same or mix across your hand. You mix two to four colors for a strong, graphic effect.
Choosing colors
Pick colors that pop or that feel calm together. For contrast, try bright pink with deep blue. For a softer mood, use pastels that blend.
Tools and supplies
– Nail polish
– Base coat
– Top coat
– Thin nail tape
– Scissors
– Small brush
Step-by-step guide
1) Prep your nails and push back cuticles.
2) Paint a base color and let it dry.
3) Tape off the shapes you want.
4) Paint the blocks.
5) Remove tape slowly.
6) Clean up edges.
7) Seal with a glossy top coat.
Tips for crisp lines
– Use fresh tape and press it down firmly.
– Work in good light.
– Let each layer dry before the next.
Design ideas
– Try one nail as a bold block accent.
– Or block several nails in a checker or stripe pattern.
– Alternate colors across fingers for a playful vibe.
Occasions
It fits daily wear and special events. It adds style without shouting. It also looks good in photos.
Give it a try this weekend and tweak as you go.
Product Recommendations:
16. Neon Details
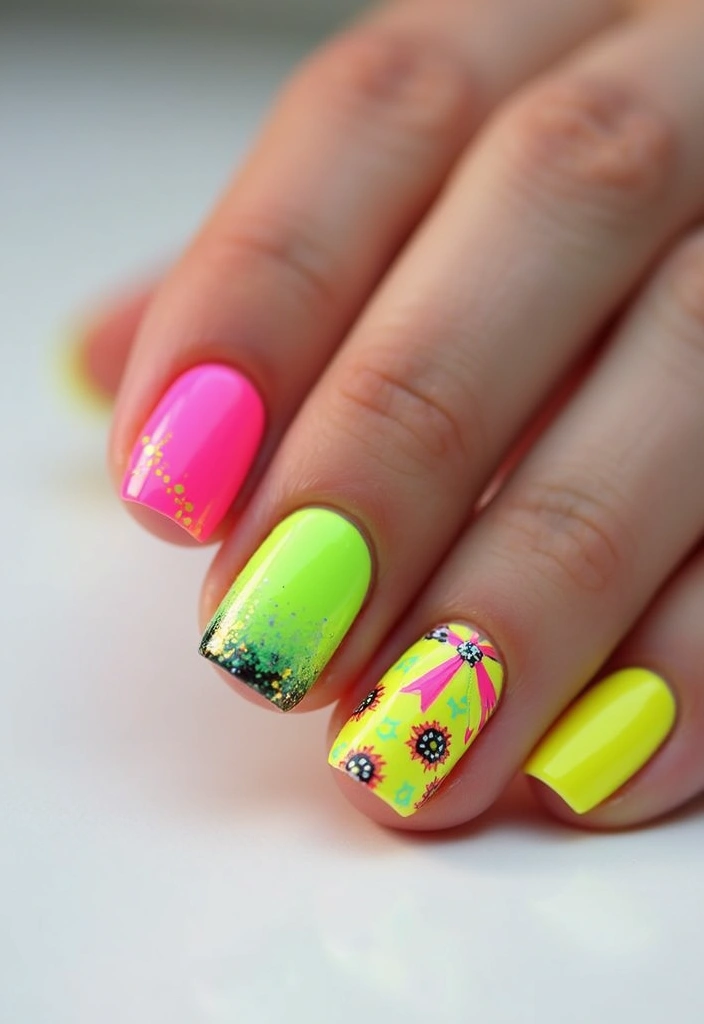
Neon nails grab attention with a bright pop. They feel playful and bold, yet easy to wear. If you want color that shows your mood, neon is a smart choice.
– Design ideas: Use neon hues as accents, on tips, or in sharp patterns. Try dots, stripes, or simple geometric shapes with two or three neon shades.
– Pairing suggestions: Neons pop on dark backgrounds—black, navy, or charcoal. On light nails, pair neon with white or pale nude to let the glow stand out.
– Application tips: For true brightness, start with a white base. Apply two coats of neon, then seal with a clear top coat. Gel nails should cure per your kit’s instructions.
– Materials and finishes: Neon polishes come in creme or jelly finishes. A glossy top coat helps the color stay vivid.
– Techniques: Create a neon gradient by sponging from the tip inward. Nail vinyls or tape give crisp neon lines.
– Occasions: Great for summer parties, music festivals, or days when you want a bold look in photos.
– Maintenance: Neon colors can wear at the tips, so reapply top coat every few days. Keep nails healthy with hand cream and cuticle oil.
Give neon a try this season and adjust as you learn what looks best.
@media (max-width: 600px) {
.normal-quiz-iframe { min-height: 570px !important; height: 570px !important; }
}
Product Recommendations:
• Nail Vinyls for Geometric Designs
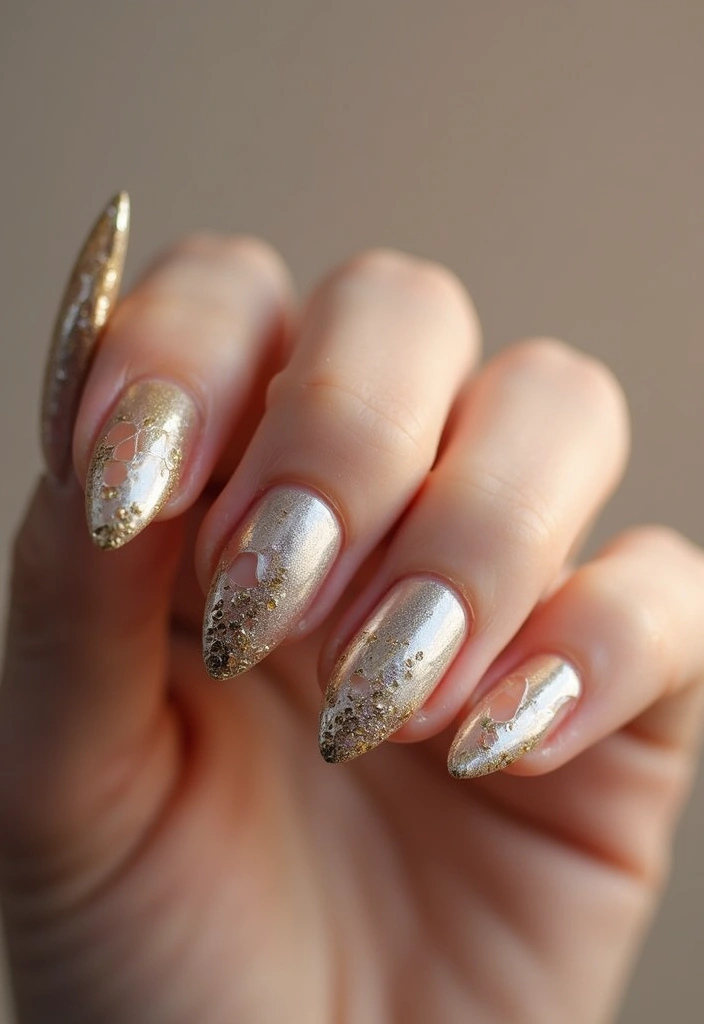
17. Textured Finishes

You want nails that stand out without a lot of effort. Textured finishes give depth you can see and feel. They add interest beyond flat polish and stay interesting longer.
Types of Textures
– Sand polish creates a grainy, beachy feel that you can almost hear as you move.
– Foil textures bring a bright, metallic shine that catches the light from every angle.
– Velvet or suede textures offer a soft, matte touch that adds a cozy look.
– Glassy fleck textures add tiny sparkles for a subtle pop without full glitter.
Layering for impact
– Pair textures with solid colors to let the finish stand out.
– Add a glossy top coat over a textured nail to seal it and give a smooth shine.
Maintenance
– Always seal textures with a strong top coat to protect the grain and prevent chipping.
– Reapply top coat every few days to keep the texture looking fresh.
– Use gentle hand care to avoid lifting or peeling the texture.
Occasions and tips
– Textured nails work for casual days and for nights out when you want a bold touch.
– If you’re unsure, start with one accent nail and keep the rest simple.
– Choose textures that fit your daily routine, so you don’t have to redo them often.
Textured finishes give your nails a tactile, engaging feel that stands out in photos and real life.
Product Recommendations:
18. Lace Patterns
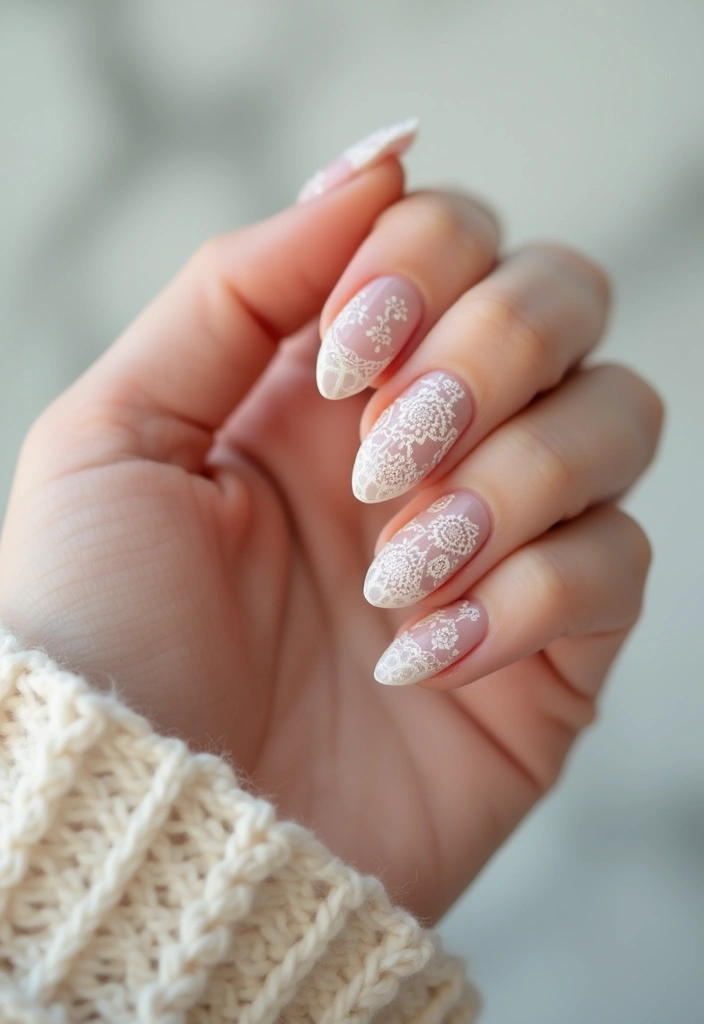
Want nails that feel romantic without looking fussy? Lace patterns give you a soft, elegant touch by echoing delicate fabric on your fingertips. Take your time to practice on a spare nail or wheel.
Ways to create lace nails
– Stamping lace gives neat, repeatable patterns you can reuse for future looks.
– Freehand lace with a fine brush creates a delicate, handcrafted look.
– If you’re new to stamping, practice on a nail wheel first to build confidence and avoid mistakes.
Color and layering tips
– Start with a light base color so the lace stands out clearly in photos.
– Use a dark lace color for sharp visibility against the base.
– For depth, layer lace over solid colors instead of on top so the pattern stays crisp.
Application basics
– Prep nails with a smooth base coat to help durability.
– Let the base color dry completely before applying lace.
– Seal the finished design with a top coat for protection and shine.
Occasions
– Lace nails suit weddings, anniversaries, and any event needing polish.
– They also work for everyday looks when you want a refined touch.
Care and practical notes
– Lace designs look best on medium or long nails; on short nails, choose smaller motifs.
– If the pattern seems crowded, trim the lace to fit.
– Reapply top coat every few days to keep shine and protection.
Lace nails bring a timeless, romantic vibe to your manicure.
@media (max-width: 768px) { .internal-links-flex { flex-direction: column !important; } .internal-links-flex > div { flex: none !important; } }
You Might Also Like
Product Recommendations:
19. Whimsical Designs

Whimsical designs let you show your playful side without shouting it out. You get tiny stories on your nails. They sing with color, shapes, and little scenes that fit your mood.
– Design ideas: Cartoon characters, animals, symbols, and abstract doodles can all live on your nails, letting you tell a tiny story.
– Color choices: Bright hues spark energy, while soft pastels create charm that still reads bold in photos.
– Techniques: Try hand painting, use a fine brush or dotter, and layer stickers or stamping for precise scenes.
– Planning tips: Choose one accent nail to feature a focal design, and keep the rest simple to avoid crowding.
– Occasions: They suit casual days, theme parties, weddings, or any time you want a cheeky pop of personality.
– Tools you’ll need: A basic kit helps: base coat, top coat, base color, fine brush, dotting tool, and stickers or stamper.
– Care tips: Finish with top coat, avoid harsh removers, and reapply shine every few days to keep colors bright.
– Realistic tips: Practice on a nail wheel, trim sticker edges, and save your best designs for your dominant hand.
With a little practice, whimsical nail designs become a quick, joyful way to express who you are on any day.
Product Recommendations:
20. Gradient Nail Art
Want nails that look smooth and stylish with little fuss? Gradient nail art blends two or three colors into a soft fade you can wear anywhere. It fits many moods, from quiet and classy to bright and playful. The trick is to apply layers so the transition feels seamless.
– What you need — Base coat, 2–3 polishes, a clean makeup sponge, a glossy topcoat, and a small cleanup brush.
– Simple technique — Start with base coat and let it dry. Put colors on the sponge in horizontal stripes. Dab the sponge on the nail to blend. Finish with topcoat for shine.
– Color ideas — For a subtle look, pick colors that sit next to each other on the color wheel or use same-family shades.
– Finish and wear — Seal with a glossy topcoat for shine and longevity. If you like depth, add a light shimmer on top.
– Occasions — Great for casual days and formal events. It pairs well with simple outfits or bold prints.
Practice on a nail wheel or a fake nail to tune the fade. Clean up edges with a small brush dipped in remover. With a little patience, you get a smooth gradient that lasts.
Product Recommendations:
21. Seasonal Themes
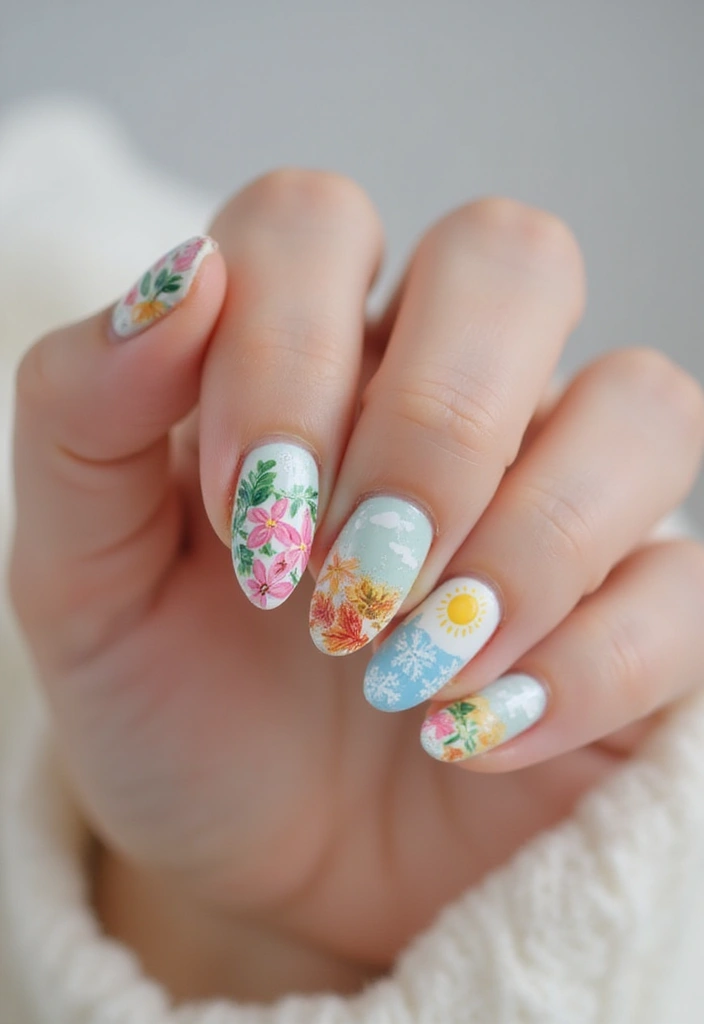
You want nails that match the season and feel alive. Seasonal themes bring nature and holidays straight to your fingertips. Your nails can change with the weather, keeping your look fresh. It’s a simple way to stay inspired all year. This keeps nails easy to wear yet full of character.
Design Ideas
– Seasonal colors and motifs set the mood. Spring brings soft greens and tiny blooms; summer shines with bright blues and sun motifs; fall glows in reds and oranges; winter glitters with icy blues and snowflakes. Keep palettes limited to two colors per season to stay chic.
– Add tiny touches like leaves for autumn or snowflakes for winter. A small accent nail can carry the whole theme without overdoing it. Use stamps, decals, or freehand lines to keep it fun and personal.
Application Techniques
– Prep nails well. Push back cuticles, file smooth, and apply a base coat. It makes color last longer.
– Try freehand painting for fine lines and tiny details. For clean repeats, stamping kits speed up your work and keep patterns even.
Layering Options
– Layer designs over solid colors to add depth. Try one thin motif over a pale base for a delicate look.
– Mix finishes like matte on top of gloss to create texture and contrast. A matte snowy look pairs well with shiny ornaments.
Occasions
– Seasonal nails fit holiday gatherings and family photos, but they also let you celebrate nature in your everyday life.
Give yourself room to try, mix, and adjust as the season changes.
Product Recommendations:
• Gel Nail Polish Set with Seasonal Colors
• Nail Art Brush Set for Detailing
22. Artistic Brush Strokes
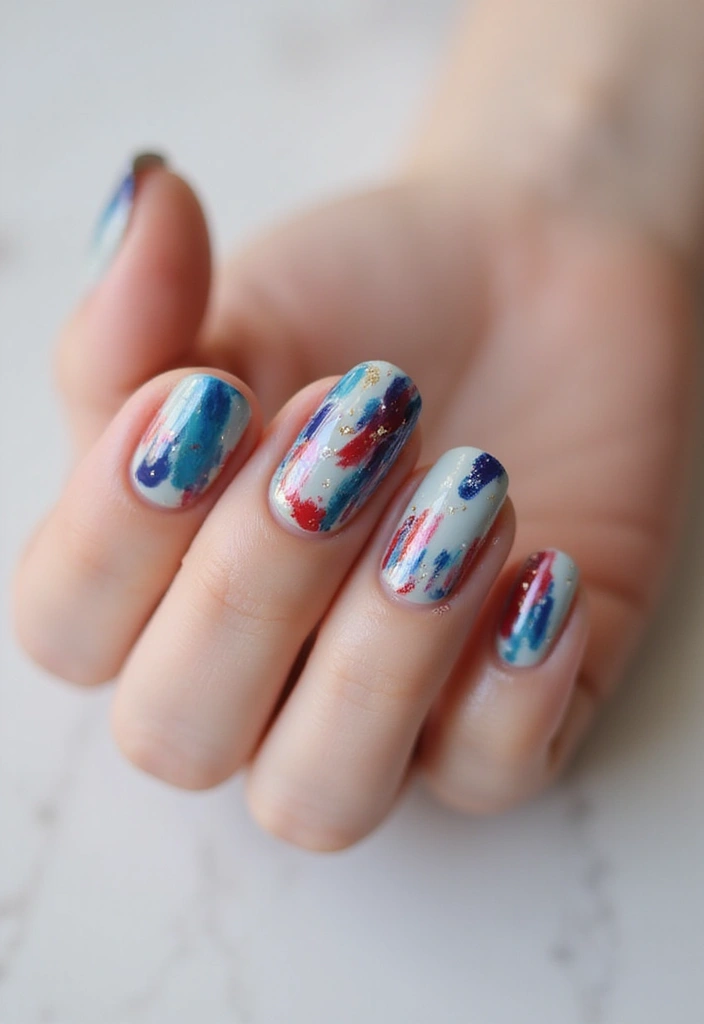
Artistic brush strokes let your nails tell a tiny story. You keep the lines imperfect on purpose, and that flaw looks bold and chic. It feels like a small painting on your fingertips. You can start with one accent nail to test the look.
What you’ll need
– A range of brushes: liner for crisp lines, flat for broad strokes, and a fine detailing brush for quick streaks.
– Nail polish or gel colors in at least two tones.
– A smooth topcoat to seal and add shine.
How to do it
– Start with clean nails and a light base color.
– Load a brush with color, then wipe off excess so you don’t flood the nail.
– Make deliberate strokes. Tilt the brush and vary pressure to keep edges soft or sharp.
– Add a second color to give depth with lighter or darker shades.
– Finish with a glossy topcoat to seal the design.
Design ideas
– Monochrome minimalism: one color, different brush marks.
– Bold duet: two colors that contrast for a striking look.
– Random vibe: mix thin and thick strokes for a freestyle mood.
Tips for staying sharp
– Work slowly, then keep moving so the lines stay clean.
– Clean brushes between colors to avoid muddied edges.
– Try a matte topcoat if you want a modern twist.
This approach brings a personal touch to your manicure and keeps your look fresh. Ready to try? Pick two shades and start.
Product Recommendations:
23. Negative Space Designs
If you want nails that feel chic and easy, negative space designs are a smart pick. They turn part of your nail into art and keep some of the nail bare. This makes the look lighter and quick to wear.
Try it with gel, regular polish, or dip powder, so you can pick your favorite method and still save drying time.
– Design Techniques — Create geometric shapes or clean lines that let the natural nail peek through the color.
– Color Combinations — Pair bold shades with the naked sections to make the gaps pop or use soft tones for a calm, everyday vibe.
– Maintenance Tips — Start with a strong base coat, keep nails hydrated, and push back cuticles so the spaces stay crisp.
– Occasions — It suits daily wear, office days, and casual nights out when you want a stylish but subtle look.
Negative space designs offer a fresh take on nail art and show elegance in simplicity. You can switch up the shapes, from a diagonal sliver to a radius curve, to match outfits or moods. Use a glossy top coat for shine or a matte finish for modern edge. With a little patience, you can master clean edges and long-lasting results. If you want a bolder look, widen the open spaces or choose sharper angles.
Product Recommendations:
24. Custom Decals
Want nails that show your style without long sessions? Custom decals let you wear your vibe on every finger. You can choose tiny text, bold symbols, or tiny pictures. The options are endless when you know how to pick and apply them.
Where to Find Custom Decals
– Online shops offer decals you can customize with your name, dates, or favorite quotes.
– You can design your own with nail art printers or decal sheets for at-home use.
– Brands also sell transfer decals that stick smoothly on bare or painted nails.
How to Apply Decals
1. Prep your nails: wash, dry, and lightly buff the surface. Apply a thin base coat and let it dry.
2. Position the decal: lift the sticker with tweezers, place it on the nail, and smooth from the center outward to remove bubbles.
3. Seal and set: press gently, apply a quick top coat, and let it dry. If your nail is curved, press the edges to fit.
4. Finish care: file along the edge if needed and avoid oils for a few hours after application.
Design Ideas
– Tiny quotes that matter to you.
– Initials, symbols, or mini icons that match your vibe.
– Seasonal motifs for holidays or events.
– Small photo-style decals of a favorite image.
Longevity and Care
– A solid top coat helps decals last longer; dry time matters.
– Avoid oils right after application to protect the design.
– If a decal starts to lift, guard it with another thin layer of top coat.
Product Recommendations:
• Gel Top Coat for Nail Protection
25. Layered Nail Art
Want nails that catch the eye? Layered nail art adds depth and motion to your hands. Layering lets you blend colors, textures, and tiny decorations so every nail tells a small story. You can go bold or subtle by choosing how many layers you stack.
– Application strategies: Start with a clean base. Paint a solid base color and let it dry. Add a second layer with another technique, like glitter over color blocking. Finish with a glossy topcoat for protection.
– Design ideas: Mix textures such as matte, gloss, and shimmer. Try color blocks with a thin line of foil or small studs. Use negative space or delicate decals to keep the look fresh. Let each layer peek through the one beneath.
– Occasions: This style fits someone who wants a bold, personal look. It works for daily wear, parties, or photo moments. You can dial it up or down by choosing more or fewer layers.
– Maintenance tips: Use thin layers to avoid chipping. Always seal with a topcoat. Reapply every few days to guard against wear. Keep nails healthy with cuticle oil and hydration.
Layered nail art invites you to explore color, texture, and sparkle in a simple, practical way.
Product Recommendations:
Conclusion
Nail art is an ever-evolving canvas for creativity, and these 25 trendy nail details prove that the possibilities are endless. Whether you’re into elegant accents or bold designs, there’s something for everyone to explore. As you experiment with these trends, remember to have fun and let your nails express your personality!
There’s no wrong way to embrace nail art, so why not try a few styles and find your favorite?
Note: We aim to provide accurate product links, but some may occasionally expire or become unavailable. If this happens, please search directly on Amazon for the product or a suitable alternative.
This post contains Amazon affiliate links, meaning I may earn a small commission if you purchase through my links, at no extra cost to you.
Frequently Asked Questions
What Are Trendy Nail Details, and Why Are They Important?
Trendy nail details are the latest designs and embellishments that can elevate your manicure game. They include small gems, rhinestones, studs, and more! Staying updated on these details is vital for expressing your personal style and keeping your look fresh and modern.
In the world of nail art, these details add a unique touch that can transform a simple polish into a stunning statement.
How Can I Choose the Right Nail Details for My Style?
Choosing the right nail details largely depends on your personal style and the occasion. If you prefer something subtle and chic, opt for gemstone accents or pearl embellishments. For a bold statement, consider studded designs or geometric patterns.
Don’t be afraid to mix and match different elements to create a look that’s uniquely you!
Are Trendy Nail Details Easy to Apply at Home?
Absolutely! Many trendy nail details can be applied at home with a bit of practice. Simple accents like rhinestone lines or glitter placement require minimal tools and can be done quickly.
However, more intricate designs like sculptural nail art or watercolor effects may take some time to master. Don’t hesitate to start with easier designs and gradually work your way up!
How Long Do Trendy Nail Details Typically Last?
The longevity of trendy nail details can vary based on the type of design and how well you care for your nails. Typically, well-applied details can last anywhere from one week to several weeks.
To ensure your nail decor lasts, make sure to use a good topcoat, avoid harsh chemicals, and keep your nails moisturized. Regular touch-ups can also help maintain the look.
Where Can I Find Inspiration for My Next Nail Art Design?
Inspiration for trendy nail details can come from various sources! Social media platforms like Instagram and Pinterest are goldmines for the latest nail trends. You can also check out nail art blogs, beauty influencers, or even local nail salons for fresh ideas.
Remember, your creativity is your best asset—don’t hesitate to experiment with colors and styles that resonate with you!
Related Topics
trendy nail details
nail art trends
gemstone accents
rhinestone designs
easy nail decor
sculptural nails
advanced nail art
textured finishes
seasonal nail themes
quick nail tips
minimalist nail art
3D nail designs