
Nail art has exploded in popularity, and why wouldn’t it? It’s a fun, fabulous way to express your unique personality without saying a word.
With just a bit of creativity and the right tools, you can transform your nails into stunning works of art right in the comfort of your home.
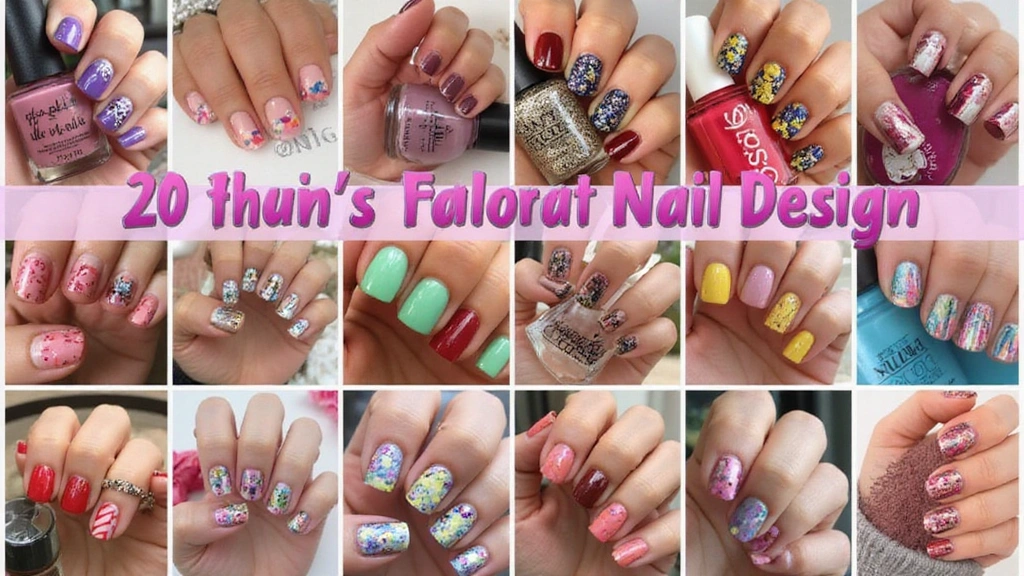
Whether you’re gearing up for a special occasion or just looking to treat yourself, these 20 nail designs are here to inspire you. Each design is trendy and totally doable, proving that salon-worthy nails can be achieved with a little skill and determination.
Let’s dive into these amazing DIY nail art ideas that will leave your friends envious. You won’t want to miss out on the jaw-dropping design at #11!
1. Rainbow Marble Madness

Mixing marble effect with a splash of rainbow colors has never looked better! To achieve this dreamy design, start with a white base coat to let those colors pop. Use a dotting tool, like the Dotting Tools Set for Nail Art, or a thin brush from an Nail Art Brush Set to swirl in greens, blues, pinks, and yellows that resemble a rainbow. The key is to not overmix; blending just enough to create stunning marble effects is what gives the design its magic.
Once you’ve created your masterpiece, seal it with a top coat, such as the Top Coat Nail Polish, to ensure the design lasts. This playful style is perfect for summer days or when you want to brighten up a dreary week.
– Use a light hand when swirling the colors.
– Experiment with different color combinations for various effects.
Overall, this design is an absolute showstopper that can be easily customized to match your mood.
2. Geometric Glam

Geometric patterns are all the rage, and for a good reason! They bring an edgy vibe to your nails while being super chic and versatile.
To create this look, start with a solid base color like deep navy or black. Using a striping brush, such as the striping brush set, you can easily add triangles, squares, or lines in contrasting colors like gold or white. This brush is perfect for achieving those fine designs and long lines that are essential for geometric styles. Alternatively, if you prefer a more precise approach, try using painter’s tape to block off sections for clean, crisp edges.
This design can be as intricate or as simple as you want; the options are endless! For a modern twist, add a matte top coat after your colors have dried, or stick with a shiny finish for a classic look. It’s a stylish design that works for any setting, from casual hangouts to fancy dinners.
Insights:
– Use painter’s tape for precise lines.
– Don’t be afraid to mix textures, like matte and glossy.
This geometric design is definitely a favorite for those who love a contemporary touch.
3. Floral Fantasy

Channel your inner artist with this beautiful floral design that screams spring!
Begin with a pastel base color (think soft pink, lilac, or mint) and let it dry completely. To create those lovely flower shapes, grab a fine detail nail art brush set; it makes painting small, precise flowers in contrasting colors like white or yellow a breeze. If you have a dotting tool, you can use it to create lovely centers for your flowers, and you can find a great set of these tools in the dotting tools for nail art.
This design can be as simple or as intricate as you want, with options to choose a single flower or create a whole bouquet effect across your nails. Once you’re satisfied with your floral creations, finish it off with a glossy shine using glossy top coat nail polish; it’ll give your design a beautiful finish that’s perfect for weddings or any romantic occasion!
**Suggestions:**
– Practice your flower shapes on paper before painting them on your nails.
– Mix different flower types for more variety.
This floral fantasy captures the essence of nature and creativity.
4. Glitter Ombre

Who doesn’t love some sparkle? The glitter ombre look adds a touch of glam to your fingertips while remaining classy.
To create this look, start with a nude or colored base coat. Once it’s dry, gently apply a layer of glitter polish, focusing more on the tips and lightly fading it downwards to create an ombre effect. Using a makeup sponge for nail art can help with blending the glitter smoothly, ensuring a seamless transition.
This design is perfect for parties or just when you want to feel extra fabulous. For the glitter application, consider using a nail glitter set that includes a variety of tools and glitters, making it easy to customize your look to match your outfits!
To finish off your design and give it that professional touch, apply a clear top coat like Sally Hansen Double Duty™. This product offers quick-dry, long-lasting protection and a streak-free shine, ensuring your stunning nails last for days.
The best part is how customizable this design is, making it a must-try for any occasion!
5. Boho Chic

Celebrate your free spirit with a boho chic design inspired by nature’s beautiful colors. Start with a base coat in earthy tones like terracotta, olive green, or deep taupe. To help achieve precise patterns resembling feathers or leaves, you’ll want to use a nail art brush set. The thin brushes in this set are perfect for the detailed work required to create stunning designs in various colors like gold, white, and turquoise.
This design radiates a unique style that stands out. To elevate the look further, consider adding tiny gems or beads. A nail gems and beads kit makes it easy to incorporate these accents. The gems and rhinestones can add that artistic flair, showcasing your personality beautifully.
To finish off your bohemian style, use a top coat that combines matte and glossy finishes. The matte and glossy top coat not only protects your design but also enhances the depth, giving your nails a professional look. This laid-back charm can be worn every day, making it a must-try for any nail art enthusiast.
6. Classic French with a Twist

The classic French manicure gets a playful upgrade with various colors and patterns! Instead of the traditional white tips, why not try vibrant colors like pastel pink, deep blue, or even metallic shades? To introduce a unique twist, consider adding stripe designs, polka dots, or tiny little hearts on the tips.
This design retains the elegance of a French manicure while adding a fun vibe that’s perfect for any occasion. It’s super adaptable, allowing you to switch up colors based on your outfit or mood. For creating those clean lines, the nail striping tape is an essential tool, making it easy to achieve precise designs.
If you’re leaning towards soft pastel colors, the pastel nail polish set is perfect for giving your nails that trendy look. Plus, with the nail art dotting tools, you can effortlessly create fun accents like dots and hearts to make your manicure truly stand out.
This style is perfect for those who want to keep things classic but also want to express their individuality!
7. Neon Vibes

Amp up the fun with neon nails that are sure to grab attention! Start with a white base coat to make those bright colors pop. For a vibrant look, consider using the neon nail polish set, featuring shades like hot pink, electric blue, and vibrant green. Paint each nail a different color for a cheerful rainbow effect, or get creative with patterns like stripes or polka dots using a contrasting neon shade.
This design is ideal for summer parties or music festivals and is all about having fun! To give your nails a modern twist, finish off with the matte top coat. It provides a chic matte finish that enhances the overall look while ensuring durability.
For an extra touch of creativity, consider accessorizing with nail art stickers. These can add delightful designs like flowers or hearts to your neon masterpiece, giving you that unique flair.
With neon vibes on your fingertips, you’ll be ready to shine bright wherever you go!
8. Minimalist Lines

For those who love the less-is-more approach, minimalist nail art is chic and sophisticated.
Start with a nude or soft pink base coat, such as the nude and soft pink nail polish set. This set offers versatile shades that provide a perfect canvas for your design. Using a fine brush from the fine detail nail art brush set, add simple straight lines, dots, or tiny triangles in contrasting colors like black or white. These subtle designs exude elegance and can easily be paired with any outfit.
For a more modern look, finish off your design with the matte top coat nail polish. This product enhances the minimalist style while ensuring your nails stay polished yet understated.
Minimalist nails are perfect for work environments or occasions where you want to keep your look sophisticated. Consider keeping the design limited to one or two nails for added impact. This style shows that simplicity can indeed be powerful.
9. Animal Prints

Bring out your wild side with stylish animal prints!
Start with a neutral base coat, then use a fine brush, like the Nail Art Brush Set, to create patterns inspired by your favorite animals—think leopard spots, zebra stripes, or snake scales. This set includes various brushes that make it easy to draw intricate designs.
For a unique twist, play with colors; classic browns can be jazzed up with metallic shades or pastels. A great option for this is the Nail Polish Set with Metallic and Pastel Colors, which offers a lovely range of soft hues for your next manicure.
To blend colors effectively, consider using a sponge, such as the Sponge Nail Art Tool. This tool helps achieve smooth gradients and ombre effects that can enhance your animal print designs.
Animal prints can be bold or subtle, depending on your style, and they work wonderfully for day or night. Mixing prints can also create an eclectic look that’s sure to be a conversation starter and a way to express your adventurous spirit.
10. Sweet Pastels

Soft pastel colors are perfect for a gentle, feminine touch. You can choose any pastel color you like—mint green, soft lavender, or pale yellow—and paint your nails with a smooth, even coat. For this, a great option is the pastel nail polish set, which includes 15 beautiful shades to help you achieve that perfect look.
For added interest, consider nail art like small flowers or abstract patterns in white or gold. Using a nail art brush set can make detailed designs easier, allowing you to create stunning and intricate patterns with precision.
This design is refreshing and can be incredibly versatile, perfect for any occasion. To enhance the longevity and shine of your nails, finish with a coat of top coat nail polish. It not only adds a beautiful glossy finish but also protects your nail art from chipping.
Pastels create a calming vibe that can brighten any day, making this DIY project both enjoyable and rewarding!
11. Metallic Marvels (You Won’t Believe This!)

Metallic nails are bold and eye-catching! Imagine dazzling metallic shades that catch the light beautifully. To achieve this stunning look, start with a base coat that matches your desired metallic color—think silver, gold, or rose gold. For a sleek finish, simply apply two coats of metallic polish.
To elevate your design, consider adding intricate patterns using nail art striping tape. This easy-to-use tape allows you to create clean lines and various designs, adding a personal touch to your metallic masterpiece. For an even more luxurious flair, you might want to incorporate some foil accents. The nail foil transfer kit provides everything you need to apply beautiful foil designs, enhancing the glam factor of your nails.
If you’re feeling adventurous, mixing different metallic shades can create a stunning gradient effect. Plus, pairing your design with some crystals or studs can take your glam up another notch. For the ultimate DIY experience, consider a metallic nail polish set to have a variety of colors at your fingertips.
Metallic nails are a surefire way to add a trendy twist to your style, making them a must for your next DIY nail art session.
12. Tie-Dye Delight

Channel your inner bohemian with a fun tie-dye design that’s playful and colorful!
Start with a white or pastel base coat. For the perfect pastel shades, consider using the nail polish set (pastel colors), which provides a delightful range of hues. Then, using a small brush from the nail art brush set, dab small amounts of different colors in circular motions to create a tie-dye effect. The key is to layer colors without overmixing to maintain that trendy tie-dye look.
To achieve smoother blending, you can use a sponge nail art tool, which makes the application process easier and more efficient. Don’t rush; allow each layer to dry before adding more colors to ensure your design pops.
Tie-dye nails are not only fun but also a creative way to express yourself and embody a carefree spirit, especially perfect for summer!
13. Under the Sea

Dive into a nautical theme with designs inspired by the ocean! Start with a blue base coat, like the Blue Nail Polish, to represent the sea. This quick-drying polish not only provides an opaque and shiny finish but also lays the perfect foundation for your under the sea design.
Incorporate elements like seashells, starfish, or waves using bright colors like coral or white. For precise shapes, consider using Nail Art Stickers. These colorful, self-adhesive decals make it easy to add those intricate details without the hassle of freehand painting.
For an extra touch, you can add some sparkle with the Glitter Nail Top Coat. This iridescent glitter gel not only gives your nails a glossy, sparkly finish but also mimics the shimmering surface of the ocean.
This design is great for summer vacations or anytime you want to feel the summer vibes. Don’t hesitate to mix different ocean elements for a vibrant look, and remember, under the sea nails can transport you to the beach with just a glance!
14. Abstract Art

### 14. Abstract Art
Unleash your creativity with abstract nail art that showcases your artistic side! Start with a neutral base coat and then apply splashes of color using a dotting tool or a fine brush to create your unique abstract design. The beauty of abstract art is that there are no rules; you can layer colors, create shapes, and play with textures.
For precise application, consider using the dotting tool set. This set comes with various sizes that allow you to create intricate designs and splashes of color effortlessly.
If you want to add more detail, the nail art brush set is perfect for drawing and precision work. With different brush types, you can easily experiment with lines and shapes to enhance your abstract masterpiece.
Once you’ve finished your design, let each color dry before applying additional layers to avoid smudging. To give your artwork a polished look, finish with the glossy top coat. This no-wipe formula adds extra shine and helps your beautiful design stand out even more.
Abstract nail art is like wearing a piece of art on your fingertips! Enjoy the freedom of expression and let your creativity shine.
15. Watercolor Wonders

Capture the beauty of watercolor paintings right on your nails! Start with a base coat of white for a clean canvas. Then, using a small brush from the nail art brush set, apply different hues in streaks to create a soft watercolor effect. These brushes are perfect for blending colors lightly, providing a light and airy feel that resembles a watercolor masterpiece.
This design is ideal for spring or summer, bringing a delicate touch to your look. For the colors, consider using the watercolor nail polish set, which offers a variety of shades to suit different moods. The marbling effect this polish provides will enhance your watercolor design beautifully.
Finally, finish off your masterpiece with the top coat nail polish to enhance the vibrancy and ensure long-lasting shine.
Watercolor nails are not just pretty; they’re a statement of creativity and finesse.
16. Vintage Lace

Recreate the elegance of vintage lace with intricate designs that evoke charm and sophistication. Begin with a soft pink or nude base coat. Using a fine brush from the Detail Nail Art Brush Set, create lace patterns around the edges of your nails or over the whole nail for a delicate effect. White and pastel shades work beautifully for this design.
This nail art is perfect for romantic occasions or whenever you want to feel elegant. The thin brushes in the set are ideal for detailed work, allowing you to really capture that lace feel with precision.
To finish your look, top it off with the Matte and Glossy Top Coat. Whether you prefer a matte finish for a subtle elegance or a glossy finish for added shine, this top coat ensures your vintage lace nails stay looking fresh and beautiful.
Vintage lace nails are timeless and fantastic for any occasion!
17. Color Blocking

Get bold with a color-blocking nail design that combines unexpected colors for a stunning effect! Start with a base coat in one bold color to lay the groundwork. To achieve that perfect look, you can use striping tape for nail art to create sections for painting different colors like bright yellow, pink, or turquoise. The contrast and clean lines make this design a real head-turner.
It’s an excellent choice for the adventurous and fashion-forward! Just remember to ensure each color is dry before applying the tape to prevent any smudging. For a vibrant finish, consider using the nail polish set (bright colors) which offers a variety of eye-catching shades. To complete your look, finish off with either a matte or glossy top coat. The matte and glossy top coat from Beetles can help you achieve a stunning finish that matches your style.
Color blocking allows you to play with colors and unleash your creative side, making it easier than ever to show off your unique flair!
18. Splatter Paint

Get artsy with a fun splatter paint design that brings a playful vibe to your nails! Start with a white or pale base coat for a clean canvas. Using a small brush from an nail art brush set, you can easily flick different colors onto your nails to create a splatter effect. The randomness of this design makes it super fun and unique!
To make the process even easier and to protect your workspace, lay down a plastic drop cloth. This will allow for quick cleanup so you can focus on your creativity without worrying about any mess. For the splatter itself, consider using an acrylic paint set, which offers a vibrant range of colors ideal for this playful style.
Splatter paint nails are perfect for casual outings or whenever you just want to have some fun. Try using contrasting colors for a more vibrant look and let your inner artist shine!
19. Seasonal Themes

Celebrate the seasons with nail designs that reflect the beauty of nature. For spring, consider floral designs that can be effortlessly created using the Nail Art Brush Set. This versatile set includes various brushes and dotting tools, perfect for crafting intricate flowers and patterns.
As summer rolls in, embrace bright colors and beach themes with the Seasonal Nail Polish Set. With six vibrant macaron pastel colors, this polish kit will help you achieve a fun, sun-soaked manicure that’s ideal for summer outings.
When autumn arrives, switch to warm tones and leaf designs, which can easily be enhanced with the Nail Stamping Kit. This kit provides a range of stamping templates and colors to create beautiful fall-inspired nail art in no time.
For winter, icy blues and snowflakes can create a chilly yet enchanting look, and the tools in these recommended products will ensure you’re equipped for every seasonal transition. This approach allows you to switch up your nails with each season, keeping your style fresh and relevant.
Suggestions:
– Change designs based on holidays or events.
– Use seasonal colors to enhance the theme.
Seasonal themes create a delightful connection to nature and the world around us.
20. Custom Nail Art Stickers

Why not create your custom nail stickers for a truly personal touch? You can design your stickers with fun quotes, patterns, or images that mean a lot to you. To get started, consider using printable adhesive sticker paper, which comes in 30 sheets of high-quality matte finish. This paper is perfect for laser or inkjet printing, ensuring your designs come out vibrant and clear.
Once your stickers are ready, you can easily apply them to your nails. To ensure they last, seal them with a nail art top coat. This quick-dry, non-toxic top coat provides a high-shine, long-lasting gloss that helps protect your designs from chipping.
For those who want to add more intricate designs or details, a nail art design tools set that includes dotting pens and painting brushes can be incredibly helpful. These tools will allow you to experiment with different shapes and patterns, making your custom nail art even more unique.
Custom nail art stickers allow for endless creativity, making your nails truly one-of-a-kind!
Conclusion

There you have it! Twenty stunning nail designs that you can easily try at home, each with its own unique flair.
Whether you’re in the mood for something classy, fun, or vibrant, these designs cater to every style and occasion.
Gather your nail supplies and let your creativity flow. Don’t forget to share your nail art adventures with friends and inspire others to try their hand at these trendy DIY designs!
Note: We aim to provide accurate product links, but some may occasionally expire or become unavailable. If this happens, please search directly on Amazon for the product or a suitable alternative.
This post contains Amazon affiliate links, meaning I may earn a small commission if you purchase through my links, at no extra cost to you.