

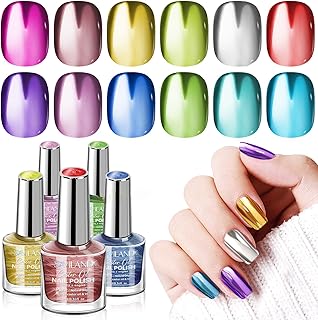
Gold and silver nails are quickly becoming the go-to for anyone looking to elevate their manicure game. Whether you’re heading to a wedding, a casual brunch, or a night out with friends, these chic colors add a touch of elegance and sparkle to any outfit. I created this post because I know we all want nails that not only look fabulous but also fit every occasion.
If you’re someone who loves nail art or is just starting to explore the world of nail colors, you’re in for a treat. This guide is tailored for you! I’ve put together 15 stunning nail color ideas featuring gold and silver that are not just trendy but also incredibly easy to pull off. You’ll find designs that are playful, sophisticated, and everything in between. Get ready to find the perfect look that suits your personality and style!
In this collection, you’ll discover how you can mix and match these metallic hues to create breathtaking designs. From subtle accents to bold statements, there’s something here for everyone. Each idea is crafted to inspire you and help you create beautiful nails that will catch everyone’s eye. So, let’s dive into these chic nail color ideas that will surely make your hands shine!
Key Takeaways
– Versatile Styles: The featured designs work for various occasions, from casual outings to formal events, ensuring you’re always stylish.
– Easy Techniques: Each nail idea includes techniques that are simple to replicate at home or can be taken to a nail salon for professional results.
– Mix and Match: The combination of gold and silver allows for creative layering and blending, giving you endless possibilities for customization.
– Seasonal Trends: These nail color ideas are not only fashionable now but also remain timeless, making them perfect for year-round wear.
– Express Yourself: Using these gold and silver designs lets you showcase your personality through your nails, making every manicure a unique expression of you.
Contents
- 1. Glittering Gold Ombre
- 2. Silver Foil Accents
- 3. Metallic Stripes
- 4. Shimmering Silver Glitter Tips
- 5. Gold Leaf Art
- 6. Geometric Patterns
- 7. Sparkling Silver and Gold Gradient
- 8. Dotted Gold and Silver Design
- 9. Half-Moon Gold and Silver
- 10. Marble Effect with Gold and Silver
- 11. Elegant French Mani with a Twist
- 12. Bold and Beautiful Mixed Metals
- 13. Delicate Floral Patterns with Gold Accents
- 14. Fun and Flirty Checkerboard
- 15. Artistic Splatter Nails
1. Glittering Gold Ombre
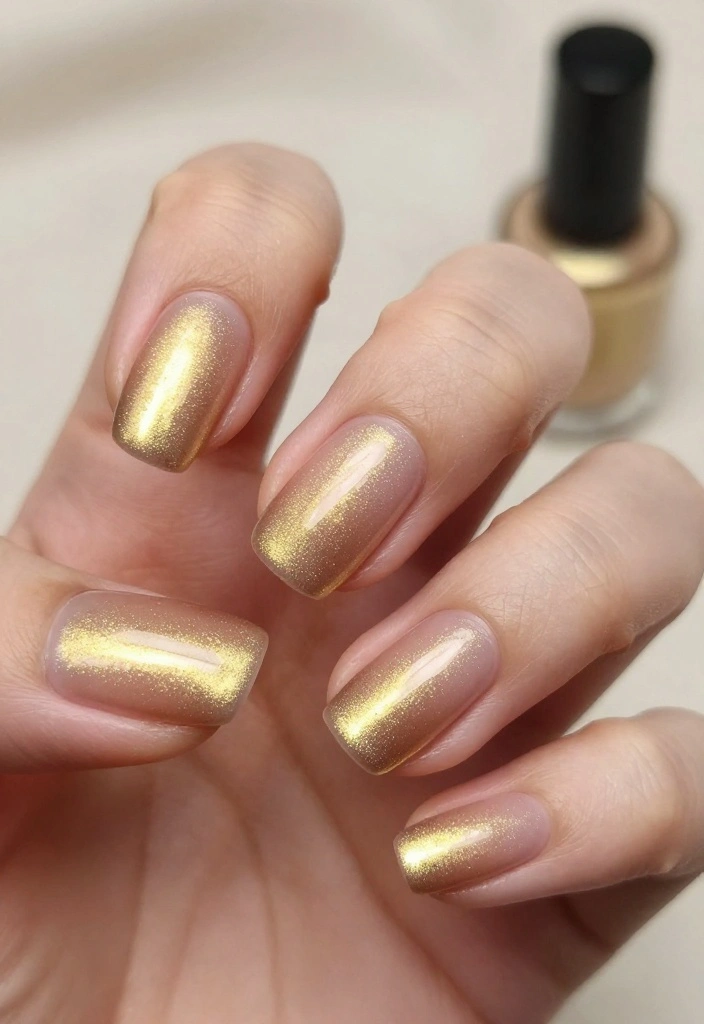
Begin your nail art adventure with a captivating gold ombre that transitions smoothly from a subtle nude to a radiant gold tip. This style strikes a perfect balance between elegance and playfulness, making it suitable for various occasions. Whether you’re heading to brunch or a night out, this look effortlessly adapts to any setting.
To create this stunning effect, first protect your nails with a base coat. Apply a nude polish as the foundation. After it dries, use a makeup sponge to dab on gold polish, blending it from the tips inward to achieve a seamless ombre. Finish with a glossy top coat for that polished look.
– Ensure each layer dries completely to prevent smudges.
– Try different shades of gold to customize your look.
– Add tiny gold glitter accents for a touch of extra sparkle.
Ingredients List:
– Base coat
– Nude polish
– Gold polish
– Top coat
Steps:
1. Apply base coat and let dry.
2. Paint nails with nude polish (1-2 coats).
3. Use a makeup sponge to apply gold polish to the tips.
4. Blend the gold towards the base for a smooth transition.
5. Seal with a top coat for added shine.
FAQs:
– How long does this design last?
– It typically lasts 5-7 days with proper care.
Fun fact: glittering gold ombre is one of the top nail color ideas to elevate any outfit in minutes. Create it in under 20 minutes with a simple sponge dab technique, starting with a nude base and layering toward a radiant gold tip.
2. Silver Foil Accents

Transform a simple manicure into a statement piece with striking silver foil accents. This design features metallic silver foil layered over a solid color base, creating an artsy and unique vibe. Perfect for everything from casual outings to formal gatherings, this look shines in any environment.
Start with a base coat, then apply your favorite solid color, like deep blue or rich burgundy. Once dry, tear small pieces of silver foil and gently press them onto your nails using a top coat for adhesion. Seal the entire design with another layer of top coat to ensure it lasts.
– Consider a matte base for a dramatic contrast.
– Mix in gold foil for a chic mixed-metal effect.
– Be gentle when applying the foil to prevent tearing.
Ingredients List:
– Base coat
– Solid colored polish
– Silver foil
– Top coat
Steps:
1. Apply base coat and let dry.
2. Paint your nails with your chosen solid color and allow to dry.
3. Cut or tear silver foil into small pieces.
4. Apply top coat to one nail at a time and press on pieces of foil.
5. Seal with another top coat.
FAQs:
– How do I remove the foil?
– Use regular nail polish remover; it comes off easily.
Silver Foil Accents
Editor’s Choice


How To Choose the Right Nail Color Ideas Featuring Gold and Silver
When it comes to selecting the perfect nail color ideas featuring gold and silver, you want to ensure that your choice reflects your style and fits the occasion. Here are some helpful tips to guide you in making the right decision.
1. Consider the Occasion
Choosing the right nail color can depend greatly on the occasion. For formal events, you might want a classic metallic gold or silver for an elegant look. In contrast, casual outings can allow for bolder combinations like glittery ombres or playful designs. Think about where you’re going and select colors that suit the mood of the event.
2. Assess Your Skin Tone
Your skin tone plays a significant role in how nail colors appear. If you have warm undertones, gold shades often look radiant and complementary. Conversely, silver tones can enhance cool undertones beautifully. Test a few colors against your skin to see which shades pop and suit your complexion best.
3. Think About Your Style
Your personal style should greatly influence your choice. If you prefer minimalist looks, a simple gold or silver polish might be enough. However, if you love experimenting, try intricate designs featuring both colors with accents like glitter or foil. Make sure the colors you choose align with your usual wardrobe and fashion sense.
4. Explore Trends and Techniques
Stay updated with current nail trends to find inspiration for your next look. Techniques such as gold leaf art, geometric patterns, or a bold checkerboard design can make your nails stand out. Look for tutorials online to help recreate these trendy styles using gold and silver, and don’t hesitate to mix and match techniques for a unique design.
5. Consider Your Nail Length and Shape
The shape and length of your nails can affect how a color looks. Longer nails can carry intricate designs like floral patterns or ombre effects with ease. Shorter nails might look cleaner with solid colors or simple accents. Choose designs that enhance the natural shape of your nails for a polished overall appearance.
6. Budget for Quality Products
Investing in quality nail products can significantly impact the final look of your nails. High-quality polishes tend to have better pigmentation and longer wear. Be prepared to spend a little more on brands known for their gold and silver formulations. This ensures your manicure lasts longer and maintains a vibrant shine.
Pro Tip: Always apply a base coat before your nail color to protect your nails and enhance the longevity of your manicure! Don’t forget to finish with a top coat for an extra glossy finish.
By considering the occasion, your skin tone, personal style, current trends, nail shape, and budget, you can effectively choose chic nail color ideas featuring gold and silver that are perfect for any occasion. Happy painting!
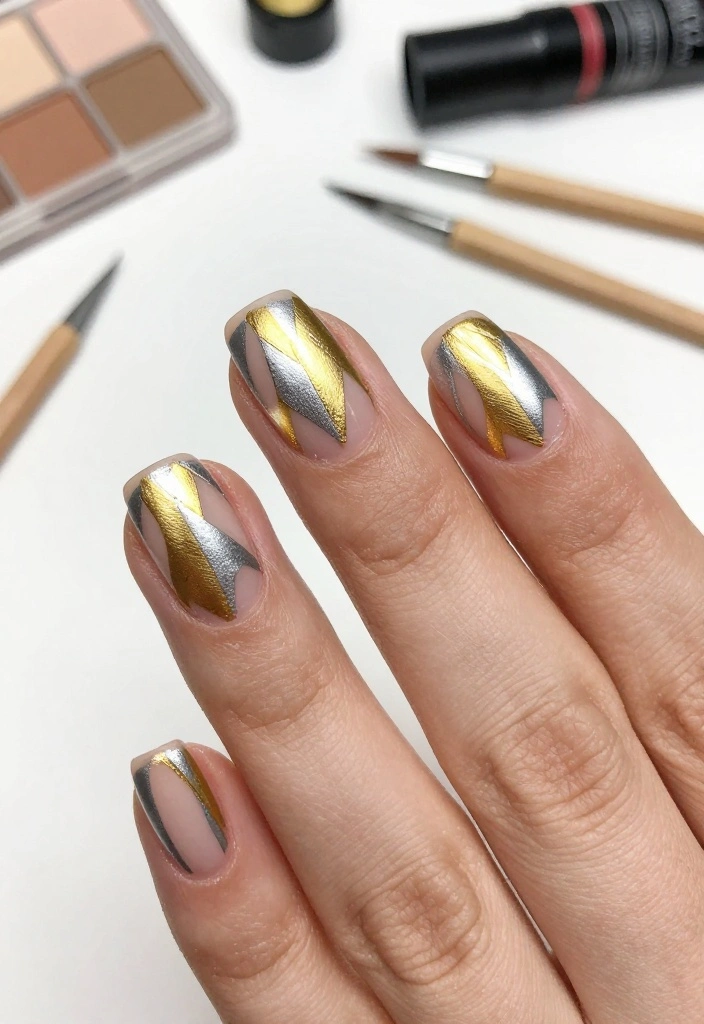
3. Metallic Stripes

Stripes are a classic design, and when infused with metallic colors, they become eye-catching and modern. Alternating silver and gold stripes add a chic contrast that elevates your nail game. This design is ideal for those looking to add a contemporary flair while still keeping it classy.
Start with a neutral base coat, and use striping tape to create your desired stripe pattern. Carefully apply gold and silver polishes to the sections, peeling away the tape before the polish dries for crisp lines. Finish it off with a top coat for durability and shine.
– Opt for matte colors as a base to make the metallics stand out even more.
– Try diagonal stripes for a fun twist on the classic look.
– Keep a small brush handy for any touch-ups along the edges.
Ingredients List:
– Base coat
– Gold polish
– Silver polish
– Striping tape
– Top coat
Steps:
1. Apply base coat and let dry completely.
2. Use striping tape to create stripes on your nails.
3. Paint with gold and silver polishes as desired.
4. Remove tape while the polish is still wet for clean lines.
5. Seal with a top coat.
FAQs:
– Can I use regular tape instead of striping tape?
– Yes, but it may not give as clean of lines since it might pull up the polish.
📹 Related Video: DOs & DON’Ts: striping tape nail art | how to use striping tape
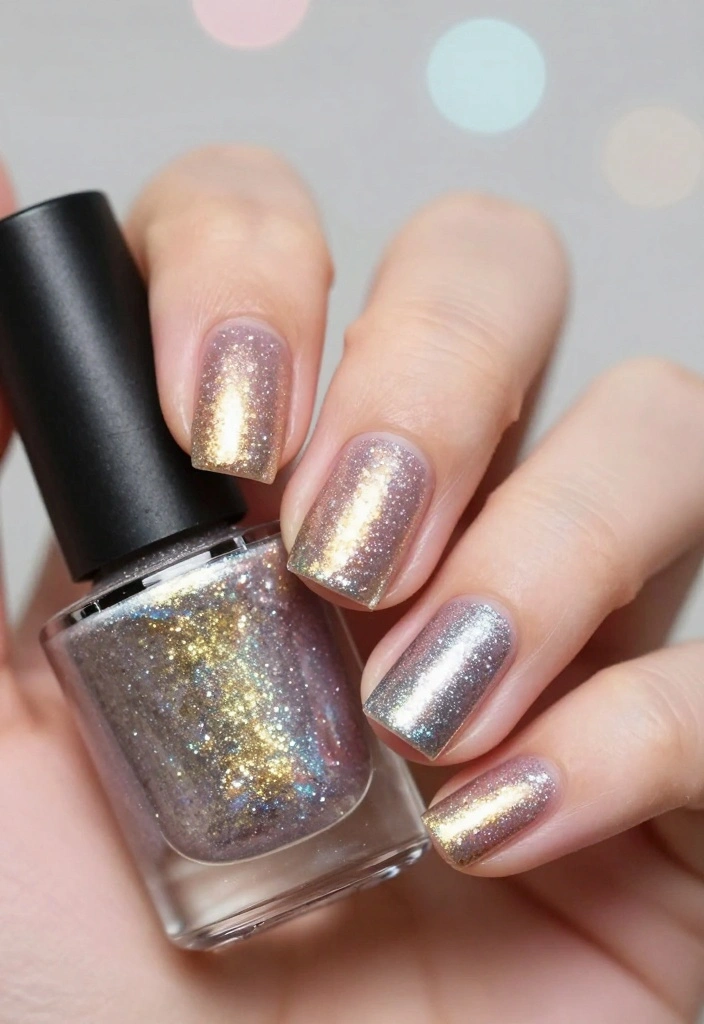
4. Shimmering Silver Glitter Tips

Elevate your manicure with shimmering glitter tips that effortlessly blend simplicity and glamour. This design is perfect for casual and formal events alike, offering a chic sparkle that enhances any look.
Begin with a solid base color, such as soft pink or light gray. Once your base is dry, apply glitter polish just to the tips of your nails using a small brush or sponge for added texture. Layer the glitter for more drama, and finish with a shiny top coat to secure your masterpiece.
– Opt for finer glitter for a more refined finish.
– Experiment with a gradient effect by blending glitter upward toward the base.
– A clear base coat works well for a subtle sparkle.
Ingredients List:
– Base coat
– Solid base color polish
– Silver glitter polish
– Top coat
Steps:
1. Apply base coat and let dry.
2. Paint nails with your solid base color.
3. Use a small brush to apply glitter polish to the tips.
4. Layer the glitter to your liking.
5. Seal the design with a top coat.
FAQs:
– How can I make the glitter last longer?
– Make sure to seal it well with top coat and avoid excessive water exposure.
5. Gold Leaf Art

For those seeking a unique and luxurious look, gold leaf art nails are an absolute must-try! This design involves applying real gold leaf onto your nails for a stunning effect that’s perfect for special occasions.
Start by applying a base coat followed by a solid color of your choice. Once dry, use a special adhesive to apply gold leaf in patches or full coverage, based on your preference. Finish with a top coat to lock in the design and add shine.
– Apply gold leaf while the adhesive is still tacky for better adhesion.
– Combine with nude or clear polish for a more understated appearance.
– Mixing in some silver leaf creates an interesting contrast.
Ingredients List:
– Base coat
– Solid colored polish
– Gold leaf
– Adhesive
– Top coat
Steps:
1. Apply base coat to your nails and let dry.
2. Paint your nails with the chosen polish color and allow to dry.
3. Apply a thin layer of adhesive where you want gold leaf.
4. Place pieces of gold leaf onto the adhesive and press down.
5. Seal with a top coat for a glossy finish.
FAQs:
– How do I remove gold leaf nails?
– Simply use regular nail polish remover; it comes off easily.
Gold Leaf Art
Editor’s Choice


6. Geometric Patterns
Geometric patterns are all the rage in nail art, and using gold and silver gives this style a modern edge. The artistic shapes bring a trendy yet sophisticated flair to your nails, making them stand out.
Start with a solid base color—white or nude works beautifully. Use striping tape to create various geometric shapes, then alternate between gold and silver polishes to fill them in. Once completed, remove the tape carefully and seal the design with a top coat.
– Use a thin brush for more intricate designs.
– Keep the shapes simple for a minimalist effect.
– Consider a matte top coat for a more edgy finish.
Ingredients List:
– Base coat
– Solid base color polish
– Gold polish
– Silver polish
– Striping tape
– Top coat
Steps:
1. Apply base coat and let dry.
2. Paint your nails with your chosen base color.
3. Create geometric shapes using striping tape.
4. Fill the shapes with gold and silver polishes.
5. Remove tape before the polish dries and seal with top coat.
FAQs:
– Can I create the patterns freehand?
– Yes, but it may take practice for clean lines.
7. Sparkling Silver and Gold Gradient
A sparkling gradient is a playful way to combine both gold and silver into one eye-catching manicure! This look is perfect for celebrations and parties, bringing a festive vibe to your nails.
Start with a base of glittery gold polish, then transition to silver glitter as you move down your nails. To achieve this effect, use a sponge to apply the silver at the tips, blending it into the gold for a soft transition. Finish with a top coat to keep your gradient vibrant.
– Opt for iridescent glitters for added depth and dimension.
– Keep the gradient light for daytime events and bolder for night outings.
– Pair with simple jewelry to let your nails shine.
Ingredients List:
– Base coat
– Glittery gold polish
– Silver glitter polish
– Top coat
Steps:
1. Apply base coat and let dry.
2. Paint the nails with glittery gold polish and let dry.
3. Use a sponge to apply silver glitter at the tips, blending downwards into the gold.
4. Seal with top coat for added shine.
FAQs:
– How long will this last?
– Typically 5-7 days with proper care.
You might also like


8. Dotted Gold and Silver Design

Dotted designs are playful and charming, making them a fantastic choice for a fun day out. A mix of gold and silver dots adds a whimsical touch to your nails without overwhelming them.
Start by applying a solid color as your base. Using a dotting tool, create dots of gold and silver in varying sizes across each nail. You can follow a specific pattern or distribute the dots randomly for a more relaxed vibe. Finish with a glossy top coat to enhance the brightness of the dots.
– Use contrasting colors for your base for maximum impact.
– Experiment with different dot sizes for a unique look.
– Keep the design consistent across all nails or mix it up for a playful approach.
Ingredients List:
– Base coat
– Solid color polish
– Gold polish
– Silver polish
– Top coat
Steps:
1. Apply base coat and allow to dry.
2. Paint your nails a solid color and let it dry completely.
3. Use a dotting tool to create gold and silver dots on each nail.
4. Let the dots dry, then finish with a top coat.
FAQs:
– How do I clean my dotting tool?
– Simply wipe it off with some polish remover after use.
9. Half-Moon Gold and Silver

The half-moon design offers a classic twist to your nails, and adding gold and silver elevates it to a sophisticated level. Ideal for formal occasions or when you want to feel extra fancy, this design is sure to impress.
Apply a base coat followed by a solid color of your choice for the main part of the nail. Once dried, use tape or a stencil to create a half-moon at the base. Fill in the half-moon with either gold or silver polish, leaving the rest of the nail in your base color. Finish with a top coat.
– Experiment with pastel colors for a fresh spring vibe.
– Try a brighter base for an eye-catching contrast.
– This design is versatile; feel free to mix and match colors in various ways.
Ingredients List:
– Base coat
– Solid color polish
– Gold polish
– Silver polish
– Tape or stencil
– Top coat
Steps:
1. Apply base coat and let dry completely.
2. Paint your nails with your chosen solid color.
3. Use tape or stencils to create the half-moon shape.
4. Fill in with gold or silver polish.
5. Remove the tape before the polish dries and seal with top coat.
FAQs:
– Can I use this design on short nails?
– Absolutely! It looks great on all nail lengths.
Half-moon gold and silver nails make me feel instantly polished without overdoing it. It’s my go-to look for formal occasions and one of my favorite nail color ideas. Pro tip: apply a solid base, tape off the half-moon, and fill with metallic polish for easy glam.
Half-Moon Gold and Silver
Editor’s Choice


10. Marble Effect with Gold and Silver
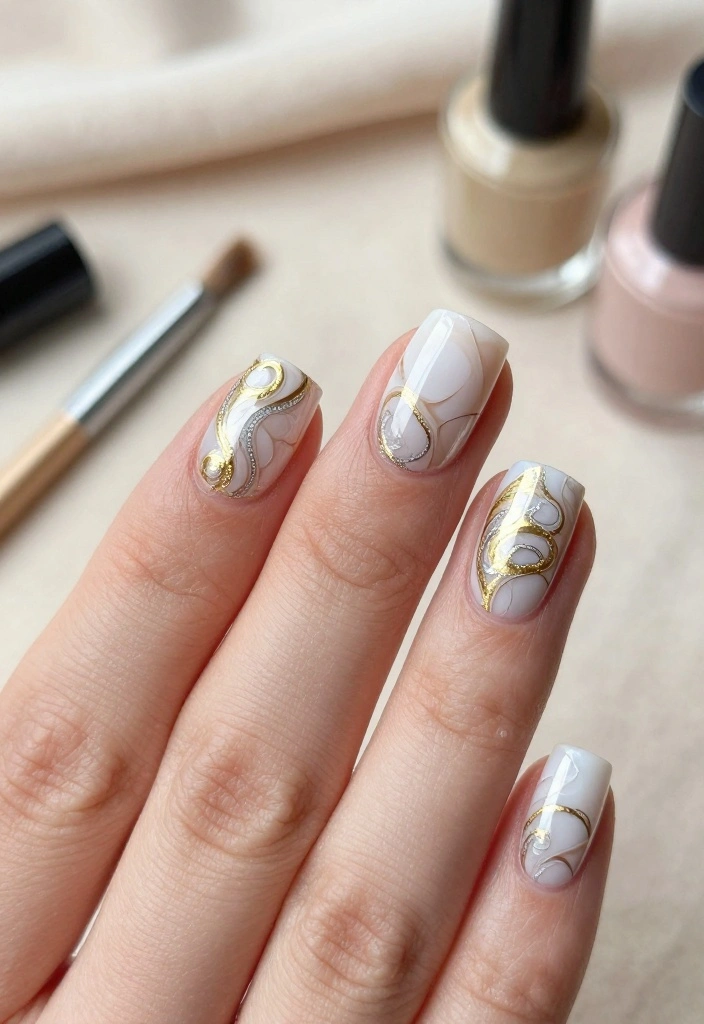
The marble effect is a chic, trendy option that creates a sophisticated look on your nails. By incorporating gold and silver into the marble design, you elevate this style to a stunning level.
To create a marble effect, start with a base coat followed by a solid white or pastel color. Use a thin brush or nail art tool to swirl gold and silver polishes into the base, forming a marbled pattern. Be sure to seal with a top coat to keep the design intact.
– Practice your swirling technique for the best results.
– Experiment with different shades of gold and silver to add depth.
– Pair this design with minimalist jewelry for a sleek, sophisticated look.
Ingredients List:
– Base coat
– White or pastel polish
– Gold polish
– Silver polish
– Top coat
Steps:
1. Apply base coat and let dry.
2. Paint nails with a solid white or pastel color.
3. Using a thin brush, swirl gold and silver polishes into the wet base.
4. Create a marbled effect and let dry.
5. Seal with a top coat for shine.
FAQs:
– Is this design hard to achieve?
– It may take a little practice, but the stunning effect is worth it!
11. Elegant French Mani with a Twist

The classic French manicure gets a chic update with gold and silver tips, keeping your nails looking neat and sophisticated while adding a trendy twist. This design is perfect for any polished appearance.
Begin with a base coat, then apply a nude or soft pink polish. For the tips, use gold or silver to create the traditional French tip. Feel free to experiment with thicker or thinner lines, and consider adding some glitter for a touch of sparkle. Finish with a top coat for a glossy finish.
– Consider using a matte base with shiny tips for a contrasting effect.
– Mix up the colors; try gold on one hand and silver on the other.
– Keep your nail shape in mind for a polished look.
Ingredients List:
– Base coat
– Nude or soft pink polish
– Gold polish
– Silver polish
– Top coat
Steps:
1. Apply base coat and let dry.
2. Paint nails with nude or soft pink polish.
3. Use a steady hand to apply gold or silver polish to the tips.
4. For extra glam, add glitter to the tips.
5. Seal with a top coat.
FAQs:
– How do I keep tips from chipping?
– A good top coat can help your manicure last longer.
Fun fact: Switching to gold or silver tips can boost a classic French mani’s sparkle by up to 30% in photos. It stays chic, polished, and totally on-trend for every occasion. Pro tip: vary tip thickness for the perfect glam twist.
Elegant French Mani with a Twist
Editor’s Choice


12. Bold and Beautiful Mixed Metals
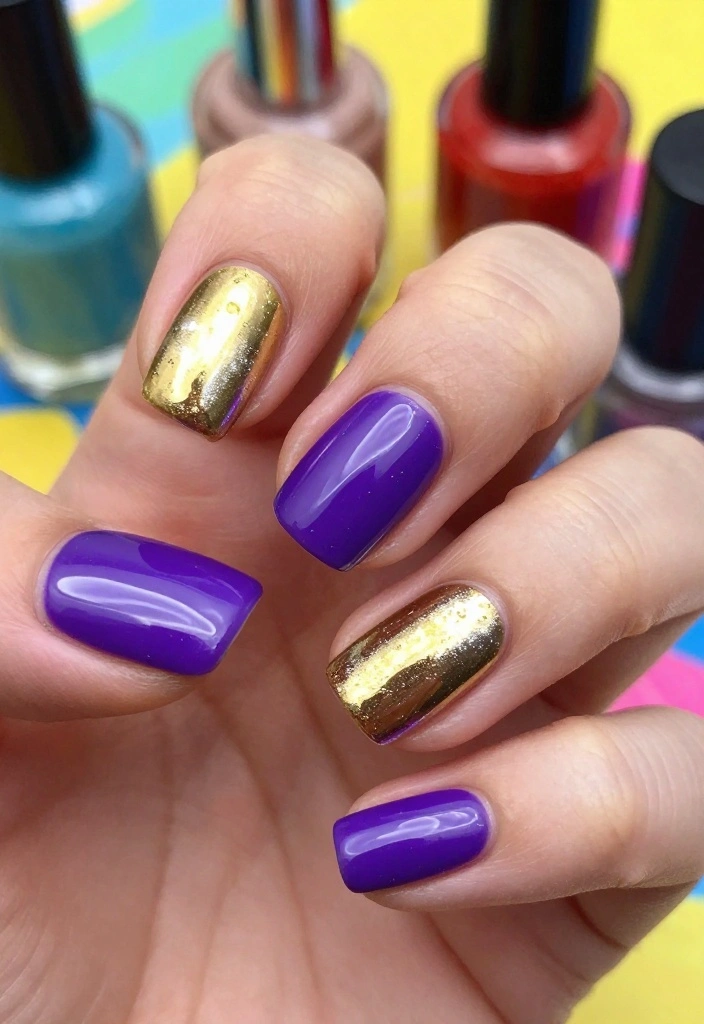
When in doubt, go bold! Mixing gold and silver in creative ways can lead to stunning nail art that showcases your unique style. This design is a daring blend of metallics that makes a powerful statement.
Start with a base coat, then paint your nails a vibrant color like royal purple or emerald green. Use a combination of striping tape and freehand techniques to create lines, shapes, or even abstract art using both gold and silver polishes. Finish with a glossy top coat to keep the design vibrant.
– Don’t hesitate to experiment; abstract designs often yield the best results!
– Allow each layer to dry to avoid mixing colors.
– Choose a color scheme that complements your wardrobe for a coordinated look.
Ingredients List:
– Base coat
– Bold colored polish
– Gold polish
– Silver polish
– Top coat
Steps:
1. Apply base coat and let dry.
2. Paint nails with your chosen bold color.
3. Use striping tape and freehand techniques to create designs.
4. Fill in shapes with gold and silver polishes.
5. Seal with a glossy top coat.
FAQs:
– How do I clean up edges when I mess up?
– A small brush and some nail polish remover will help.
You Might Also Like


13. Delicate Floral Patterns with Gold Accents

Floral patterns always bring a touch of femininity and charm, and adding gold accents elevates this design to another level. Perfect for weddings or romantic evenings, these nails are both delicate and striking.
Start with a base coat of a soft pastel color. Once dried, use a fine brush to paint floral designs with gold or a contrasting color. Tiny dots or leaves can enhance the floral effect. Finish with a top coat for a polished look.
– Use lighter shades for a soft, romantic vibe.
– Experiment with different floral designs for variety.
– Gold leaf can be a beautiful addition for a hint of luxury.
Ingredients List:
– Base coat
– Pastel colored polish
– Gold polish
– Fine nail art brush
– Top coat
Steps:
1. Apply base coat and let dry.
2. Paint nails with your chosen pastel color.
3. Use a fine brush to create floral patterns in gold.
4. Add tiny dots or leaves for a complete design.
5. Seal with a top coat.
FAQs:
– Can I use stencils for floral patterns?
– Yes! Stencils can help achieve precise designs.
Delicate Floral Patterns with Gold Accents
Editor’s Choice


14. Fun and Flirty Checkerboard

Checkerboard nails are playful and fun, making them a perfect choice for casual outings or a day out with friends. Adding gold and silver makes this design stand out while maintaining a light-hearted vibe.
Start with a base coat, followed by a solid color like black or white. Use tape to create squares on your nails, alternating between gold and silver for a trendy look. Seal the design with a top coat to protect it and add shine.
– Use contrasting colors for your base and checkerboard for a striking effect.
– Keep your squares uniformly sized for a clean appearance.
– Experiment with different colors for a unique twist.
Ingredients List:
– Base coat
– Solid color polish
– Gold polish
– Silver polish
– Tape
– Top coat
Steps:
1. Apply base coat and let dry completely.
2. Paint your nails with a solid color and let dry.
3. Use tape to create square shapes.
4. Alternate filling in squares with gold and silver polish.
5. Carefully remove tape and seal with top coat.
FAQs:
– Can I use nail stickers instead of tape?
– Yes, nail stickers can also be effective for this design.
15. Artistic Splatter Nails

Unleash your creativity with artistic splatter nails! This design allows for free expression and makes a bold statement through the use of gold and silver splatters on a solid background.
Start with a base coat in your color of choice. Once dry, use a brush to flick or splatter gold and silver polish across your nails, creating a unique look each time. Be sure to seal with a top coat to preserve the vibrant finish.
– Experiment with different base colors to change the overall vibe.
– Keep a cotton swab handy for clean-up around any splatter that lands outside the nail.
– Practice the flicking motion on paper to perfect your technique.
Ingredients List:
– Base coat
– Solid color polish
– Gold polish
– Silver polish
– Top coat
Steps:
1. Apply base coat and let dry.
2. Paint nails with a solid color and allow to dry completely.
3. Use a brush to flick gold and silver polish onto your nails.
4. Seal the design with a top coat for shine.
FAQs:
– How do I remove splatter polish?
– Regular nail polish remover works effectively for this design.
Conclusion
With these 15 chic nail color ideas featuring gold and silver, you have a plethora of options to express your personal style. From elegant ombre effects to playful splatters, there’s a design for every occasion. Don’t forget to experiment, play, and most importantly, have fun with your nail art!
The world of nail design is limitless; let your creativity shine and inspire others with your unique looks. Happy manicuring!
Note: We aim to provide accurate product links, but some may occasionally expire or become unavailable. If this happens, please search directly on Amazon for the product or a suitable alternative.
This post contains Amazon affiliate links, meaning we may earn a small commission if you purchase through our links, at no extra cost to you.
Frequently Asked Questions
What are the top nail color ideas featuring gold and silver that work for any occasion?
A great place to start is a neutral base with metallic accents to keep things versatile.
Try: 1) Gold foil tips on a nude or blush base, 2) Silver chrome on a pale pink, 3) a chic gold and silver French manicure, 4) mixed-metal accent nails with one statement ring finger, 5) a solid metallic look in either gold or silver for bold evenings. These nail color ideas stay chic from day to night and suit any occasion.
How do I choose between gold and silver tones to match my skin tone and outfits?
Think of undertones and balance. If you have warm undertones, go for richer gold shades; cool undertones pair beautifully with silver or chrome. For versatility, mix metals on different nails or add a small gold accent on one nail with silver on the rest. This keeps your look flexible and always on-trend with these nail color ideas featuring gold and silver.
What easy at-home techniques can I use to create chic gold or silver nail art?
You can achieve salon-worthy results with simple tools. Try: a) applying foil sheets or foil tape for gold or silver accents, b) stamping plates with metallic polishes for precise designs, c) nail tape to create clean lines and color blocking, d) chrome powder over a gel base for a mirror finish, e) gradient sponging to blend metallics with a neutral base. These nail art ideas are practical and budget-friendly.
How can I make gold or silver nails last longer and resist chipping?
Prep is everything: file and buff nails, push back cuticles, and remove oils. Use a base coat to protect the natural nail, apply thin coats of your metallic color, and seal with a durable top coat—reapply every 2–3 days. If you’re using gel, cure according to the product directions and finish with a glossy top coat. Gentle hand care and gloves during chores can extend wear of your nail color ideas.
Any tips to care for metallic nail colors to prevent dullness or tarnish and keep them looking fresh?
Yes! Avoid harsh acetone removers and frequent aggressive filing to prevent dulling. Store polishes in a cool, dark place and apply a fresh top coat every few days to maintain shine. Pair metallics with a non-acetone remover for touch-ups, and consider mixing in a matte top coat to disguise wear. With these care steps, your gold and silver nails stay vibrant and chic as part of your nail color ideas.
Related Topics
nail color ideas
gold nails
silver nails
nail art trends
chic nail designs
occasion nails
easy nail art
metallic finish
fashion nails
party ready
beginner nail art
weekend vibes
I love these nail color ideas! Gold and silver always add a touch of glam. Have you ever tried mixing them for a fun design?
These colors are so chic! Speaking of nails, I once tried to do my own nail art and ended up looking like I was finger painting. Lesson learned!
Did you know that gold nail polish has been popular since ancient Egypt? It’s amazing how styles come back around!
I remember wearing gold nails to a wedding once, and everyone kept complimenting me! It felt so special. What’s your favorite occasion to dress up your nails?
For a quick shine-up, I recommend using a top coat with glitter. It makes any color pop and looks fabulous without too much effort!