
I created this post because marble pink nails keep catching my eye and I wanted a simple guide you can actually use. If you love a chic look that feels fancy but stays easy, this one is for you. I pulled together 12 stunning marble pink nail ideas that blend soft pinks with marble swirls, with steps you can follow at home without special tools.
If you enjoy fresh nail art, want looks that pop in photos, and need options that work on short nails as well as long ones, this is for you. You care about nails that last, affordable supplies, and looks that fit work days, weekends, and nights out. This guide stays practical while chasing that soft, luxe vibe.
What you’ll get is a ready-to-use collection. You’ll discover how to recreate 12 looks, plus tips on color pairing, brush technique, and how to layer shades to mimic marble. You’ll learn when to go glossy or matte and how to seal the design so it holds up through daily wear. Each idea is explained in a simple, stepwise way so you can try it this weekend.
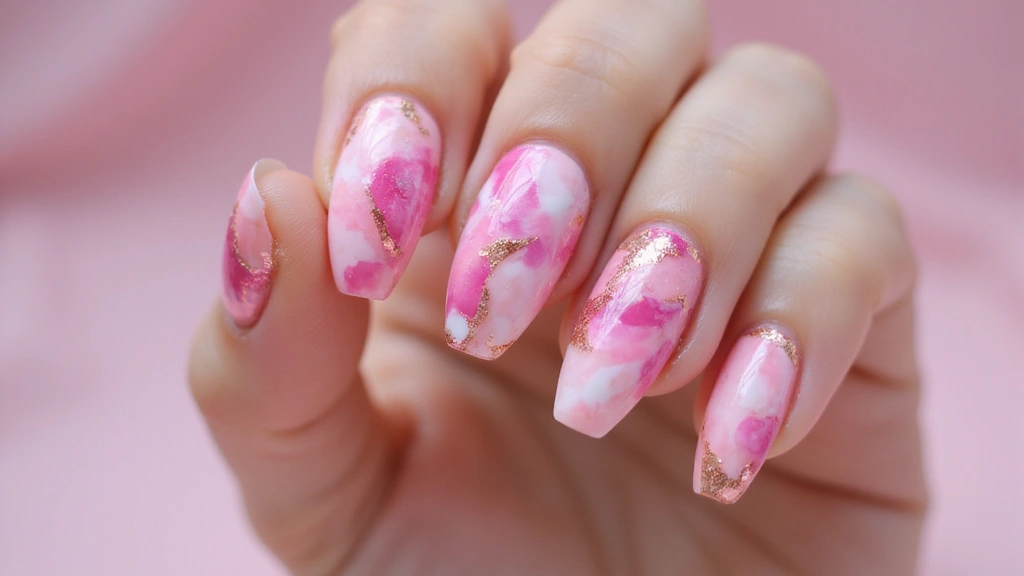
Picture creamy pink nails with white veins skimming across each finger, catching light with a soft glow. Some designs add a touch of sparkle or a whisper of metallic to give a subtle lift. The marble effect stays smooth and not busy, so it works with most outfits and skin tones.
I keep expectations real. Marble pink nails sound fancy, but they can be easy if you start with a simple swirl and clear top coat. The key is thin layers, patient drying, and good base and top coats. If a design feels tough, try a simpler version and add one small marble vein.
Here is why you should try one of these looks this week. Start with a pink shade you already own and a white nail art pen or a thin brush. Pick the design that matches your mood, gather basic tools, and practice a short swirl on a nail or two. When you nail it, share a pic in the comments or tag a friend who loves pink marble nails.
1. Soft Pink Marble with Gold Swirls

You want nails that feel calm and chic, with a touch of shine. Soft pink marble nails with gold swirls deliver that vibe. They suit day dates and casual nights. Here is a practical way to do them at home.
What you’ll need:
– Base coat
– Pale pink polish (two thin coats)
– White or lighter pink for marble veins
– Fine brush and gold polish for swirls
– Cosmetic sponge
– Matte top coat or glossy top coat
– Clear top coat
Step by step:
– Apply a base coat to protect your nails. Let it dry.
– Paint two thin coats of pale pink. Let each coat dry.
– Create marble veins. Dab a little white on a sponge and gently press it on the nail. Twist and lift to form soft veins. Repeat until you like the look.
– Add gold swirls. Use a fine brush to draw curved gold lines. Build lines slowly for a natural look.
– Let the gold dry to avoid smudges.
– Finish with your choice of top coat. Matte gives a velvet look. Glossy adds shine.
– Seal with a clear top coat for lasting wear.
Quick care:
– Wear gloves with dish soap to protect the finish.
– Moisturize cuticles daily.
@media (max-width: 600px) {
.normal-quiz-iframe { min-height: 570px !important; height: 570px !important; }
}
2. Fuchsia and White Swirl Marble

Want a bold nail look that turns heads? Fuchsia and white swirl marble nails give you a striking pink marble style that shines at any party. It works on short nails too, so you can try it anytime.
What you’ll need
– Bright fuchsia polish
– White polish
– A fine nail art brush or a thin toothpick
– A dotting tool (optional)
– Clear topcoat
Here is how to do it
1) Prep nails with a clear base coat. It protects nails and helps color stay.
2) Paint all nails with bright fuchsia. Let the color dry fully before you continue.
3) Create the marble swirls. Dip the fine brush in white and draw curved lines across the nail. Let some lines cross over others to mimic natural marble.
4) Soften and blend. Gently drag a clean brush over the white lines to blur edges. If a line looks too bold, tap it with the brush to soften.
5) Add tiny accents. Use a dotting tool to place small white dots or silver specks along the swirls for extra depth.
Finish with a glossy topcoat. Let it dry fully to avoid smudges. Here is why this look works: bright fuchsia makes the white swirls pop for a clean marble vibe. Next steps: try a lighter or darker fuchsia, or add glitter for extra sparkle.
Dare to stand out with fuchsia and white swirl marble nails! Perfect for any occasion, they’re a bold statement that proves even short nails can steal the spotlight.
3. Gold Leaf Accents on Marble Pink

Need a marble pink nail look that feels chic but easy to wear. Gold leaf accents add luxury without shouting. Here is how to pull it off.
Base coat: paint two thin coats of marble pink. Let them dry. The soft pink with light veins looks smooth in daylight.
Gold leaf placement: cut tiny pieces from the sheet with clean tweezers. Put a dab of clear glue or clear topcoat where you want leaf. Lay the leaf pieces on the tacky spots. Press gently with a soft brush to smooth edges. The leaf catches light and adds subtle shimmer.
Seal it: once the leaf sits, brush on a clear topcoat. A glossy finish makes the gold pop; a satin topcoat looks more muted. Let it dry.
For success:
– Topcoat after laying the leaf to lock it in
– Try different placements for a unique look
– Pair with a simple outfit to let the nails shine
Care tips: avoid harsh soaps for 24 hours after applying, and wear gloves when cleaning.
This look gets noticed. Next steps.
4. Ombre Marble Pink and Fuchsia

Ombre Marble Pink and Fuchsia
You want nails that look soft yet eye catching. This ombre marble combo does that. It starts with a gentle pink base and ends with a bold fuchsia tip. Here is how to make it look smooth. This combo works on short and long nails.
– Base and ombre: Paint a pale pink on all nails. Let it dry. Apply a second thin pink layer. Use a makeup sponge to dab both pink shades from cuticle to tip. Tap in small circles to blend into a smooth gradient.
– Marble top layer: On a clean, dry brush, swirl a lighter pink with white. Gently drag tiny curved lines over your nails. Keep the swirls loose so the pink and white mix like marble.
– Clean edges and set: Use a tiny brush with polish remover to neaten the cuticles. Press down a touch to even the surface. Let it dry.
– Finish: Apply a clear topcoat. For a fashion-forward look, seal with a matte topcoat.
Pro Tips:
– Use an ultra-fine brush for precise marble lines.
– Practice the ombre on a practice nail or wheel before the real set.
– Matte topcoat adds a modern finish and longer wear.
And you can swap pinks for coral or rose to fit your mood and outfit.
5. Glittery Fuchsia and Marble Pink Mix

Looking for a nail look that pops but stays chic? A Glittery Fuchsia over Marble Pink nails can do it. The marble keeps things soft, and the glitter adds a party glow. This style works for a night out, a lunch with friends, or a bold daily look.
For this Look
– What you need:
– Clear base coat
– Marble pink polish
– White or lighter pink for veins
– Fine glitter polish in fuchsia
– High-gloss top coat
– Create the marble pink base: Paint a pink coat. While it’s still a touch wet, dab in white or lighter pink to form thin veins. Don’t overdo it; small swirls feel natural.
– Add the glitter: Apply a fine fuchsia glitter polish. Dab on the tips for a gradient or sweep across the whole nail for full sparkle.
– Vary the glow: Use different amounts of glitter on each nail for a playful, mismatched look.
– Seal the shine: Finish with a strong top coat to lock in color and smooth the surface.
– Dry and care: Let each layer dry fully. Cap the free edge to prevent chipping.
– Quick cleanup: Use a small brush dipped in remover to tidy edges.
This combo catches eyes and keeps nails looking polished.
This look shines at any party and still feels easy to wear. Give it a try this weekend.
Make your nails the talk of the town! A Glittery Fuchsia over Marble Pink nails is the perfect blend of chic and fun, turning everyday moments into glam occasions.
6. Chic Marble Pink French Tips

Want a French mani that stays classy but feels fresh? Try Chic Marble Pink French Tips. The look keeps a clean line while adding a soft, artful twist. A nude or pale pink base helps the marble read clearly without shouting.
What you need
– Nude or soft pink base color
– Pink and white polish for marbling
– Fine nail brush or toothpick
– Thin tape for clean edges
– Matte or glossy topcoat depending on your vibe
Here is how to do it.
Steps
– Prep nails with a smooth file and neat cuticles. Let them dry completely.
– Paint a nude or pale pink base. Allow it to dry so the marble stays sharp.
– Create the tip marble. On a small palette, mix a touch of pink with white. Use a fine brush or toothpick to draw gentle swirls at the tip. Keep the veins light and soft.
– Get clean lines. Place a slim strip of tape along the natural tip edge. Paint up to the tape or over the marble, then pull away the tape while the polish is still tacky.
– Seal the look. Finish with a topcoat. Matte topcoat gives a modern feel; gloss keeps it classic.
Why it works
This style feels refined yet subtle. It hides slight nail growth and avoids a bold clash. It fits the office, a date, or a formal event.
Next steps
Apply this to all nails for a uniform look or pick two accent nails. Short nails read well with a light marble touch.
Chic marble pink French tips are the perfect blend of elegance and creativity. With just a nude base and a touch of pink, you’ll wow your friends without saying a word!
@media (max-width: 768px) { .internal-links-flex { flex-direction: column !important; } .internal-links-flex > div { flex: none !important; } }
You might also like

7. Abstract Marble with Bold Fuchsia Dots

Want a playful twist on marble nails? This abstract look uses bold fuchsia dots on a pink marble base.
Here is why this look works. The base stays soft and easy to wear while the bright dots grab the eye. The mix of smooth swirls and crisp spots creates depth you can see and feel.
What you’ll need
– Marble pink nail polish as the base.
– White polish for the marble swirls.
– Fuchsia polish for the dots.
– Dotting tools in different sizes.
– A small brush or toothpick for splotches.
– A high shine topcoat for sealing.
– A quick dry finish if you’re short on time.
How to apply
– Start with a marble pink base and let it dry to the touch.
– Add white and pink swirls to mimic real marble.
– Dip a dotting tool into fuchsia polish.
– Make bold dots across the nail in a scattered pattern.
– Use a larger dotting tool for big dots.
– Use a small tool for tiny dots.
– Scatter the dots randomly to create an artsy vibe.
– Add a few random fuchsia splotches for a looser feel.
– Finish with a glossy topcoat to seal color and add shine.
– Let nails dry completely before daily activity.
Next steps: try this on one nail first before doing the full set.
You can switch pink shades to fit your mood.
8. Marble Pink with Rhinestone Accents

Want a marble pink nail look with a touch of shine? Rhinestone accents give that luxe finish you crave.
What you’ll see
Soft marble pink nails that shimmer as light moves. Rhinestones line the cuticles or form tiny patterns on each nail.
How to achieve it
– Start with clean nails. Paint a marble pink base and let it dry completely.
– For extra hold, apply a small dab of nail glue where you want each rhinestone.
– Place stones along the cuticle or arrange them into a simple design on one or more nails.
– Finish with a glossy topcoat to lock in the stones and boost shine.
Pro tips
– Mix tiny and medium stones for depth and texture.
– Choose silver, clear, or pink gems to fit your style.
– On short nails, keep patterns simple to avoid crowding.
– Use a topcoat with a smooth finish to keep stones looking new.
– If you’re using gel polish, cure per the kit instructions to keep stones secure.
Why it works
The soft base stays calm while the gems catch the eye. It fits formal events, weddings, and nights out when you want a little drama.
Next steps
Practice on a swatch or nail wheel first. This helps you test placement before you try it on every nail.
9. Watercolor Marble Effect

You want nails that look soft and dreamy. Watercolor marble nails use gentle blends. Start with a pale pink base. Then add a sheer white wash to create a watercolor look. Use a small brush or a damp sponge to dab colors on. Leave some pink showing for a soft finish. This style feels light and fresh for spring and summer.
Here is how to do it:
– Prep and base: clean nails, push back cuticles, shape, and apply base coat. Let it dry.
– Pink layer: apply two coats of soft pink. Let each coat dry.
– Watercolor wash: dab sheer white onto the nail. Use a light touch and let edges stay soft.
– Build depth: if you want more color, add another pale pink or white dab. Dry between layers.
– Top coat choice: finish with a matte top coat for a modern look, or go glossy if you like shine.
Helpful hints:
– Keep the brush damp for translucent whites.
– Let each layer dry fully before the next.
– Wipe the brush between colors to keep blends clean.
Next steps: practice on a nail tip or swatch to tune the blend. With patience, you get a calm pink marble that fits everyday life.
10. Neon Marble Pink Nail Art

If you want a look that truly pops, neon marble pink nails are a bold choice. The mix of bright pink swirls with white and darker pink creates movement that catches every eye.
Here is why this design works: the neon base brings energy, while the marble veins keep the look playful and chic. It fits parties, festivals, or any time you want a standout manicure.
What you need
– Base coat to protect your nails and keep neon from staining\n\n
– Neon pink nail polish for the base\n\n
– White polish for the marble veins\n\n
– Dark pink polish for depth in the swirls\n\n
– Top coat for shine or a matte top coat for a different finish\n\n
– Fine brush, striping brush, or a toothpick for veins\n\n
– Optional black or silver accents for extra contrast
Step-by-step guide
1. Start with a clean, dry nail and apply a base coat to prevent staining.\n\n
2. Paint a smooth neon pink base. Let it dry fully.\n\n
3. While the pink is still a touch wet, dab small dots of white and dark pink. Use a fine brush to swirl them together into marble veins.\n\n
4. Define the veins with a thin line using a toothpick or striping brush. Keep lines light so the neon base shows through.\n\n
5. Seal your work with a top coat. Go glossy for a bright finish or matte if you want a softer look.
Tips for lasting wear
– Use thin layers to avoid pooling or streaks\n\n
– Clean your brush often when drawing veins\n\n
– For extra depth, add tiny black or silver specks along some veins
Common questions
– Will neon pink stain nails? Yes, so always use a base coat and avoid thick layers.\n\n
– Which finish lasts longer? Gloss top coats tend to last longer in daily wear; matte looks fresh but can show wear sooner.
Next steps: gather your tools, prep your nails, and try this bold neon marble pink design for your next mani.@media (max-width: 768px) { .internal-links-flex { flex-direction: column !important; } .internal-links-flex > div { flex: none !important; } }
You Might Also Like
@media (max-width: 600px) {
.visual-quiz-iframe { min-height: 995px !important; height: 1100px !important; }
}
11. Marble Pink with Foil Accents

Struggling to make your marble pink nails pop? Marble pink with foil accents gives you a polished, light catching look that works for any occasion. Here is why it clicks: the soft pink stays calm, while the foil adds a glint that draws the eye.
What you’ll need:
– Marble pink polish
– Metallic foil in your favorite color (gold, silver, or rose gold)
– Foil glue or a clear top coat to act as the glue
– A top coat for shine and protection
Here is how to do it:
– Start with clean, shaped nails. Push back cuticles and wipe with alcohol. Apply a thin base coat and let it dry.
– Apply two coats of marble pink. Let each coat dry. For a subtle marble effect, add a tiny dab of white or a lighter pink and blend softly while the polish is still wet.
– Add foil accents. Brush a small line of foil glue in random patches. Wait a moment, then press small foil pieces onto the glue. Tap lightly to smooth.
– Seal the look. Press a generous top coat over the foil to lock it in and add shine.
Pro tips:
– Use foil glue for lasting adhesion.
– Pick foil colors that match your outfit to keep the look cohesive.
– Reapply a top coat every couple of days to protect the foil.
Wear it and feel stylish. This trend is stylish, not flashy.
12. Seasonal Marble Pink Nail Designs

Want nails that stay fresh through every season? Seasonal marble pink nail designs are a smart pick. They give a soft pink base with seasonal accents.
Start with a pale pink marble base. Use white and a touch of the lightest pink to create the swirled look.
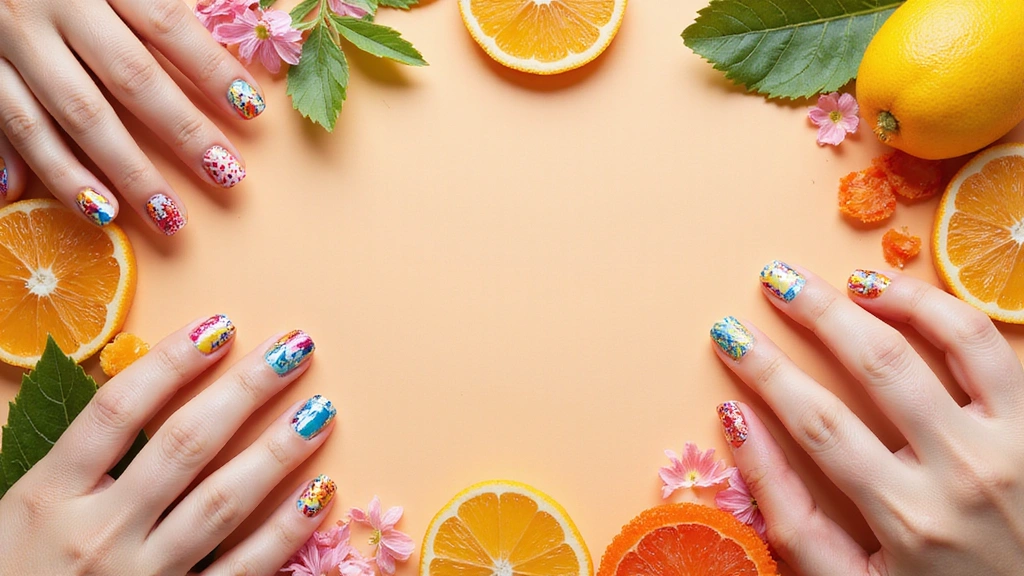
Add a seasonal twist. Spring loves soft florals. Summer shines with bright fruit or sun motifs. Autumn glows with leaves and earthy tones. Winter sparkles with snowflakes or glitter.
Make it easy. Use decals or tiny hand-painted details to stay quick and neat.
For Seasonal Designs:
– Mix in seasonal colors for variety.
– Use decals or hand-paint details for added creativity.
– Change designs as the seasons change to keep your style fresh.
Why this works. The pink marble gives a calm backdrop while the theme pops. It stays classy and eye-catching in photos.
Next steps. Practice with a clean brush and a dotting tool. Seal with a glossy top coat for shine. If you want, switch to a matte finish for a softer look.
By embracing seasonal pink marble nails, you’ll have a look that feels current and fun.
Seasonal marble pink nails are a masterclass in versatility! From spring florals to winter sparkles, let your creativity flow with every changing season. Give your nails a fresh twist that keeps your friends green with envy!
Conclusion

Marble pink nails are not just a trend; they are a canvas for creativity, self-expression, and fun! From elegant swirls to vibrant accents, there’s a design for every personality and occasion. As you experiment with these stunning ideas, you’ll not only elevate your nail game but also inspire your friends to follow suit. So go ahead and rock those marble pink nails with confidence!
Frequently Asked Questions
What Are Some Easy Ways to Achieve Marble Pink Nails at Home?
Creating stunning marble pink nails at home is easier than you think! Start with a base coat of soft pink nail polish, then use a small brush or a nail art tool to swirl in white and fuchsia polish while it’s still wet. Finish with a glossy topcoat for that chic look. Don’t forget to practice a bit; it’s all about getting those swirls just right!
Can I Customize My Marble Pink Nails with Other Colors?
Absolutely! Marble pink nails are versatile and can be customized with a variety of colors. Try adding gold or silver accents for a touch of elegance, or go bold with hues like teal or purple. Just remember to keep the balance; a softer base works beautifully with bolder accents!
How Long Do Marble Pink Nails Typically Last?
With proper care, marble pink nails can last anywhere from a week to two weeks. To extend the life of your nail art, apply a good quality topcoat and avoid using your nails as tools. Regular touch-ups can also keep your look fresh and fabulous!
What Should I Do If My Marble Pink Nails Start to Chip?
If your marble pink nails start to chip, don’t worry! You can do a quick fix by applying a thin layer of the base color over the chipped area and redoing the marble effect on just that spot. Alternatively, consider adding a glitter overlay to disguise the chips while still keeping it chic!
What Are Some Occasions for Wearing Marble Pink Nail Art?
Marble pink nails are perfect for a variety of occasions! Whether you’re heading to a casual brunch, a night out, or even a wedding, these versatile designs can elevate any outfit. The chic and soft look makes them suitable for both everyday wear and special events, so feel free to show them off anytime!
Related Topics
marble pink nails
nail art
fuchsia accents
gold swirls
ombre nails
glitter nails
chic nail designs
easy nail ideas
seasonal nail art
abstract marble
beginner friendly
luxury nail accents
These marble pink nail ideas are absolutely gorgeous! I can already picture my friends’ reactions when they see them. Which design do you think would be the easiest to try at home?
I love these nail designs! They remind me of the time I tried to do my own marble nails and ended up with a pink and white disaster that looked like a baby threw up! At least it was memorable, right?
Did you know that the color pink is often associated with feelings of calm and relaxation? Maybe that’s why these nails are so stunning; they just make you feel good!