
I put this post together because a small heart on your nails can light up a whole day. Nail art that’s sweet and easy to do at home helps you feel put together without taking hours. You get style without a trip to the salon or a big mess to clean up.
If you love quick, pretty nails and want ideas you can actually copy, this one is for you. It doesn’t matter if you’re new to nail art or you just enjoy neat, clean lines. These designs are simple, doable, and look polished on any hand.
Inside, you’ll find 12 Heart Design Nails that cover soft, sweet looks and bold, punchy styles. Each design comes with straightforward steps, color ideas, and tips for a clean finish. You’ll also see why heart motifs stay timeless in a modern palette.
I’ll keep things simple with the right tools and a few tricks. You can use regular nail polish or gel if you prefer, and you only need a dotting tool, a thin brush, tape or nail stencils, and a good top coat. Take your time, let layers dry, and seal with a smooth, long-lasting shine.
Now for the tease: design number 5 is something you won’t expect. It uses a tiny negative space heart that looks chic and is easy to recreate. Swap colors to fit your outfit, mood, or season, and you’ll see how small changes change the whole vibe.
Grab a cup of coffee, pick a few favorites, and try them this weekend. If you save your favorites and note what you like about each one, you’ll build a simple plan you can repeat. You’ll walk away with real options to refresh your look without buying a ton of new polishes. Let’s dive in and start creating nails that feel totally you.
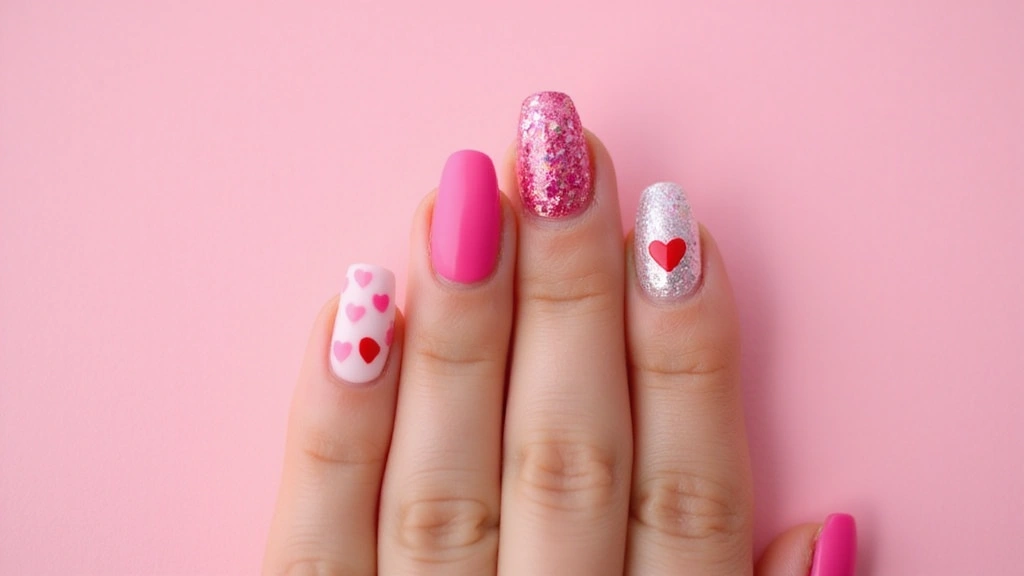
1. Classic Red Hearts

Want nails that feel timeless and romantic? Classic red hearts on a neutral base fit that need.
A bold heart pops against nude or pale pink, keeping your look clean and chic.
Here is how to nail it.
– Prep with a base coat to protect your nails.
– Paint two coats of nude or light pink. Let dry.
– Use a fine brush or dotting tool to draw red hearts on a couple of nails.
– Finish with a quick-dry top coat to seal the shine.
Tips
– Vary heart sizes for a playful touch.
– Add glitter along the edges for a subtle sparkle.
– If your hand shakes, try a stencil or sticker for clean edges.
Why you’ll love it
This look works with many outfits and moods. It reads romantic without shouting, and the nude base keeps it fresh.
Common questions
– Do I need fancy tools? Not really; a fine brush, dotting tool, or toothpick works.
– How long does it last? With a good base and top coat, about a week.
Limitations
A steady hand helps. If you’re new to art, practice on a nail wheel first.
Classic red hearts on your nails are not just a design; they’re a timeless expression of love. Keep it chic with a neutral base, and let your style shine through!
@media (max-width: 600px) {
.visual-quiz-iframe { min-height: 995px !important; height: 1100px !important; }
}
2. Pastel Heart Ombre

If you want nails that feel soft and sweet, the pastel heart ombre is a perfect pick. It blends gentle colors with tiny hearts for a friendly, girlish vibe. The gradient runs pink to lavender, and the little hearts look like sprinkles on top.
What you’ll need
– Base coat and top coat
– Pastel nail polishes (pink, peach, lavender)
– A clean makeup sponge
– White polish or a light pastel for hearts
– A small dotting tool or fine brush
Here is how to do it
– Prep your nails with a base coat. Let it dry.
– On a small sponge, dab stripes of pink and lavender to form a short gradient.
– Tap the sponge on your nail to transfer the colors. Repeat until the fade looks smooth.
– Let the pastel layer dry before you move on.
– With white or light pastel, paint tiny hearts. Place a few near the tip or scatter them across the nail.
– Finish with a shiny top coat for a fresh look.
Pro tips
– Use lighter shades for an airy feel.
– Mix heart sizes and placement for a playful look.
– If the hearts blur, clean your brush and keep coats thin.
– A gloss top coat makes colors pop and lasts longer.
– For a touch of sparkle, add a thin glitter layer after the hearts dry.
This style works well for spring days, brunch with friends, or a casual night out.
3. Glittery Heart Tips

Glittery Heart Tips
Want nails that catch the eye and stay in place? Try glittery heart tips. This look blends a French base with hearts at the tips and a sparkling top coat.
Start with a pink or beige base. Shape your nails and push back cuticles. Paint a French tip, keeping it thin.
Next, draw hearts along the tip line. Use a fine brush or a small dotting tool. Make the hearts the same size for balance.
Add a glitter layer over the hearts. Use fine glitter for a refined shine. Apply in light coats and let each dry before the next.
Seal everything with a clear top coat. This adds gloss and helps the design last longer. If you want more drama, try a tinted clear or a different heart color.
A touch of powdered glitter on the pink base can give a glow. For dates or events, this style shines with steady hands and patience.
Tips for best results:
– Choose ultra-fine glitter for a classy look.
– Apply thin layers and cap the tip to protect the design.
– Try pink, champagne, or neutral tones for variety.
With these steps, your nails will sparkle and look chic each time you show them.
“Glittery heart tips are a love letter to your nails! With just a splash of sparkle, you can turn a simple mani into a heartfelt masterpiece that shines bright!”
4. Heart Beat Nail Art

Heart Beat Nail Art
If you want nails that feel playful and chic, try heart beat nail art. A heartbeat line runs across the nail and ends in tiny heart shapes. It looks fresh and not too flashy.
What you’ll need
– Base coat and a solid nail color
– Fine detail brush or nail art pen
– Black or red polish (or your favorite shade)
– Top coat and optional rhinestones
How to create it
1) Paint your base color and let it dry completely.
2) With a fine brush, draw a smooth heartbeat line from one side to the other.
3) Add small hearts at the peaks of the line.
4) If you want extra sparkle, place a few rhinestones along the line.
5) Finish with a clear top coat to seal the design.
Color ideas
Red or black lines pop on light bases. You can swap the base to a soft pink or icy gray for a subtler look. Try a white line on a rich navy for contrast.
Tips to glow up the look
– Use a bold heartbeat color against a pale base for high contrast.
– Keep the line thin for a clean, refined feel.
– Make every nail unique by varying heart sizes or line twists.
This design brings a fun vibe to any manicure without taking hours. Now you know how to make it yours.
5. Floating Hearts

Want a nails look that’s soft and dreamy? Floating Hearts nails give you that feel. The trick is a translucent base and tiny hearts that drift across your tips. It’s perfect for date night or casual wear.
What you need
– sheer base polish
– dotting tool or fine nail art brush
– soft colors like pale blue, pink, or lavender
– top coat
– optional matte top coat for a modern touch
Here is why this design works: the sheer base lets the hearts rise gently, and light colors keep everything gentle and easy to wear.
Step-by-step
1) Prep your nails. File smooth, push back cuticles, and apply a thin base coat. Let it dry.
2) Apply one or two sheer coats of your chosen base color. Allow each layer to dry completely.
3) Draw soft hearts with a dotting tool or fine brush. Use pale blue, pink, or lavender.
4) Scatter the hearts in a drifting pattern. Mix sizes so some look tiny, others a bit larger.
5) Seal with top coat. If you like a chic, modern vibe, finish with a matte top coat; for shine, use glossy instead.
Tips for best results
– Let each color layer dry fully before adding more hearts.
– Clean your tool between colors to keep edges clean.
– Try different heart placements on each nail for a unique look each time.
This design adds a delicate touch to any outfit and lasts with simple care.
6. Heart Splatter Design

You want nails that feel bold and fun. The heart splatter design fits. It blends color splashes with tiny hearts for a lively look you can wear anywhere.
– Step 1: Pick a base color. Choose a shade you love. Let it dry completely.
– Step 2: Create the splatters. Dip a straw or a thin brush into a contrasting polish. Tap, flick, or puff to scatter color across the nails. Leave some white space so the shapes pop.
– Step 3: Add tiny hearts. Paint small heart shapes in white or another bright color. Place them near the splatters for balance.
– Step 4: Seal the look. Apply a clear top coat. This protects the art and gives a smooth, glossy finish.
Here is why it works. The mix of bold splashes and neat hearts creates a modern, playful vibe. You can swap colors to match outfits or moods.
Tips for best results:
– Use a thick polish for crisper splatters.
– Work in a well-ventilated area to stay safe.
– Experiment with color combos to discover fresh looks.
Next steps. Try this at home on a weekend. Practice makes the splatters more unique. Show off your heart art on socials to spark ideas for friends.@media (max-width: 768px) { .internal-links-flex { flex-direction: column !important; } .internal-links-flex > div { flex: none !important; } }
You might also like
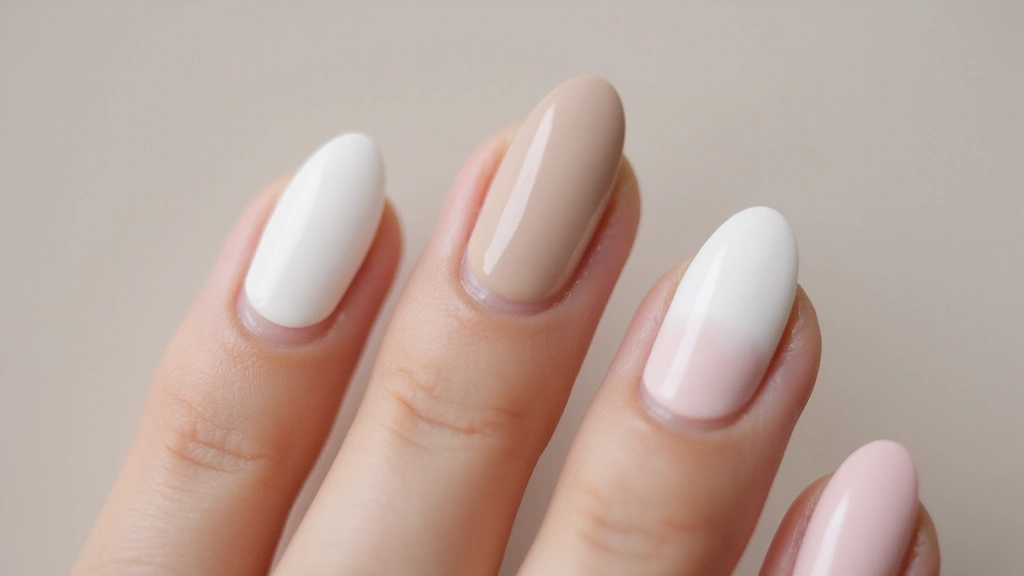
7. Minimalist Heart Outline

Minimalist Heart Outline
Looking for a nail look that stays quiet but chic? The minimalist heart outline fits. It puts a tiny heart on a clean, neutral base. The line stays crisp, the vibe stays fresh, and it works with almost any outfit.
To start, gather your tools. A thin nail brush helps draw small hearts. You can use a nail art pen or a striping brush for clean lines. Have a top coat ready to seal the look.
Here is why it works:
– Use a thin nail brush to draw a delicate heart outline on each nail.
– Pick a base color like beige, taupe, or pale gray for a soft backdrop.
– Outline the heart in black or gold for a clear, stylish edge.
– Keep the lines thin to keep the design light and refined.
– Finish with a matte top coat for modern elegance.
– Add a tiny dot or a second nail with a similar line for variety.
This look is versatile. It can be polished for work or dressed up for evenings. It lets your nails speak without loud patterns.
Next steps: practice on a nail wheel first, then try the design on one hand. Use guide tape to shape even hearts until you’re steady. When you’re ready, mix colors or sizes to create a small collection of minimalist hearts.
8. Watercolor Hearts

Want nails that feel soft and artistic? Watercolor hearts pull that off. The look blends pale colors into gentle heart shapes. It’s perfect for spring and summer and it looks like a small painting on your fingertip.
What you need
– Pure white nail base
– Light pink, pale blue, and lavender polish
– A makeup sponge for soft blending
– A clear top coat to seal the design
– A tiny brush or heart stamp for tiny hearts
How to do it
– Paint a clean white base and let it dry.
– On a small palette, dab the light pink, blue, and purple to create soft blobs.
– Gently press the makeup sponge on the nail to blend the colors. Keep the edges light.
– Draw tiny heart shapes with a fine brush or stamp a small heart in pink or white.
– Finish with a thin top coat to add a subtle, wet look.
Tips to perfect
– Clean the sponge between dips to keep colors light.
– Work in quick, small bursts so the blend stays soft.
– Try color combos like pink with mint or blue with peach.
Next steps: give this style a try on a single accent nail and compare with your plain nails. Your look stays gentle and easy to switch up.
9. 3D Heart Charms

Want nails that pop at your next event? Try 3D heart charms. They add real depth and a playful vibe. This look shines in photos and in real life.
Here is why it works: tiny hearts sit on the nail and catch light. A dab of glue holds them steady. A top coat seals the finish.
What you need:
– Base polish
– 3D heart charms
– Clear nail glue
– Quick-dry top coat
– Tweezers
Next steps:
1) Paint nails and let dry completely.
2) Put a small dot of glue where you want a charm.
3) Place a heart on the dot with tweezers.
4) Press for a few seconds to secure.
5) Apply top coat over and around the charm.
6) Let it dry fully.
Tips for long wear:
– Pick charms with a touch of sparkle.
– Arrange them in a loose pattern for interest.
– Use a strong top coat and avoid soaking hands right after.
Care and removal:
When you want them off, wrap foil and remover on each nail or soak briefly. Gently lift the charm to protect your nail.
This look gets compliments and makes your nails feel special.
10. Heart Lace Nail Art

Heart Lace Nail Art
You want nails that feel romantic and stay chic. Heart lace nail art delivers a soft, lasting look.
What you need matters. A pastel base, white or gold polish, and either a lace stamping plate or a fine brush for freehand lace. Heart shapes in the lace add a sweet touch without overpowering the whole nail.
Here is why this works: the gentle lace lines on a light base read timeless and elegant. It fits weddings, anniversaries, or a cozy date night.
Next steps are simple. Start with clean, shaped nails. Paint two coats of your pastel color and let them dry. Then apply the lace.
If stamping, ink the plate, pick a heart lace pattern, and stamp onto the nail. If painting by hand, use a tiny brush to draw small hearts and fine lace lines. Let each layer dry to avoid smudges.
Finish with a top coat to seal the design and add shine or a soft matte look.
Tips you can use today:
– Use a fine nail art brush for precise work.
– Choose colors that clearly contrast with the base.
– Reapply top coat every few days to keep chipping away.
Design ideas to try: lace on all nails, or a single lace accent nail. A tiny rhinestone near the cuticle adds a subtle glow.
Care tips: use gentle remover and skip harsh scrubbing to extend the life of your manicure.@media (max-width: 768px) { .internal-links-flex { flex-direction: column !important; } .internal-links-flex > div { flex: none !important; } }
You Might Also Like
11. Heart Patterned Nail Wraps

Want heart-shaped nails fast without a big art project? Heart pattern nail wraps are your go-to. They arrive pre-designed with cute heart motifs and are easy to apply at home. You just pick the nail that fits, peel off the backing, and press the wrap onto your nail. Finish with a top coat for extra durability and shine. It’s a simple way to get store-perfect nails in minutes.
What makes heart pattern wraps work
These wraps stay flat and snug against your nail, even along the curves. You get a smooth, clean finish every time. There are several sizes and many heart designs, so you can mix patterns or go consistent across all nails. When you’re ready for a new look, removal is quick with standard polish remover.
How to apply
1) Pick the wrap size that fits each nail.
2) Peel the wrap from its sheet.
3) Place it on the nail and press from base to tip.
4) Trim any excess with a nail file for a tidy edge.
5) Apply a clear top coat to seal the design and add shine.
Tips for best results
– Make sure nails are clean and fully dry before you start.
– Use a nail file to shave off any stray wrap along the edges.
– A top coat makes the design last longer and gives a glossy finish.
– Avoid soaking your hands in water for at least an hour after application to help them set.
Next steps? Grab a few heart patterns you love and try them tonight. With these wraps, you’ll have cute, flawless heart nails in no time.
Ready for heart design nails in minutes? Heart patterned nail wraps make it easy to express your love for nail art without the fuss – just peel, stick, and shine!
@media (max-width: 600px) {
.normal-quiz-iframe { min-height: 570px !important; height: 570px !important; }
}
12. Mixed Media Heart Nail Art

Are you after nails that feel like tiny art pieces? Mixed media heart nail art lets you mix color, shine, and texture for a look that catches the eye. You get depth and color in one design, plus a touch of fun with small charms or rhinestones.
What you need
– Base coat and a pale or clear base color
– Nail paint in a couple of shades for the heart and background
– Glitter and tiny charms or rhinestones
– Fine brush, tweezers, and a dotting tool
– Nail glue or a clear resin for heavy pieces
– Top coat to seal everything
How to do it
– Prep your nails with a base coat so the design lasts.
– Paint the nails with a light color as the base. Let it dry.
– Sketch a heart shape or place a heart stencil. Fill or outline it with your chosen color.
– Add texture in layers. Brush on a thin line of paint, sprinkle glitter, then press on a rhinestone or tiny charm with tweezers.
– Use a sticky base or glue for heavier pieces so they stay put.
– Create negative space by leaving parts of the nail bare if you want a lighter look.
– Finish with a clear top coat. Let it cure fully.
Tips to keep it clean
– Plan your layout first to avoid a cluttered look.
– Work in stages and let each layer dry before you add the next piece.
– Test texture by gently tapping the nail to feel every piece.
– Clean up edges with a small brush dipped in polish remover for a neat finish.
This heart art adds real texture and personality to your nails, making them feel like a tiny gallery you wear.
Mixed media heart nail art is where your creativity meets fun! Elevate your nail game with vibrant colors, textures, and sparkly charms. Who knew love could be this dazzling?
Conclusion

These heart design nails are perfect for anyone looking to express their love in a fun and stylish way.
With endless variations, there’s something for everyone to fall in love with! Whether you prefer minimalist styles or glittering designs, heart nails can easily complement your look for any occasion.
Don’t be afraid to try out these designs; they might just inspire you to create your very own unique heart nail art!
Frequently Asked Questions
What Are Heart Design Nails and Why Are They Popular?
Heart design nails are a charming and playful nail art trend that involves painting tiny hearts on your nails. They’re popular because they add a touch of romance and fun to your look, making them perfect for various occasions like Valentine’s Day, date nights, or simply to express your love for nail art!
These designs are versatile and can be adapted to match any outfit or mood, which makes them a favorite among nail art enthusiasts.
How Can I Create Heart Design Nails at Home?
Creating heart design nails at home is easier than you think! Start with a solid base coat to protect your nails, then choose your favorite colors for the heart design. You can use a fine brush, dotting tool, or even a toothpick to paint your hearts.
For a classic look, opt for red hearts on a nude base, or try a pastel ombre for something softer. Don’t forget to finish with a top coat for lasting shine and protection!
What Tools Do I Need for DIY Heart Nail Art?
For DIY heart nail art, you’ll need some basic tools to get started. Essential items include a good-quality base coat, nail polish in your chosen colors, a dotting tool or fine brush for precision, and a top coat to seal your design.
Optional tools like nail tape can help create clean lines, and nail wraps can offer an easy solution for quick heart designs without the fuss of painting!
Are Heart Design Nails Suitable for All Occasions?
Absolutely! Heart design nails are incredibly versatile. Whether you’re dressing up for a romantic evening, a casual day out, or even a festive celebration, there’s a heart design that fits the occasion.
From bold glittery heart tips for a party to minimalist heart outlines for a professional setting, you can tailor your nail art to match your style and event perfectly.
How Long Do Heart Design Nails Typically Last?
The longevity of heart design nails largely depends on the quality of products you use and your daily activities. Generally, with a good base coat, quality nail polish, and a top coat, you can expect your designs to last anywhere from 5 to 10 days.
To make them last longer, avoid harsh chemicals, wear gloves while doing chores, and consider touch-ups for any chips that might occur!
Related Topics
heart design nails
nail art
DIY nails
minimalist heart
glitter nails
pastel ombre
3D nail charms
easy nail designs
romantic nail art
seasonal nail trends
quick nail art
playful nail styles
These heart design nails are adorable! I can’t wait to try the one with the tiny hearts. Do you think it would look good with a sparkly top coat?
Did you know that nail art dates back to ancient Egypt? They used to decorate their nails with all sorts of colors! It’s amazing how far we’ve come!
Absolutely, Ava! It’s fascinating to see how nail art has evolved from ancient Egyptian customs to today’s creative designs. The heart patterns in this post are just one beautiful example of that ongoing artistry!
I once tried to do heart designs on my nails for Valentine’s Day, and it turned into a total mess! I ended up with more polish on my table than on my nails! Anyone else had a nail art disaster?
Haha, Nail art can definitely be tricky! I’ve had my fair share of polish mishaps too-sometimes it feels like the nails have a mind of their own. But hey, the mess is part of the fun and learning process! Maybe next time your heart designs will turn out perfect. Keep trying!