
Why I made this post. Simple, chic nails lift my mood on busy days. I crave minimalist nail designs that look polished without long sessions in front of a mirror. So I pulled together a collection that feels clean, quick, and easy to copy. A neat line and a soft shine can brighten a whole day.
Who it’s for. If you love clean lines, soft neutrals, and tiny accents that don’t shout, this is for you. If you’re juggling work, class, or family and still want a small win of self-care, you’ll find value here. These looks fit both casual days and dressier nights, with one simple idea in common: less is more.
What you’ll get. A set of 14 minimalist nail designs that are easy to copy and hard to forget. From barely-there sheer tones to crisp negative-space looks, each design is built for neat results with minimal effort. And yes, You Won’t Want to Miss #4! You’ll also find tips on choosing shades for your nails and finishes that suit your vibe.
How to apply. I kept things practical. You can do these with basic tools: nude or sheer polish, a thin brush or dot tool, and a good top coat. Start with clean nails, push back cuticles, and shape them. Apply a base coat, then one or two light coats, and finish with a top coat for shine or a satin feel.
What this means for you. These looks give you a reliable, stylish option without heavy commitment. They work on short and long nails, and you can switch finishes to match outfits or moods. They’re quiet, elegant, and ready for travel or a quick change between work and night.
Take action. Pick one design this week and try it. If you love the result, share a photo in the comments or tag me. I’m excited to see how minimalist nail designs show up in real life.
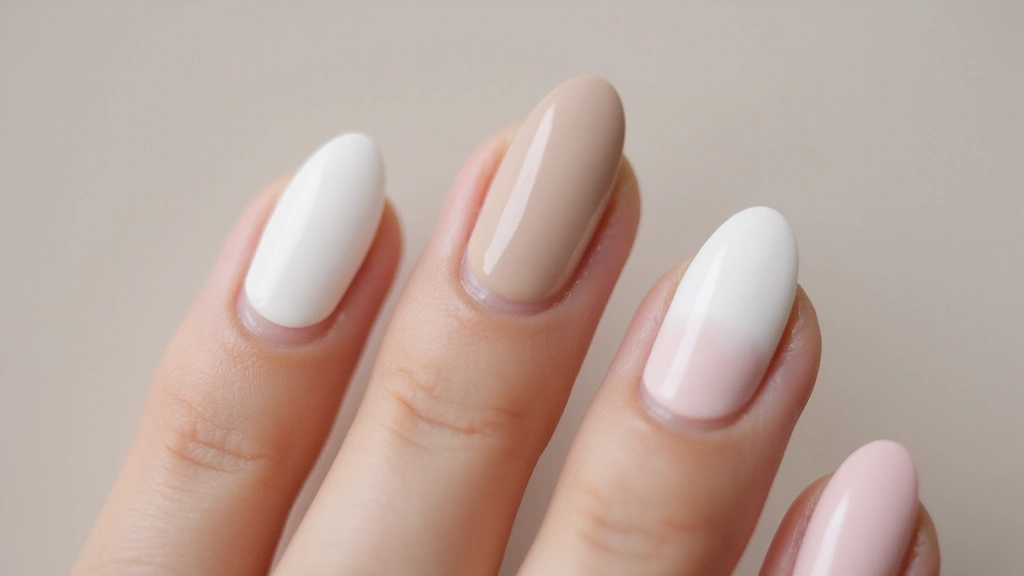
1. Soft Milky White Elegance

Soft Milky White Elegance
If you want a calm, clean look for any event, milky white nails work. They feel fresh and timeless. They bring a polished vibe to any outfit.
Here’s how to get the look:
– Choose the Right Base: Start with a nourishing base coat. It smooths the nail bed and protects your nails.
– Opt for Gel for Longevity: Gel polish gives a creamy, glassy finish that lasts longer and resists chips.
– Keep it Clean: Do a quick topcoat refresh every few days to keep the shade bright.
– Gloss vs Matte: A glossy finish reads ultra polished. A matte topcoat adds a modern edge.
Extra tips for best results:
– Thin Coats Rule: Apply in thin layers and build with two light coats, not one thick one.
– Cap the Free Edge: This helps reduce wear at the tip and make the color last.
– Hydration Wins: Finish with cuticle oil to keep the skin around nails healthy.
This shade works with every skin tone and pairs with nearly any wardrobe. It’s easy to wear, easy to maintain, and always chic.
Minimalist nails are your secret weapon for effortless elegance. A soft milky white not only enhances your natural beauty but also adds a polished touch to any outfit. Keep it clean, and let your nails shine!
2. Nude Shades for Every Skin Tone

Nude nails can be your easiest look. They blend with your skin and still read polished. The trick is to pick a shade that matches your undertone and your mood for the day. Here are simple steps to help you find your perfect nude and wear it well.
Nude shades can flex with your plan. They match outfits from workwear to weekend denim. They also pair with many makeup looks, from light eyes to bold lips. The right nude can blend in or stand out just enough. Test swatches in daylight and watch how the shade changes in different light.
– Undertones: Cool undertones pair with pinkish nudes. For deeper or cooler skin, a rosy pink nude can blend without washing you out.
– Textures: A creamy finish feels smooth and modern. A sheer nude lets your nail bed show a touch of color, while a glossy nude adds a hint of shine.
– Minimal art: A tiny gem or a delicate line adds personality with no crowding. Keep the art color soft so the nude remains the star.
– Practical tips: Test swatches on daylight to see how the shade blends. Start with a shade one step lighter or darker than your skin.
With nude shades, you cover your nails and lift your whole look for any occasion.
3. Sheer Finishes: The Key to Natural Beauty

If you want nails that look natural but polished, sheer finishes are for you. They let the natural nail show through and keep a clean, bright look.
Sheer finishes are forgiving. Small flaws blend with the color instead of shouting out.
How to make sheer nails work:
– Layer thin coats to build color and depth until you reach your preferred opacity.
– Try a French twist by using sheer polishes on the tips for a modern take on the classic manicure.
– Short nails benefit most: sheer shades visually lengthen nails and keep the vibe light.
Give it a try and you may love the low-maintenance, chic feel.
To apply well:
– Start with clean, dry nails and a quick buff.
– Apply a base coat to protect and smooth the surface.
– Add 2–3 ultra-thin layers of sheer polish, letting each dry before the next.
– Finish with a clear top coat for shine and lasting power.
Common questions:
– Will it chip? A light top coat helps; reapply when you see wear.
– Is it work-friendly? Yes—subtle, professional, and neat.
Sheer finishes stay fresh and suit many skin tones and styles.
With these tips, you can wear sheer polish anywhere—from work to weekends. Keep a top coat in your bag for quick touch-ups.
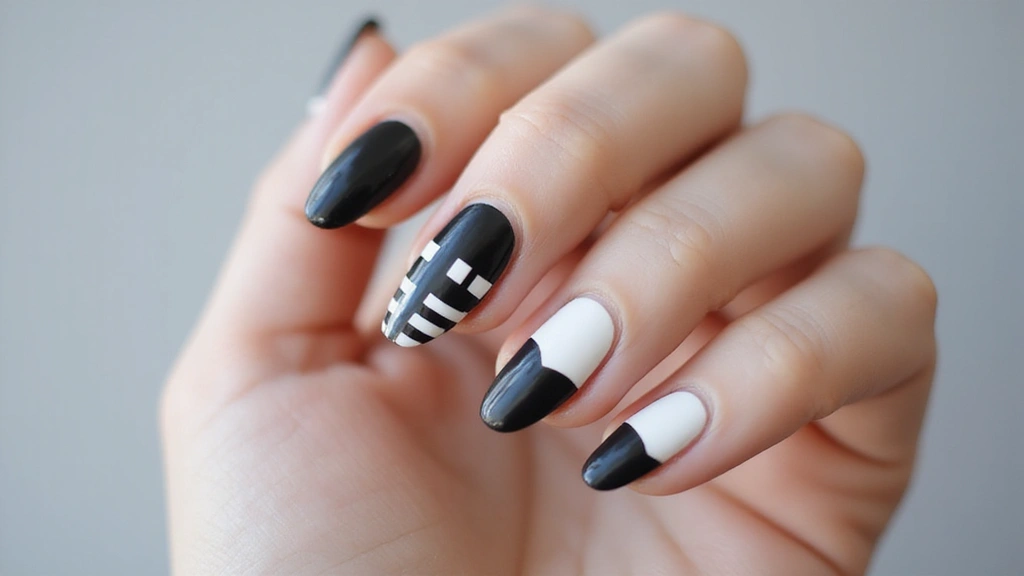
4. Geometric Lines on a Minimalist Canvas

You want nails that feel chic with little fuss. Geometric lines on a minimalist canvas give a modern, easy look you can wear anywhere. It works on nude shades, blush tones, or bold black for contrast.
– Use Tape for Precision Use nail tape for precision, so lines stay sharp and clean, even on short nails.
– Choose Monochrome for a Sleek Look Choose a monochrome palette or soft shades to keep the look calm while letting the lines stand out.
– Play with Negative Space Play with negative space by leaving small sections bare, which adds depth and a refined vibe.
– Finish with a Bold Top Coat Finish with a bold top coat to seal the design and give a glossy, durable shine.
To get this look, gather your supplies: nail tape, a fine brush, a base coat, a top coat, and your color choices.
1. Prep nails by cleaning, shaping, and buffing.
2. Paint a smooth base color and let it dry completely.
3. Place thin tape to mark the lines, then press down firmly.
4. Fill with the second color and slowly lift the tape to reveal clean edges.
5. Clean the edges with a brush, then cap all nails with top coat.
Geometric lines give a statement that’s simple, elegant, and easy to wear.
@media (max-width: 600px) {
.visual-quiz-iframe { min-height: 995px !important; height: 1100px !important; }
}
5. Classic French Twist with a Modern Edge

If you want a French manicure that feels fresh but still chic, this tweak can help. The classic white edge stays elegant, but color choices lift it into a modern vibe. You get a clean line with more personality.
– Colored Tip: Swap white for pastel or bold shades. A pale mint, soft lavender, or sunny coral keeps the silhouette, while a loud blue or pink makes a statement. Use a steady hand or a nail guide, apply the tip color, and seal with a clear top coat for durability.
– Ombre Effect: Create a smooth nude base that fades into pink or peach at the tip. Lay down a nude shade, then blend with a small sponge or soft brush to craft a gentle gradient. Finish with a top coat to keep the fade even and glossy.
– Glitter Accent: A hint of sparkle at the tips adds glam without going overboard. Tap on fine glitter or a glittery polish in a thin strip, then blend edges with a clear coat. This works well on long and short nails alike.
This approach stays timeless while feeling current. Keep nails well-groomed, trim cuticles, and choose colors that suit your skin tone. For longevity, apply a strong base coat and recoat every few days.
A classic French manicure gets a modern twist when you swap out the white tips for your favorite colors. Whether it’s soft pastels or bold hues, your minimalist nails will shine with personality!
6. Subtle Dot Art for a Fun Spin

Dot art fits the minimalist vibe you crave. Tiny dots add texture without shouting. Dots go with almost any color combo, from soft pastels to bold contrasts.
Tools make the job easier. A dotting tool gives clean, round dots and steady sizes. If you don’t have one, a toothpick or a bobby pin can work in a pinch.
Color choice matters. A dark base makes light dots pop. A light base lets dark dots stand out. Try soft pinks with white, navy with pale blue, or gray with black for a calm, modern look.
Placement ideas. Put dots at the base of your nails for a subtle cue. Add dots on one nail as a tiny accent. You can line them up along the cuticle or sprinkle them across the tip.
Try this quick setup.
– Use a base coat and your chosen base color.
– Use a dotting tool to place dots in your chosen pattern.
– Alternate dot sizes by rotating the tool or using a larger/smaller end.
– Finish with a clear top coat to seal and shine.
Give dots a try and adjust size and placement to fit your mood.@media (max-width: 768px) { .internal-links-flex { flex-direction: column !important; } .internal-links-flex > div { flex: none !important; } }
You might also like
7. Natural Ombré for a Soft Look

Want a soft, natural look that still feels polished? Natural ombré nails give you a gentle gradient without bold lines. This style works on real nails and adds a quiet glow.
– Choose Similar Shades: Pick nude to milky tones that sit close on the color wheel for a seamless blend.
– Prep the Nail: Lightly buff and shape, then push back cuticles and clean the surface so polish sticks smoothly.
– Apply a Subtle Base: Start with a sheer nude base to set a neutral ground for the gradient.
– Use a Sponge for the Gradient: Dampen a makeup sponge and gently dab the second shade onto the nail, blending from cuticle to tip.
– Build in Light Layers: Apply 2–3 thin coats and let each dry before the next to keep the fade soft.
– Seal with Shine: Finish with a glossy topcoat to lock in the color and give a salon-quality finish.
– Tips for Perfection: If you see a patch, add a light dab with the sponge and smooth the edge with a clean brush.
This natural ombré look works on both short and long nails. With practice, you can nail it quickly for daily wear. Keep nails dry after washing to help the polish last.
@media (max-width: 600px) {
.normal-quiz-iframe { min-height: 570px !important; height: 570px !important; }
}
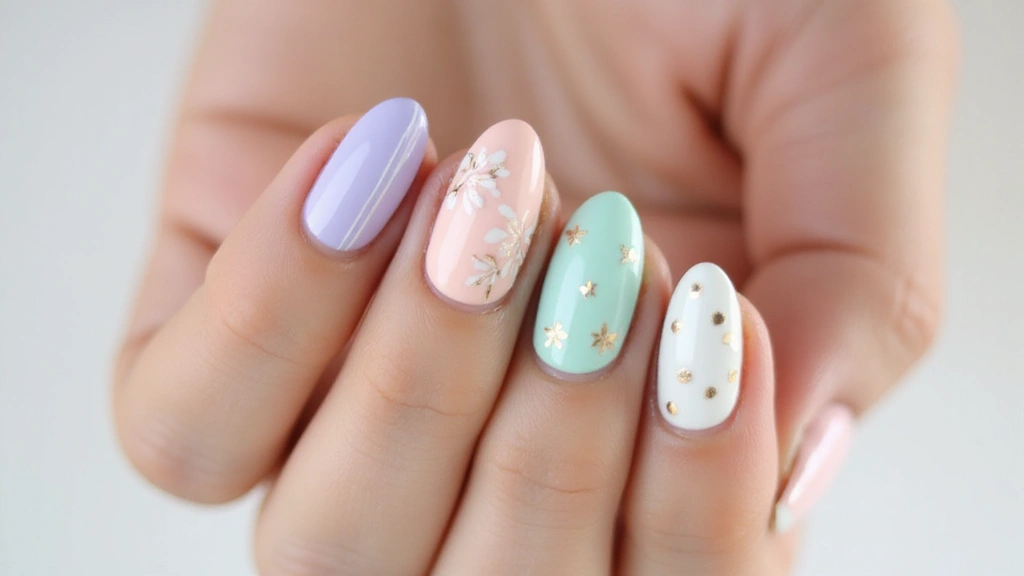
8. Minimalist Nail Art with Metallic Accents

You want nails that feel polished but aren’t loud. Minimalist nail art with metallic accents gives you that balance—clean plus a hint of glam. You can wear it anywhere, from work to weekends. Here’s a simple, shop-ready way to pull it off.
– Base color: Keep the base nude, milky, or soft pink. A calm backdrop lets the metal pieces stand out without competing with color.
– Metallic accents: Use just a few tiny elements. Think one dot near the cuticle, a slim stripe, or a delicate foil shard. Place them with care.
– Metal choice: Pick one metal—gold or silver—and use it for all accents. Mixing metals can feel busy, so keep to a single tone for cohesion.
– Finish and texture: Decide between a shiny gloss or a subtle satin finish. Gloss makes the metal pop; satin keeps the look extra restrained.
– Application tips: Work with a fine brush or dotting tool. Apply thin layers, let each dry, then seal with a clear top coat to extend wear.
– Practical ideas: Try negative space by leaving a slim crescent at the base on one nail, then dot or line tiny accents on the others. It reads chic and modern.
This approach stays minimal while giving you a luxe touch you can wear daily.
9. Negative Space Nails for a Trendy Twist

Want nails that feel polished without a heavy design? Negative space nails fit the bill. You leave parts of the nail bare, so your natural nail color shows through. The look is clean, chic, and easy to match with almost any outfit. It also makes each nail look longer because the eye travels along the open space. Here’s how to get it right.
– Choose simple shapes Try tiny triangles, straight lines, or simple stripes. Keep shapes small and crisp so the bare areas stay clear.
– Balance the space Spread the bare areas across fingers and nails. If one nail is busy, let the others breathe.
– Add color with contrast Paint the rest of the nail in a bold shade for pop. A glossy top coat makes lines sharp; matte finish feels modern.
This approach blends simplicity with trend, giving you a fresh, wearable look.
Want to experiment? Start with one hand and a couple of nails. Use nail tape to keep edges clean, or a fine brush for freehand shapes. If your nails are short, begin with a small corner space and grow with confidence. Try diagonal blocks, or a single strip of color along the tip. Negative space nails pair well with nude tones, black and white, or bright pops.
10. Subtle Marble Effect for Textured Elegance

If you want nails that feel chic but stay simple, this subtle marble look is for you. It adds texture and depth without shouting.
Here’s how you can nail it at home:
– Use a Soft Palette: Stick to milky whites or soft greys for a delicate marble look. Layer the color in thin coats so the veining stays soft.
– Try Water Marbling: This technique creates gentle swirls that mimic real marble. Work quickly and keep your brushes clean so the patterns stay crisp.
– Seal with a Glossy Topcoat: Finish with a clear gloss to boost shine and help the design last. Let the topcoat dry fully for a glassy finish.
To apply it at home, start with a pale base coat. Build the color in thin layers for a smooth, even field. For subtle veins, dab a tiny bit of grey in a few spots and blend softly. If you try water marbling, practice on a nail wheel first so you know how the pattern moves. Then dip each nail slowly to transfer the marble onto your nail.
Finish with the glossy topcoat and give it a moment to set. The shine makes the veins pop and keeps the look long-lasting.
The result is effortless elegance that catches eyes without shouting.
11. Soft Gradient Nail Art

Soft gradient nails feel light, fresh, and easy to wear. By blending milky white into nude or pastel, you get an ethereal look that fits any day, any mood.
– Prep nails by cleaning, filing, pushing back cuticles, and applying a thin base coat; this creates a smooth canvas that helps the gradient stay even and last longer.
– Choose your colors: milky white with nude or a soft pastel to build an airy base.
– Use a makeup sponge: dab the two colors onto a sponge, then press gently onto the nails in light, stippling motions.
– Blend gently and build: repeat with light dabs, letting each layer dry before the next for a smooth, seamless transition.
– Seal with shine: finish with a glossy topcoat to lock in the gradient and give nails a polished look.
– Care and maintenance: reapply the topcoat every few days, keep hands dry, and use a base coat if you scrub dishes.
This soft gradient stays elegant on short or long nails and pairs well with any minimalist outfit.
Soft gradient nails are like a breath of fresh air—effortlessly gorgeous and perfect for any occasion. Embrace milky whites and nude shades for an ethereal look that speaks to your mood!
@media (max-width: 768px) { .internal-links-flex { flex-direction: column !important; } .internal-links-flex > div { flex: none !important; } }
You Might Also Like
12. Simple Stripes for a Chic Look

Want a chic, minimalist nail look that isn’t hard to pull off? Simple stripes give you a clean, modern vibe with almost no fuss. They work on short or long nails and match any outfit.
Materials you’ll need
– Base coat
– A base color (neutral shades work best)
– Stripe tape or a fine striping brush
– A second color for the stripes
– Top coat
How to do it
1. Prep nails. Wash hands, shape the edges, push back cuticles, and lightly buff the surface.
2. Paint base color. Apply two coats and let each coat dry completely.
3. Map the stripes. Place striping tape where you want the lines and press the edges down firmly.
4. Add the stripes. Paint over the taped area with the second color, then remove the tape while the polish is still fresh.
5. Accent nail. Repeat stripes on one nail or keep all nails clean for a true minimalist look.
6. Seal the design. Finish with a top coat to smooth edges and add shine.
Pro tips
– Work with steady, light strokes to avoid smudges.
– If a line slips, fix it quickly with a tiny brush dipped in remover, then retape.
– Cap the free edge to help the stripes wear longer.
This striped style is versatile for casual days and polished events alike. It’s easy to customize, adds just the right contrast, and stays true to minimalist vibes you love.
Simplicity is the ultimate sophistication. With just a few lines, you can create minimalist nails that elevate your style effortlessly – chic, modern, and oh-so-easy to achieve!
13. Floral Minimalism for a Touch of Nature

You want nails that look fresh and calm, not loud or crowded. Floral minimalism uses tiny flowers on a nude or milky base. It adds a touch of nature while staying simple and elegant. Here’s how you bring this style to life.
– Prepare your nails: shape them, push back cuticles, and buff lightly.
– Choose a nude or milky base and apply base coat.
– Create a soft canvas with one sheer layer first.
– Use a dotting tool to place tiny blooms. Keep flowers small.
– Stick to a limited color palette. Muted pinks, creams, and sage read as calm.
– Add a few tiny leaves for depth without crowding.
– Finish with a top coat: glossy for shine or matte for a chic look.
Tips for crisp tiny blooms
– Use a clean brush and a steady hand.
– Practice on a nail wheel first.
– Let each layer dry before adding the next.
This look stays neat as you go about your day. It pairs well with light outfits and fits daily wear.
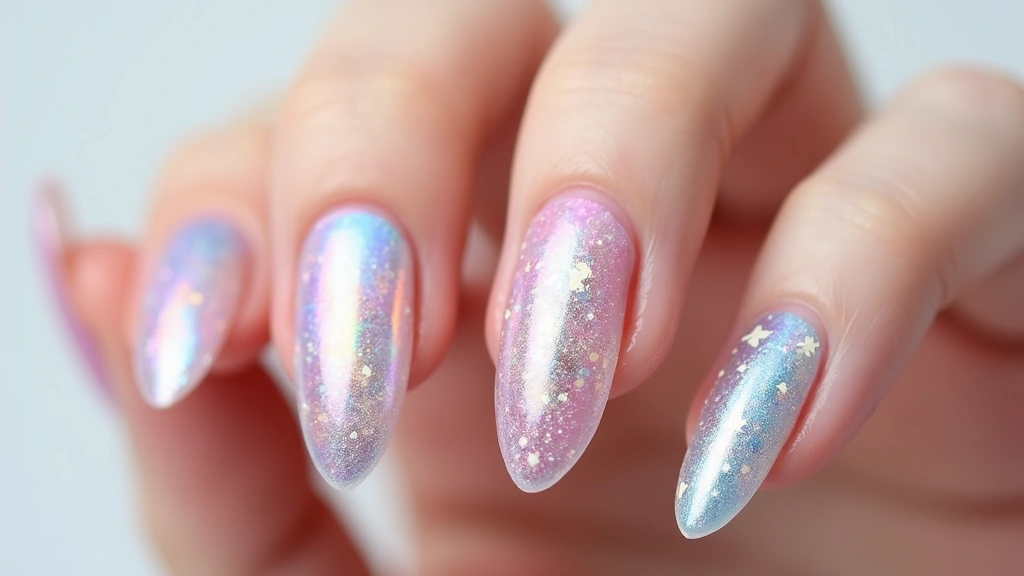
14. Metallic Foil Accents for a Minimalist Glam

Metallic foil adds a luxe touch to simple nails. Used the right way, it glimmers without shouting. You get a clean, modern look that works with any outfit. Here’s a simple plan to pull off minimalist foil.
– Base matters: Pick a calm canvas. Milky white, nude, or soft pink keeps the foil the star.
– Place small pieces: Cut tiny foil bits. Put them on one or two nails for a quiet glow.
– Seal the shine: Press the foil flat with a brush or tweezers. Top it with a thin clear coat to lock the design.
– Keep edges clean: Let the foil stop before the cuticle for a neat line.
– Choose a color hit: Gold for warmth, silver for a cool glow, or rose gold for soft shimmer.
This approach stays sleek and wearable. It catches light without stealing focus. It works for beginners and for a quick update.
– Try one accent nail for a subtle nod to glam.
– Or add foil on two nails for a balanced, minimalist statement.
Take a moment to plan your edge and you’ll nail a chic, minimal look every time.
Conclusion

Minimalist nail designs are all about showcasing beauty in simplicity.
Whether you’re drawn to milky whites, nude shades, or sheer finishes, these styles are versatile and effortless. You don’t always need bold colors or intricate designs to make an impact—sometimes, less truly is more!
Why not take inspiration from these ideas and experiment with your next manicure? Your nails deserve a little love.
Frequently Asked Questions
What Are Minimalist Nail Designs and Why Are They Popular?
Minimalist nail designs focus on simplicity and elegance, often featuring milky whites, nude shades, and sheer finishes. They are popular because they offer a chic, polished look without the need for elaborate decorations. Perfect for busy lifestyles, these designs uplift your mood while being easy to maintain.
How Do I Choose the Right Nude Shade for My Skin Tone?
Choosing the right nude shade involves understanding your undertones! If you have warm undertones, look for shades with a hint of peach or yellow. Cool undertones work well with pink or lavender shades. The right match will blend seamlessly with your skin, providing a polished look that’s effortlessly gorgeous!
What Tools Do I Need to Create Minimalist Nail Art at Home?
Creating minimalist nail art at home is simple! You’ll need a few basic tools: a good-quality base coat, your choice of nail polish in milky whites or nude shades, a top coat for shine, and some nail art brushes or dotting tools for designs. Don’t forget to have some cotton pads and nail polish remover on hand for any touch-ups!
Can I Achieve Minimalist Nail Designs Without Professional Help?
Absolutely! Many minimalist nail designs are easy enough to achieve at home. Styles like simple stripes, dot art, and negative space nails can be done with a steady hand and a bit of practice. Follow the tips provided in the article, and you’ll be flaunting your chic nails in no time!
What Are Some Tips for Making My Minimalist Nails Last Longer?
To make your minimalist nails last longer, start with a solid base coat to protect your natural nails. Apply thin layers of polish and seal everything with a high-quality top coat. Avoid harsh chemicals and wear gloves when doing chores. Regular maintenance like touching up chips can help keep your nails looking fresh and gorgeous!
Related Topics
minimalist nails
nude shades
sheer finishes
milky white nails
easy nail art
geometric designs
negative space
subtle marble
floral minimalism
quick nail designs
beginner friendly
chic nail art