
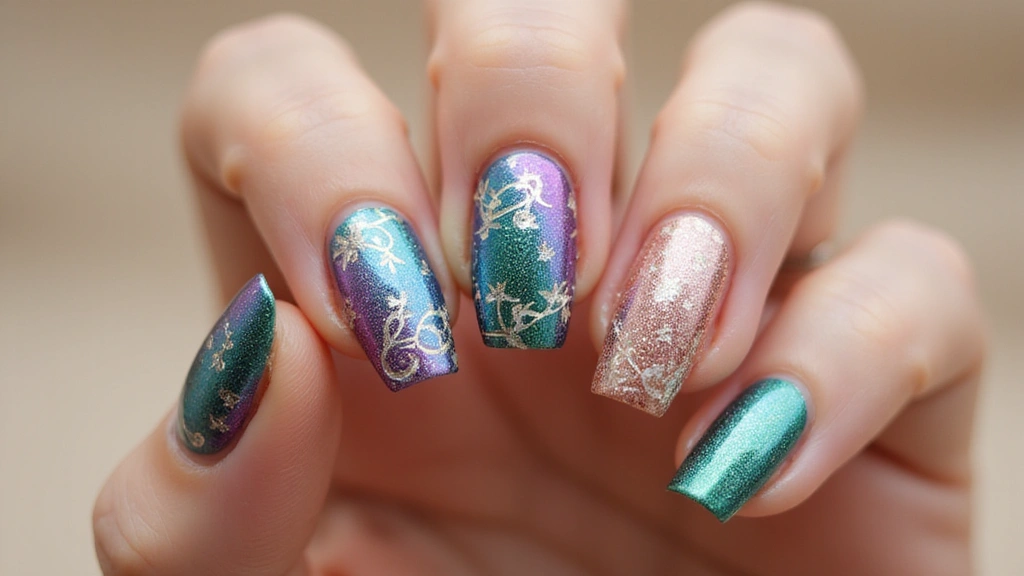
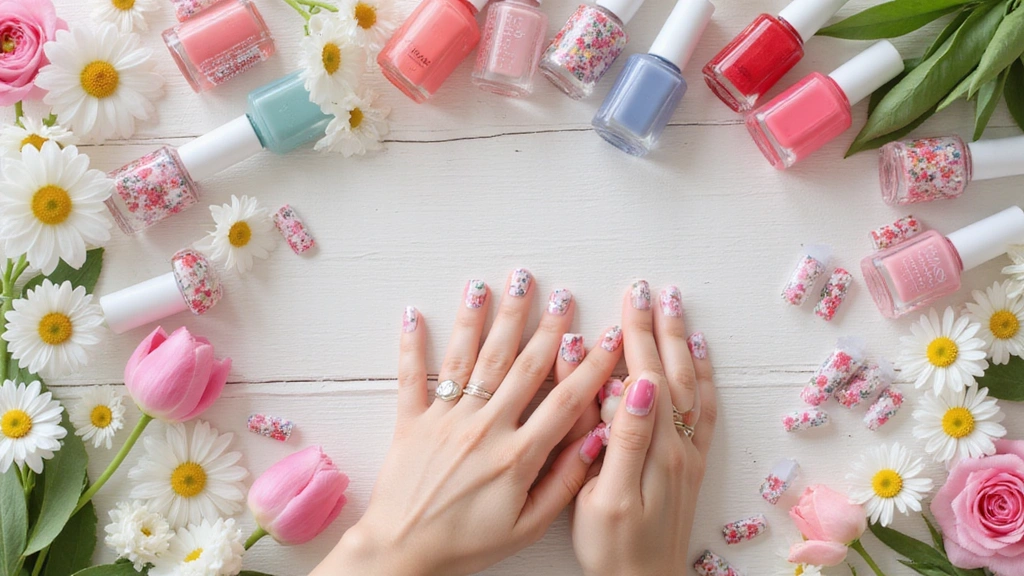
If you’re looking to add a touch of magic and shimmer to your nails, iridescent nail designs are the way to go! These mesmerizing shades change color with the light, creating a stunning rainbow effect that’s hard to resist. From subtle pearly glows to bold holographic statements, iridescent nails can fit any personality and occasion. Whether you’re getting ready for a special event or just want to pamper yourself, these designs promise to make your fingertips as fabulous as you feel. Get ready to be inspired by 15 breathtaking looks that will have everyone staring at your nails in awe!
1. Iridescent Pearl Ombré

Imagine a beautiful gradient that dances between soft iridescent whites and delicate pastels. The iridescent pearl ombré is a dreamy way to incorporate shimmering effects into your nail art. Start by applying a sheer base, then blend in your iridescent polish from the tips towards the cuticle for a soft fade. This design is perfect for any occasion, from casual brunches to elegant weddings. You can mix and match colors like peach, lavender, and mint for a personalized touch.
Tips:
– Use a makeup sponge for an airbrush effect.
– Seal your design with a glossy top coat to enhance the shine.
– Consider adding tiny pearls or gemstones at the base for extra sparkle!
2. Holographic Glitter Tips

Take your classic French manicure to another level with holographic glitter tips! This design combines the elegance of a traditional French tip with the playful shimmer of holographic polish. Start with a nude base and dip your tips into a holographic glitter for an eye-catching finish. The best part? This design is versatile; you can wear it for a night out or make it your go-to everyday look.
Unique Insights:
– Layer your holo glitter over a colored polish for a bolder statement.
– Experiment with different shapes for the tips—try triangles or chevrons for a fun twist.
– Finish with a matte top coat for an unexpected texture contrast.
3. Iridescent Marble Effect

Marbling is a beautiful nail art technique that mimics the look of natural stone, and when you add iridescence? Pure magic! To create the iridescent marble effect, start with a solid color base, then swirl different shades of iridescent polishes using a thin nail art brush or a dotting tool. The result is a stunning, multi-dimensional design that catches the light beautifully.
<strongSuggestions:
– Pair shades of blue and green for a refreshing ocean vibe.
– For an autumn look, try warm hues like copper and gold.
– Seal your design with a high-gloss top coat to keep that shine!
4. Prism Rainbow Nails

Let your nails be the canvas for a prism rainbow! Using a combination of iridescent colors, create a rainbow effect that shines bright in any light. Start with a white base coat to make the colors pop, then use a small nail brush to apply the iridescent shades in a rainbow order. This whimsical look is perfect for summer festivals or fun outings.
Tips:
– Try using neon shades for an ultra-vibrant look.
– Add a clear top coat to keep everything smooth and shiny.
– Consider using nail stickers or stencils for clean lines between colors.
5. Iridescent Foil Accents

If you’re looking to add an artsy touch to your nails, iridescent foil accents are the perfect choice. This technique involves applying pieces of iridescent foil onto your nail design to create a stunning layered effect. Start with a solid color base and apply the foil in random patches for an eclectic vibe. The iridescent foil will reflect light differently, providing a unique shimmer with every angle.
Creative Ideas:
– Use foil in the shape of leaf patterns for a nature-inspired look.
– Pair with a matte base for a chic contrast.
– Layer multiple colors of foil for a multi-dimensional effect.
Add a touch of artistry to your iridescent nails! With foil accents, each nail becomes a unique masterpiece that shimmers with every move. Embrace the eclectic vibe and let your creativity shine!
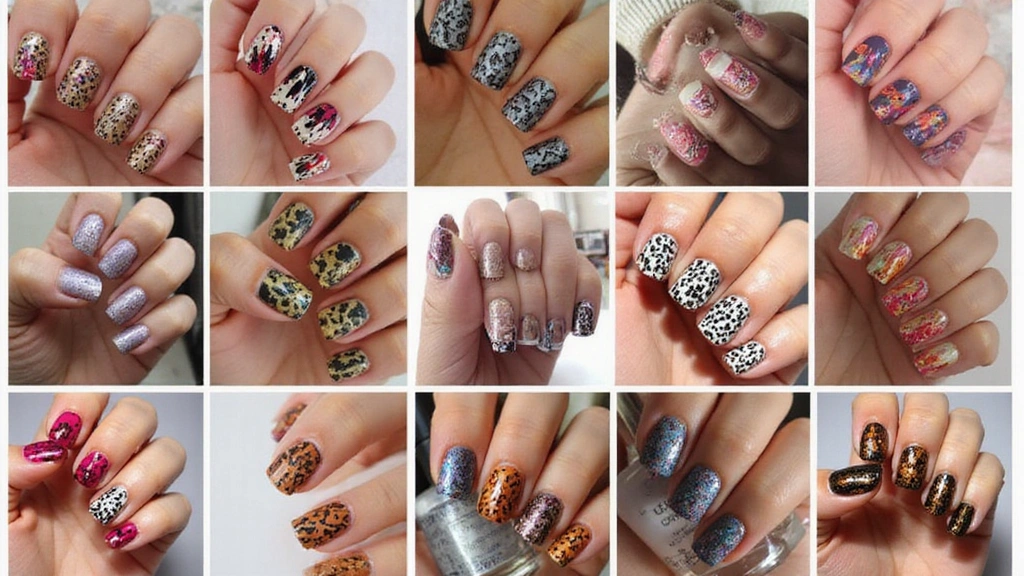
6. Shimmering Animal Print

Animal print gets a fabulous upgrade with an iridescent twist! Whether you choose leopard spots or zebra stripes, using iridescent polishes can make your nails a statement piece. Start with a solid color base, then use a nail art brush to add your animal print design with iridescent polish. The shimmering effect adds depth and flair to the classic pattern.
Suggestions:
– Create a base using earthy tones for a more muted animal vibe.
– Pair your iridescent animal print with solid color accents on other nails for a balanced look.
– Finish with a glossy top coat to keep everything sleek and shiny.
7. Iridescent Glitter Fade

For a sparkling and fun look, try the iridescent glitter fade. This design starts with a solid color base and gradually fades into a glitter effect towards the tips. Use an iridescent glitter for a magical touch. The key is to build up the glitter gradually, so it looks like it’s blending into your base color perfectly.
Tips:
– Use a damp brush to pick up more glitter for an intense look.
– Consider adding tiny star or moon stickers to enhance the celestial vibe.
– Seal with a top coat for longevity and shine.@media (max-width: 768px) { .internal-links-flex { flex-direction: column !important; } .internal-links-flex > div { flex: none !important; } }
You might also like
8. Geometric Iridescent Nail Art

Get modern and chic with geometric iridescent nail art! This design uses bold lines to create various shapes on your nails, highlighted with iridescent polish that makes the shapes pop. Start with a nude base and use striping tape to create clean geometric lines. Fill in the shapes with different iridescent colors for a trendy look.
Unique Insights:
– Experiment with different shapes like triangles, squares, or even abstract designs.
– Use contrasting colors for the base and shapes for added drama.
– Top it off with a glossy coat to keep everything vibrant and fresh.
9. Iridescent Lace Details

Combine elegance and fun with iridescent lace details. This design can transform any outfit into something special. Start with a solid base color, then use a thin brush or lace stamping plate to apply iridescent patterns on top. The lace effect adds a romantic touch, while the iridescent finish gives it a modern twist.
Suggestions:
– Try layering different lace designs for a more intricate look.
– Use light pastel colors for a delicate, bridal-inspired vibe.
– Seal with a high-gloss top coat to keep the lace defined and shiny.
10. Iridescent Watercolor Effect

Watercolor nails are all the rage, and adding an iridescent effect takes them to the next level! This design mimics the soft, blended look of watercolor paintings, enhanced with shimmering iridescent hues. To create this effect, use a thin nail brush and mix iridescent polish with a clear base to achieve a transparent look. Apply in soft strokes for the best results.
Tips:
– Use a light touch to create soft, flowing lines.
– Experiment with various color combinations to find your perfect palette.
– Finish with a matte top coat for a modern take!
11. Iridescent Clouds

Capture the beauty of a sunset sky with iridescent clouds on your nails. This whimsical design uses soft colors to mimic the look of fluffy clouds, enhanced by iridescent polish. Start with a gradient base, then use a sponge to dab on cloud shapes with iridescent white or pastel polish. This design is playful and perfect for those who love a bit of whimsy.
Suggestions:
– Pair with a solid color on other nails for a curated look.
– Add small star decals for a dreamy night sky vibe.
– Seal with a glossy top coat for a smooth finish.
Let your nails paint a whimsical sunset with iridescent clouds! This playful design adds a touch of magic to your look, reminding you that beauty is in the details.
12. Iridescent Broken Glass

The broken glass effect is not only trendy but adds a unique flair to your nails. This design mimics shards of glass using iridescent flakes or pieces that create an edgy look. After applying a base color, place the iridescent shards at random angles on your nails. This design will shine and reflect light beautifully, making it a conversation starter!
Unique Insights:
– Combine different sizes of shards for depth.
– Use a dark base color to make the iridescent pieces pop.
– Seal with a clear top coat to keep the look intact.@media (max-width: 768px) { .internal-links-flex { flex-direction: column !important; } .internal-links-flex > div { flex: none !important; } }
You Might Also Like
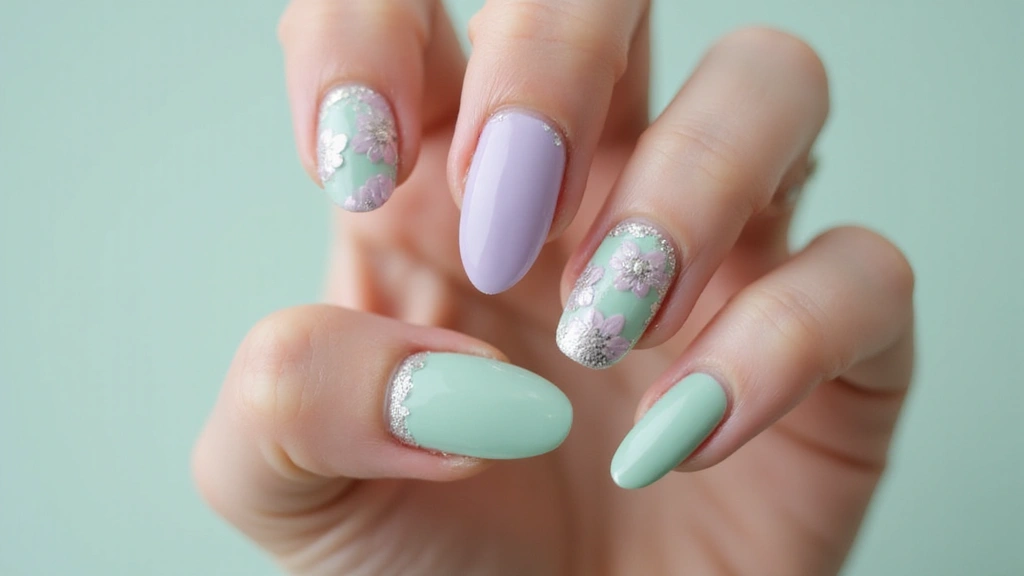
13. Iridescent Floral Accents

Bring the beauty of nature to your nails with iridescent floral accents. This design employs delicate floral patterns enhanced by iridescent polish. Start with a pastel or nude base and paint small flowers using various iridescent shades. These accents can elevate any look, giving you a touch of elegance and femininity.
Creative Ideas:
– Try using floral stickers for a quick and easy design.
– Opt for a matte base to contrast the glossy floral detailing.
– Add tiny rhinestones at the center of each flower for added sparkle.
Add a touch of nature to your nails with iridescent floral accents! They not only elevate your look but also showcase your unique style. Who knew elegance could bloom right on your fingertips?
14. Iridescent Candy Stripes

Add a playful touch to your manicure with iridescent candy stripes! This fun design brings a sweet, youthful vibe to your nails. Start with a white or pastel base color, then create stripes using iridescent polishes in varying widths. You can even alternate colors for a rainbow candy effect! This design is perfect for summer parties or any time you want to add a little joy to your day.
Tip:
– Use striping tape to achieve clean lines.
– Pair with a bright base color for a pop-art feel.
– Seal with a glossy top coat for a smooth finish.
Unleash your inner artist with iridescent candy stripes! Brighten your day and your nails with a playful design that adds a sprinkle of joy to any occasion. Why blend in when you can shine like a rainbow?
15. Iridescent Galaxy Nails

Dream of the cosmos with iridescent galaxy nails! This design captures the beauty of outer space with a mix of deep colors enhanced by iridescent polish. Start with a dark base color, then use a sponge to apply various iridescent shades, blending them together to create a galaxy effect. Finish with small star decals for that final touch.
Unique Insights:
– Use a glitter top coat to add extra sparkle.
– Experiment with different color combinations for your own personal galaxy.
– Seal with a top coat to lock in your beautiful design.
Conclusion

Iridescent nails are not just a trend; they’re a way to express your personality and creativity! From elegant ombré looks to playful geometric designs, there’s an iridescent style for everyone. Embrace these shimmering effects to add enchantment to your nail art routine, and don’t forget to share your favorites with friends!
Let your nails shine and inspire others with these breathtaking designs!
Frequently Asked Questions
What are iridescent nails, and why are they so popular?
Iridescent nails are a dazzling nail design that showcases a shifting spectrum of colors, giving your nails a magical, rainbow-like effect. They’re popular because they add a unique touch to nail art, making your manicure stand out in any light. Whether you’re going for a chic look or something playful, iridescent nails can elevate your style effortlessly!
How can I achieve the perfect iridescent ombré effect at home?
Creating the perfect iridescent ombré effect at home is easier than you think! Start with a solid base coat in a lighter shade, then use a makeup sponge to dab on the iridescent polish, blending it towards the tips of your nails. For a seamless transition, use gentle tapping motions. Finish with a top coat for that extra shine, and you’ll have a stunning ombré manicure that turns heads!
What nail care tips should I follow to keep my iridescent nails looking fresh?
To keep your iridescent nails looking fabulous, always start with a good base coat to protect your nails. Regularly moisturize your cuticles and use a top coat every few days to maintain shine. Avoid exposure to harsh chemicals and wear gloves during chores. If you want to change designs, gently remove the polish without damaging your nails and give them a break before applying new colors!
Are iridescent nail designs suitable for all occasions?
Absolutely! Iridescent nail designs are incredibly versatile. From elegant iridescent pearl ombré for weddings to playful geometric patterns for casual outings, there’s a design for every occasion. Just choose the color palette and style that best fits the vibe of your event, and you’ll shine like a rainbow no matter where you go!
What are some creative ways to incorporate iridescent accents into my nail art?
Get creative with iridescent accents by experimenting with techniques like iridescent foil accents, glitter fades, or even combining them with other designs like floral or marbling! You can use iridescent polish to create stripes, dots, or intricate patterns. The beauty of iridescent nails is their ability to blend with various styles, so don’t hesitate to mix and match for a unique look!