
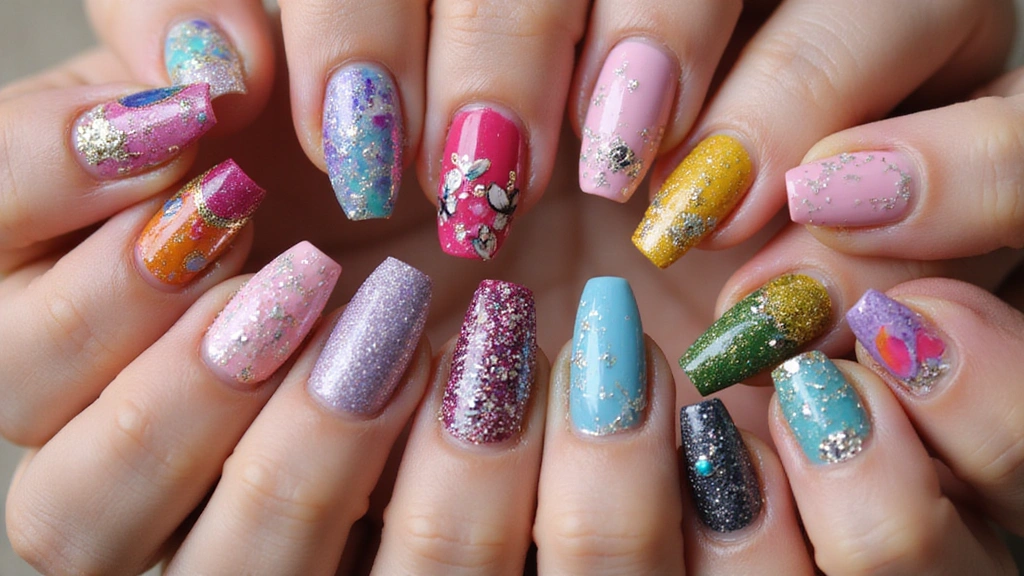
Nail art has transformed into a widespread form of self-expression, allowing individuals to showcase their creativity at their fingertips.
From glittering gems to intricate patterns, the possibilities are truly endless! Whether you’re a beginner or a seasoned pro, these DIY nail art designs will inspire you to transform your nails into tiny canvases.
Get ready to be amazed by these 15 stunning designs that you can easily recreate at home. Grab your polish and tools, and let’s dive into the colorful world of nail art!
Contents
- 1. Ombre Magic
- 2. Marble Effect
- 3. Glitter Galore
- 4. Floral Delight
- 5. Geometric Shapes
- 6. Negative Space
- 7. Animal Patterns
- 8. Abstract Art
- 9. Seasonal Themes
- 10. Textured Nails
- 11. Holiday-Inspired Designs
- 12. Dip Powder Nails
- 13. Personalized Touches
- 14. Neon Vibes
- 15. Watercolor Technique
1. Ombre Magic

Ombre nails are a timeless trend, blending two or more colors seamlessly. This gradient effect can be achieved using a makeup sponge, like the makeup sponge for ombre nails, making it super easy to master even for beginners.
Choose colors that complement each other—like a soft pink fading into a deep magenta or a blue transitioning to a light lavender.
1. Begin by painting your nails with a base color.
2. Apply the two colors you’ve chosen onto the sponge.
3. Dab the sponge onto your nails for that gorgeous ombre effect.
4. Seal it with a top coat, such as top coat nail polish, to lock in the design for a long-lasting finish.
The result? A stunning transition that gives your nails a professional look right at home. Ombre is perfect for any occasion and can be customized for seasonal themes too!
For an added bonus, consider using a nail polish set with complementary colors to ensure your designs are visually appealing. Use a contrasting base color for a more dramatic effect. Don’t forget to clean up the edges with some nail polish remover for a polished finish.
2. Marble Effect

Who wouldn’t love the elegance of marble on their nails? This chic design mimics the stunning swirls of marble and is surprisingly easy to create.
You will need a white base and two contrasting colors—think black and gold or navy and silver. To make the process even smoother, consider using a nail polish set (white and contrasting colors) that provides all the shades you need in one convenient package. Here’s how to achieve the look:
1. Paint your nails with a white base coat.
2. Using a thin brush from an nail art brush set, randomly apply the two colors to create a marbled effect.
3. Use a toothpick or a fine brush to swirl the colors gently.
4. Finish with top coat nail polish for shine and longevity.
The beauty of marble nail art is that no two nails will look alike, making each set uniquely yours! The top coat not only gives a glassy finish but also seals in your design to help it last longer.
3. Glitter Galore

Glitter nails bring a sparkle that simply cannot be ignored! This design is incredibly versatile, allowing you to mix and match glitter with various colors and styles.
Start with a solid base coat, like Sally Hansen Double Duty™, Base and Top Coat, for that perfect foundation. While the polish is still wet, sprinkle glitter on the nails for an even coat. You can use a nail art glitter set that includes fine glitter options, which are great for achieving a fun gradient on the tips or covering the entire nail for a full-on glitter bomb.
Press lightly to ensure the glitter sticks, and seal it all in with the top coat for lasting shine. Glitter nails are perfect for parties or just when you want to add a little magic to your day!
After your nail session, keep your workspace tidy by using a lint roller for nail art cleanup to easily remove any excess glitter around your fingers for a neat finish.
4. Floral Delight

Floral designs celebrate nature’s beauty and can add a fresh touch to your nail art. They’re customizable for any season, from vibrant daisies in spring to delicate snowflakes in winter. With just a few basic colors and some helpful tools, you can create stunning floral patterns right at home.
Start by painting your nails in your chosen base color. For precise flower shapes, consider using a dotting tool set, like the one from Happy Dotting Company. This 16-piece set includes various tools that will help you achieve the perfect dotting technique for your flowers.
Next, use a fine brush to add green leaves. An excellent choice for this is the nail art brush set by Artdone, which features various brush types, including striping brushes perfect for creating intricate details.
To elevate your floral nail art, finish with tiny gems at the center of the flowers. The nail gems and rhinestones kit from Teenitor offers a variety of options to add that extra sparkle and catch the light beautifully.
The key to beautiful floral nail art is choosing colors that pop against your base. A light blue background with bright yellow flowers can really stand out! With these tools, you can recreate stunning, nature-inspired designs that are sure to impress.
5. Geometric Shapes

Geometric nail art is all about clean lines and bold shapes, giving your nails a modern and chic look. This design is perfect for those who love minimalistic art.
To achieve those crisp lines and angles, consider using nail art tape. It helps you create precise sections for different colors, ensuring a sharp finish that enhances the overall aesthetic of your design.
Here’s how to get started:
1. Begin with a solid base color.
2. Once dry, use the tape to section off areas for your chosen colors.
3. Paint over the tape with your selected shades and remove the tape before it dries for the best results.
4. Seal everything in with a top coat nail polish for a glossy finish that adds durability and shine.
For more intricate designs, you might want a nail art brush set. This set includes various brushes and tools that help you create long lines and detailed patterns, elevating your nail art game.
This design allows for countless combinations, from triangles to stripes to squares! Choose contrasting colors for a striking look.
6. Negative Space

Negative space nail art is a trend that embraces the natural nail color as part of the design, creating a modern and artistic look that’s easy to achieve. You can play with shapes and patterns while leaving spaces unpolished to truly make your design stand out.
To get started, use a Sally Hansen Double Duty™, Base and Top Coat to prepare your nails. This quick-drying, clear nail polish provides a smooth foundation for your art and ensures long-lasting wear.
Next, grab some nail art tape to outline the shapes you want to fill in. The precision of the tape helps create those clean lines we all love, allowing you to focus on creativity without the mess.
Once your shapes are outlined, paint the sections between the tape, leaving the rest bare. Remember to peel off the tape while the polish is still wet to achieve the best results. For an added twist, finish off your design with OPI Nail Lacquer Top Coat in matte. This cool finish offers an artistic contrast to the glossy base coat and helps protect your design, ensuring that it looks fresh for days.
This style creates a breathable and unique design that really stands out, making negative space nail art a fun and simple project to elevate your manicure game!
7. Animal Patterns

Animal prints are always in style and can add a fun twist to your nail art. Whether it’s leopard spots, zebra stripes, or snake skin, these designs can be easily recreated at home.
Start with a neutral base and use a fine brush or dotting tool for details. One helpful toolset is the Nail Art Brush Set, which includes a variety of brushes that make it easier to create intricate animal patterns.
Here’s how to achieve the look:
1. Apply a base coat that matches your chosen animal print style.
2. Use a brush from your Nail Art Brush Set to create the animal patterns.
3. Add details and variation in color for a more realistic look; the Dotting Tools for Nail Art can help you achieve precise dots and accents.
4. Seal with a top coat like the Nail Art Top Coat to maintain your design, ensuring it stays chip-free and glossy.
You can even customize your prints with wild colors for a more playful vibe! To gain more control, practice on paper before applying to your nails.
8. Abstract Art

If you love expressing your creativity, abstract nail art is a fantastic option! This allows you to use different colors and techniques without following strict rules.
You can splash colors randomly or create specific designs:
1. Start with a base color.
2. Use a brush or sponge to add swirls, lines, or dots in different colors. For this, consider the Nail Art Brush Set, which includes various brushes that make it easy to create intricate designs.
3. Let your creativity flow—there are no boundaries! To add perfect dots and fine details, the Nail Art Dotting Tools will come in handy.
4. Finish with a top coat for a polished look.
Abstract designs give your nails a colorful and artistic flair, perfect for showing off your unique style. For a stunning variety of colors, try the Gel Nail Polish Set, which includes a wide range of shades to enhance your design.
The more colors you use, the more dynamic your design will be!
9. Seasonal Themes

Seasonal nail art is a fun way to celebrate holidays and changes in the weather! From Halloween pumpkin nails to springtime flower designs, the options are endless.
To create stunning seasonal looks, consider using a nail art brush set that includes various tools like dotting tools and striping brushes. These will help you achieve intricate details in your designs, whether you’re painting autumn leaf patterns or delicate snowflakes for winter.
Choose colors and designs that reflect the season:
1. For autumn, use warm colors and leaf patterns.
2. Winter can bring icy blues and snowflakes.
3. Spring is perfect for pastel florals.
4. Summer shines with bright colors and beach themes.
To make your seasonal designs even easier, look into seasonal nail art stickers. This pack features a variety of self-adhesive decals for every holiday, saving you time while ensuring your nails are festive and fun.
Incorporate symbols or motifs that represent each season, like hearts for Valentine’s Day, using these easy-to-apply stickers.
For vibrant colors that suit each season, consider getting a nail polish set with seasonal colors. This set includes bright shades perfect for summer and soft pastels for spring, allowing you to create the perfect seasonal manicure.
Look online for inspiration based on upcoming holidays so you can plan your designs ahead!
10. Textured Nails

Adding texture to your nails can create an eye-catching effect that elevates your nail art. Techniques like caviar beads, sand polish, or even a velvet finish give your nails a unique look.
To create textured nails:
1. Start with a base coat of your favorite color.
2. While it’s still wet, sprinkle caviar beads for nail art or apply sand nail polish.
3. Alternatively, use velvet nail top coat for a soft finish.
4. Seal it all in with a top coat for durability.
Textured nails add depth and an interesting tactile element to your style. By incorporating these products, you can easily enhance your nail art and achieve that striking, textured look. Coordinate the texture with your outfit for a cohesive look.
11. Holiday-Inspired Designs

Holidays bring the perfect opportunity to showcase themed nail art. Whether it’s festive colors for Christmas or spooky designs for Halloween, holiday nails are always a hit!
You can create simple designs or go all out with the right tools and materials. For instance, for Christmas, think red and green with snowflakes or ornaments. Using a nail art brush set can help you achieve precise designs with ease. These brushes are perfect for detailing, whether you’re painting intricate snowflakes or adding tiny ornaments.
Halloween can include ghosts, bats, and pumpkins with bright oranges and blacks. To simplify your nail art process, consider using holiday nail art stickers. These self-adhesive decals are a fantastic way to add festive flair to your nails without the hassle of freehand painting.
Easter brings pastels and cute bunny or egg designs. The nail stamping kit, such as the nail stamping kit, can help you create beautiful, uniform patterns that are perfect for this holiday. With various stamping templates included, you can easily create delightful designs that are sure to impress.
Independence Day can inspire stars and stripes in red, white, and blue. These designs can be as simple or detailed as you like, making them perfect for any skill level. Try to match your nail art with your holiday outfit for a complete festive look!
12. Dip Powder Nails

Dip powder nails are a growing trend that create long-lasting, durable color without the need for UV light. This method involves dipping your nails into colored powder, which gives a vibrant finish.
1. Start with a base coat to prepare your nails.
2. Dip your nails into the colored powder, one nail at a time.
3. Brush off the excess powder and repeat until you achieve the desired opacity.
4. Seal with a top coat. For this, you can use the Top Coat for Dip Powder Nails, which will help ensure your manicure lasts longer and looks flawless.
Dip powder nails can last for weeks without chipping, making them perfect for those who lead busy lifestyles. To get started, consider the Dip Powder Nail Kit. This kit includes everything you need, with 20 colors and essential liquids like base and activator, making it ideal for DIY nail art enthusiasts.
Additionally, if you want to add intricate designs or touch-ups, having a good set of tools is essential. The Nail Art Brush Set offers a variety of brushes and dotting tools to help you create stunning details.
Experiment with ombre effects by transitioning between different colors during the dipping process!
13. Personalized Touches

Adding a personal touch to your nail art makes it even more special. Whether it’s your initials, a favorite symbol, or a meaningful color, personalizing your nails can express your unique style.
1. Choose a base color that you love.
2. Use a fine brush, like those from the Nail Art Brush Set, to add small designs such as hearts, stars, or even your initials.
3. Incorporate favorite colors that represent you.
4. Finish with a top coat, such as the Top Coat Nail Polish, to protect your design and ensure it lasts.
This is a great way to create unique nail art that tells a story about who you are. Plus, it makes for fantastic conversation starters! If you’re looking for an easier way to personalize your nails, consider using Nail Stickers and Decals—they can make the process a breeze while still allowing you to showcase your individuality.
14. Neon Vibes

Neon nails are all about bright colors and bold statements. Perfect for summer or parties, this trend can bring a fun pop to any outfit! To achieve an electrifying look, consider using the Neon Nail Polish Set, which features six vibrant colors that will make your nails stand out. Starting with a white base will help these neon shades really pop.
Once you have your base ready, you can apply the neon polish in fun patterns, such as stripes or dots. To aid in your creative designs, grab a set of nail art dotting tools. These tools are perfect for creating intricate patterns and designs, ensuring that your neon nails are as unique as you are.
Finally, enhance the brightness and longevity of your nail art by adding a glossy finish with a glossy top coat. This no-wipe formula will give your neon nails an eye-catching shine, making them perfect for festivals or summer vacations.
Pair your neon nails with neutral outfits to let them truly shine!
15. Watercolor Technique

Watercolor nails give a soft, dreamy look that mimics beautiful watercolor paintings. This technique is simple and allows for a lot of creativity!
1. Start with a white base coat for better visibility. A great option for this is the top coat nail polish, which provides a smooth base and enhances the overall finish.
2. Using a small brush, such as those found in the nail art brush set, apply various colors of polish in a light layering technique. The brushes in this set are perfect for precision work and help you create the perfect watercolor effect.
3. Blend the colors gently to create a watercolor effect. To achieve the best results, consider using pastel shades from the pastel nail polish set for a softer look, or opt for brighter colors for a more vibrant appearance.
4. Finish with the top coat nail polish to smooth out the texture and add a glossy shine.
This design is perfect for spring and summer, providing a light and fresh aesthetic. Whether you choose soft pastels or bold hues, the watercolor technique is sure to impress!
Conclusion

With these 15 jaw-dropping DIY nail art designs, you’re now armed with inspiration to create stunning looks at home!
Whether you’re feeling adventurous or prefer something classic, there’s a design here for every mood and occasion. Don’t hesitate to mix techniques and come up with your own unique creations!
Share your nail art journey and let your creativity shine.
Note: We aim to provide accurate product links, but some may occasionally expire or become unavailable. If this happens, please search directly on Amazon for the product or a suitable alternative.
This post contains Amazon affiliate links, meaning I may earn a small commission if you purchase through my links, at no extra cost to you.