
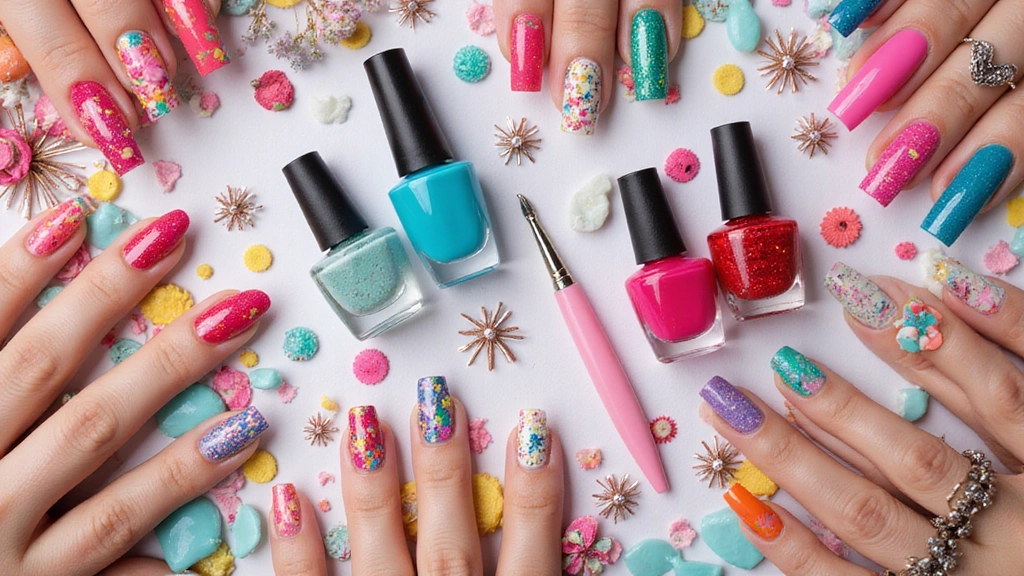
Nail art is a brilliant way to express yourself and add a splash of personality to your look. Whether you’re prepping for a big event or just lounging at home, having fabulous nails can make a huge difference.
From intricate designs to trendy colors, the possibilities are endless when it comes to DIY nail designs. Feeling inspired? Grab your favorite nail polishes, nail art tools, and let’s get crafty with 25 stunning designs that are sure to make your friends green with envy!
Get ready to unleash your creativity and turn your nails into mini masterpieces that reflect your unique style.
1. Ombre Sunset Nails

Ombre nails are a classic and chic choice that never goes out of style. The sunset ombre effect combines vibrant colors that blend together beautifully. To create this look, choose complementary shades like coral, orange, and yellow for that stunning sunset feel.
You can achieve this by using a makeup sponge. Simply paint the colors onto the sponge, press it onto your nails, and voilà! Here are some tips:
– Use a base coat to protect your nails.
– Make sure to blend well at the edges for a seamless transition.
– Seal with a top coat to give it that glossy finish.
This design is perfect for summer and will definitely catch everyone’s attention!
2. Minimalist Dot Nail Art

Minimalism is in, and what better way to embrace it than with dot nail art? This design is not only trendy but super easy to do. Pick a nude or pastel base color and let it dry completely. Now for the fun part – get a dotting tool or even a bobby pin!
Add dots of varying sizes in contrasting colors on one or two nails for a chic accent. Here are some tips:
– Keep the dots evenly spaced for a clean look.
– Experiment with color combinations that suit your style.
– This design is perfect for any occasion, from casual hangouts to formal events. Less really is more!
3. Geometric Nail Designs

Geometric nail art is all about sharp lines and bold shapes. This modern trend allows you to get creative with tape and nail polish. Start by painting your nails with a solid base color. Once it’s dry, use nail tape to create your desired geometric shapes.
Fill the sections with different colors for a striking effect. Some tips for success include:
– Use a fast-drying top coat to prevent smudging.
– Don’t be afraid to mix and match colors; contrasting shades can really make your design pop.
– Practice your precision – clean edges elevate the whole look! This design is a guaranteed conversation starter!
4. Floral Nail Art

Floral designs are timeless and can add a touch of elegance to your nails. They are perfect for spring and summer, but can really be worn year-round. Start with a soft base color and let it dry. Then, using a fine brush or a dotting tool, paint delicate flowers on a few accent nails.
Choose colors that complement your base for a harmonious look. Some tips include:
– Practice your flower strokes on paper before applying to nails.
– Mix up flower types for a garden look.
– Finish off with a glossy top coat for a polished finish. This design will make you feel cheerful and stylish!
5. Marble Nail Art

Marble nails are all the rage, giving your nails a sophisticated, upscale vibe. To recreate this look at home, start with a white base coat. Next, use a thin brush or a straw to swirl in shades of gray, black, or even gold for a luxe marble effect.
Here are some pointers for perfecting your marble nails:
– Work while your base coat is still wet for easier blending.
– Don’t overdo the swirls; subtlety is key!
– Top it off with a high-gloss top coat to enhance the luxurious look. You’ll feel like you just walked out of a high-end salon!
6. Glitter Gradient Nails

Who doesn’t love a little sparkle? Glitter gradient nails are the perfect way to add some glamour to your everyday look. Start with a base coat, then apply your favorite glitter polish at the tips of your nails, fading it towards the cuticle for a beautiful gradient effect.
Here’s how to make it work:
– Use a makeup sponge to dab the glitter onto your nails for a more blended effect.
– Experiment with different colors of glitter for unique looks.
– Seal everything with a top coat for longevity. These are sure to be a hit at parties or any festive occasion!
7. Neon Nail Designs

Neon nails are a fun way to bring some vibrancy to your nails, especially in summer. Choose your favorite neon colors and paint a few nails solid or create playful patterns. These eye-catching shades can lift your mood instantly!
For tips, consider:
– Pair neon colors with a neutral base for a balanced look.
– Mix and match designs on different nails for added excitement.
– Finish with a matte top coat for a trendy twist. These nails will make you stand out in any crowd!
8. Animal Print Nail Art

Animal print never goes out of style, and it’s super fun to try on your nails! From leopard spots to zebra stripes, you can create wild designs that express your fierce side. Start with a base color, then use a fine brush to add your animal print details.
Here are some tricks:
– Use a contrasting color for the print for maximum impact.
– Don’t worry about perfection; the wild look is part of the charm!
– Finish with a shiny top coat to make your design pop. These nails will definitely turn heads!
9. Color Blocked Nails

Color blocking is a trendy nail design that involves using bold colors in distinct blocks. Choose two to four colors that complement each other. Start with a base coat and wait for it to dry. Use striping tape to section off parts of your nails, painting each section a different color.
for this design:
– Use bright colors for a summery feel.
– Mix matte and glossy finishes for added interest.
– Seal with a top coat for durability. You’ll be rocking a runway-ready look in no time!
10. Marble and Gold Foil

For a luxurious twist on marble nails, try adding gold foil accents. Start with a white base, create your marble effect, then add small pieces of gold foil for a glamorous finish.
to nail this design:
– Apply the gold foil while the marble is still tacky for better adhesion.
– Use a top coat to secure the foil and add shine.
– Keep the design simple for an elegant look. This combines sophistication with creativity flawlessly!
11. Seasonal Nail Art

Celebrate the seasons right on your nails! From autumn leaves to winter snowflakes, seasonal nail art is always a fun way to express your love for different times of the year. Choose a base color that represents the current season, then add themed designs using nail art brushes or stickers.
Here’s how to keep it seasonal:
– Use seasonal colors for the base and designs.
– Add tiny details that represent the season, like pine trees for winter or flowers for spring.
– Change your design as the seasons change to keep things fresh and fun. These nails will make you feel festive and in tune with nature!
12. Watercolor Nails

Watercolor nails offer a super whimsical look that’s perfect for artistic souls. This technique mimics the soft blending of watercolor paints. Start with a white base coat, then use a thin brush to dab on watered-down nail polish in various colors, blending them as you go.
For best results:
– Use pastel or bright colors for a cheerful look.
– Layer colors for a more dimensional effect.
– Finish with a glossy top coat for a fresh finish. You’ll feel like you’re wearing a piece of art on your fingertips!
13. Gradient Glitter Nails

Take your glitter game up a notch with gradient glitter nails! Start with a base color, then apply glitter polish starting from the tips and gradually decrease the amount as you go down towards the cuticle. This creates an eye-catching gradient effect that sparkles.
Some tips include:
– Opt for colors that complement each other for a cohesive look.
– Use a sponge to help with blending the glitter for a smoother transition.
– Seal with a top coat for extra sparkle and longevity. These nails will make you feel like a star!
14. Tie-Dye Nails

Bring back the retro vibes with tie-dye nails! This fun and carefree design can be customized to represent your favorite colors. Start with a white or light base coat, then use a toothpick or a dotting tool to swirl different colors together in a tie-dye pattern.
Here are some tips:
– Use bright, contrasting colors for a bold look.
– Don’t be afraid to make mistakes; the messiness adds to the overall effect!
– Seal with a top coat to keep your design intact. You’ll channel good vibes with these funky nails!
15. Stamped Nail Art

Nail stamping is a game-changer for creating intricate designs quickly! With a stamping kit, you can transfer beautiful patterns onto your nails. Choose a base coat and allow it to dry, then use a stamping plate to pick up your design and stamp it onto your nails.
Some tips for success:
– Make sure your base is dry to prevent smudging.
– Experiment with different patterns and colors.
– Use a top coat to lock in the design. This technique opens a whole new world of nail art possibilities!
16. Cut-Out Nail Art

Cut-out nail art is a bold way to make a statement! This design involves cutting out shapes or patterns from your nails, leaving some negative space for an edgy look. Start with a base coat and choose a contrasting color for the cut-out areas.
Some pointers include:
– Use a nail file to create clean edges.
– Experiment with different shapes like triangles or chevrons.
– Seal your nails with a top coat to enhance durability. You’ll turn heads with this unique design!
17. Textured Nail Art

Textured nails are a fun way to add dimension to your nail art. You can achieve this look with textured polishes or by adding embellishments like beads, rhinestones, or even fabric. Start with a base coat and apply your textured polish or adhere your chosen embellishments while the polish is still wet.
Some tips for creating stunning textured designs:
– Keep the embellishments minimal for a classy look.
– Mix different textures for a unique touch.
– Seal your design with a top coat to enhance its longevity. Get ready to explore some tactile nail art!
18. Metallic Nail Designs

Metallic nails are all about shine and glamour! You can achieve this look with metallic nail polishes or foils. Start with a base coat and paint your nails with a metallic polish. For added flair, consider using nail foils to create unique designs.
for metallic perfection:
– Opt for darker shades for a classy vibe.
– Use a glossy top coat for extra shine.
– If using foils, apply them while your base is still wet for better adherence. These nails scream elegance and sophistication!
19. Bohemian Nail Art

Bohemian nails celebrate free-spirited designs with earthy colors and intricate patterns. Start with a neutral base, then use a fine brush to paint dreamcatchers, feathers, or tribal patterns in warm, earthy tones.
For boho vibes:
– Use muted shades like browns, greens, and terracotta.
– Keep designs detailed but not overwhelming.
– Finish with a top coat for a polished look. This style brings out your creative and artistic side!
20. Customizable Nail Wraps

Nail wraps are a fantastic way to achieve intricate designs in no time! You can purchase or create your own custom wraps. Simply apply them to your nails, file off the excess, and seal with a clear top coat. They are perfect for those short on time but wanting to rock a fancy look.
for using nail wraps:
– Make sure your nails are clean and dry for better adhesion.
– Choose wraps that complement your outfit or mood.
– Top coat is essential for prolonging their life. You’ll be ready in a flash!
21. Fun and Funky Nail Shapes

Time to play with nail shapes! Experimenting with shapes like oval, stiletto, or coffin can change the whole look of your nails. Start with your desired length and shape your nails accordingly. Each shape pairs well with different designs, so choose wisely based on your style!
Some tips:
– Stiletto nails pop with intricate designs, while square nails look fabulous with bold colors.
– Regular maintenance is key to keeping unique shapes looking fresh.
– Don’t forget to seal your look with a top coat! Embrace your fun side with these unique nail shapes.
Conclusion

With these 25 stunning nail designs, you’re all set to impress with your DIY skills. Whether you prefer bold and colorful or elegant and minimalist, there’s a design for every mood and occasion.
Experiment, have fun, and don’t forget to show off your gorgeous nails to your friends! You’re bound to inspire them with your creativity and flair for nail art.