
Spring is the season of renewal, and what better way to celebrate than with stunning 3D nail art?
This year, 2025, brings forth vibrant colors, intricate designs, and a fresh wave of creativity in nail art.
From blooming florals to whimsical textures, these 21 nail art ideas will inspire you to express your unique style while welcoming the season.
So grab your nail supplies and let’s dive into the world of spring 3D nails that will surely make heads turn!
Contents
- 1. Delicate Daisy Dreams
- 2. Cherry Blossom Bliss
- 3. Vibrant Floral Burst
- 4. Whimsical Butterfly Garden
- 5. Radiant Rainbow Swirls
- 6. Elegant Tulip Touch
- 7. Garden Gnome Charm
- 8. Nature’s Marble
- 9. Playful Polka Dots
- 10. Serene Watercolor Blooms
- 11. Geometric Spring Patterns
- 12. Sparkling Crystal Blooms
- 13. Soft Pastel Ombre
- 14. Whimsical Garden Paths
- 15. Sunflower Delight
- 16. Enchanted Forest
- 17. Classic French Twist
- 18. Vintage Floral Lace
- 19. Tropical Paradise
- 20. Ethereal Moonlit Garden
- 21. Feathered Elegance
1. Delicate Daisy Dreams

Nothing embodies the spirit of spring quite like the cheerful daisy!
This delightful nail art idea showcases tiny, hand-painted daisies emerging from a soft pastel background. To achieve the stunning 3D effect, layer gel polish and strategically place small beads in the center of each flower. A light blue base paired with white and yellow daisies creates a fresh, vibrant look. Don’t forget to finish with a glossy topcoat for that extra shine, ensuring your daisies truly pop.
For the best results, practice your flower strokes on paper before applying them to your nails, and use a dotting tool set for perfectly round flower centers. Keep the design simple yet striking, and feel free to mix in different colors for a unique twist.
Daisies symbolize innocence and purity, making them an ideal choice for spring. You can also take inspiration from other floral designs, like tulips or orchids, to create a fuller bouquet effect.
To elevate your nail art experience, consider using a pastel nail polish for those soft colors, and don’t forget a quick-dry topcoat to keep your nails looking fabulous while minimizing smudging. Additionally, a nail art brush set can help with the intricate details, and adding some rhinestones for nail art can give your design that extra sparkle.
2. Cherry Blossom Bliss

Capture the essence of spring with breathtaking cherry blossoms on your nails! This enchanting design showcases soft pinks and whites that beautifully mimic the delicate petals of cherry blossoms. To achieve a stunning 3D effect, you can utilize a fine nail art brush, such as the one available here, along with an acrylic paint set that you can find here to create raised petals. Tiny pearls, which you can purchase here, can be added to mimic the centers of the flowers.
Begin with a nude base and layer on your pink and white designs, ensuring that each layer dries completely before adding the next. To elevate your design, consider enhancing it with gold or silver accents; gold foil for nail art is available here. For a chic finish, seal your masterpiece with a matte topcoat, which you can find here.
For added realism, use a fine brush to paint tiny branches that make the flowers pop against the background. This beautiful design not only looks stunning but also symbolizes renewal and hope, making it a perfect choice for the spring season! Unique insights: Pair cherry blossoms with a matte topcoat for a modern twist, and consider incorporating small butterflies or bees for an extra touch of detail.
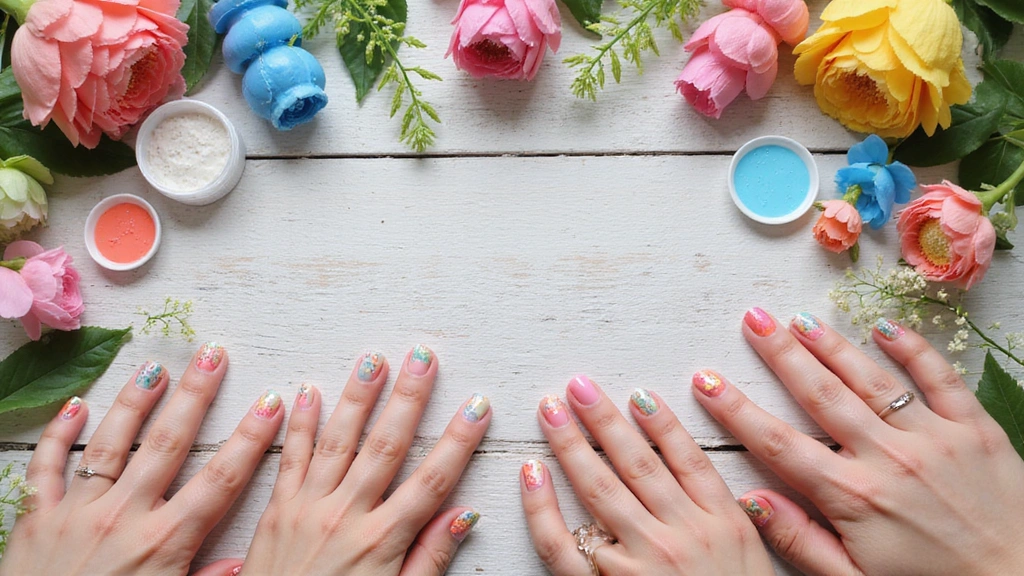
3. Vibrant Floral Burst

Unleash your creativity with a stunning vibrant floral burst design that will make your nails come alive!
This fabulous idea brings together a variety of colorful flowers, featuring 3D elements that create a dynamic and lively effect. Opt for bright shades like reds, yellows, and blues to cultivate a garden of blooming flowers on your nails. To achieve the striking 3D effect, layer the flowers using gel polish or acrylic paint, ensuring each layer dries completely before adding additional details.
Enhance your design by using a sponge for ombre effects to blend colors seamlessly beneath your flowers, giving it that extra pop.
For a more natural look, incorporate a variety of flower shapes and sizes, and don’t shy away from adding leaves or vines to fill any empty spaces. The outcome will be a fun and eye-catching manicure that truly embodies the spirit of spring!
This design also allows for your personal expression—mix and match your favorite flowers and feel free to experiment with different textures.
To get started, consider using a gel polish set in vibrant colors, a flower stamping plate for intricate designs, and a nail art tools set to elevate your creations. Finally, seal your masterpiece with a topcoat for a shiny finish that will make your floral burst truly stand out!
4. Whimsical Butterfly Garden

Transform your nails into a whimsical butterfly garden that captures the essence of spring!
This enchanting design features exquisitely crafted 3D butterflies in a variety of vibrant colors, gracefully fluttering across your nails. Begin with a light base color, such as mint or lavender, and bring your butterflies to life using a combination of gel polish in vibrant colors and acrylics.
To achieve a stunning 3D effect, layer the paint to create raised wings and enhance the look with tiny nail rhinestones for an added touch of sparkle. Feel free to experiment with different butterfly patterns and hues, making each nail a unique masterpiece that breathes life and movement into your manicure.
For the best detailing, use fine art brushes to perfect those intricate designs, and don’t hesitate to mix in some glitter for extra glam! This delightful design is ideal for those who adore vibrant and playful aesthetics.
Embrace the symbolism of transformation and beauty that butterflies represent, making this design perfect for the vibrant renewal of spring. And for a flawless finish, apply a quick-dry topcoat to ensure your stunning manicure lasts.
5. Radiant Rainbow Swirls

Add a burst of color to your spring manicure with mesmerizing radiant rainbow swirls!
This design focuses on vibrant hues blending seamlessly to form an eye-catching swirl pattern. Start with a white or light-colored base coat, and then use a nail art brush to apply swirling designs in various neon shades from a neon gel polish set.
For added dimension, incorporate tiny beads or pearls along the swirls to create stunning 3D elements. To elevate the overall appearance, finish your nails with a glossy topcoat that enhances the vibrancy and provides a polished look.
Don’t forget to practice your swirling technique on a practice nail first and clean your brush between colors to maintain clarity and avoid muddiness. This playful design is perfect for anyone looking to showcase their fun side this spring!
Feel free to customize your rainbow swirls by selecting your favorite colors or putting your unique twist on the classic rainbow palette. For a more organized application, consider using a nail art palette to mix and match your shades!
6. Elegant Tulip Touch

Celebrate the beauty of tulips with a sophisticated nail design that embodies elegance and charm! This manicure showcases exquisitely painted tulips in soft hues of pink, purple, and yellow, resulting in a delicate and refined appearance. Begin with a nude or light pink base and use a fine detail brush to carefully paint the tulips, layering for a stunning 3D effect.
To elevate your design, consider applying a matte topcoat for a chic finish or embellishing with tiny nail pearls at the base of the flowers. This design speaks to the essence of spring through its simplicity—remember, less is often more!
For best results, use a small detail brush for the tulip petals and allow each layer to dry completely before adding further details. This nail art is versatile, making it suitable for both casual outings and formal events. Plus, tulips symbolize love and care, making this design an ideal choice for thoughtful gift-giving.
Don’t forget to explore a pastel gel polish set to achieve those soft shades, and consider using a nail art palette for mixing and blending your colors. Happy painting!
7. Garden Gnome Charm

Add a playful twist to your nail art with charming garden gnomes! This delightful design features whimsical 3D gnome figures nestled among vibrant flowers, creating a cheerful garden scene.
Begin with a bright base color, such as sky blue or grass green, to set the stage for your gnomes. Use modeling clay to shape your 3D gnomes, allowing them to stand out with their cheerful colors. Surround your gnomes with colorful flowers and leaves for a complete garden feel, using flower stickers for added detail.
This playful design is perfect for those who love a touch of humor in their nail art and can spark joy and conversation at gatherings and events. Don’t hesitate to get creative with your gnome designs—experiment with different hats, facial expressions, and flower varieties to make each nail unique. To ensure a flawless finish, consider using a quick-dry topcoat and enhance your precision with nail art brushes and a bright gel polish set.
8. Nature’s Marble

Transform your nails into a stunning homage to nature with a marble effect that draws inspiration from the beauty of natural stones!
This exquisite design showcases soft greens, blues, and whites, perfectly mimicking the appearance of marbled stones. Start with a base coat and utilize a sponge technique for blending the colors seamlessly, ensuring a smooth marble effect.
To elevate your manicure with a 3D touch, add small pieces of gold leaf or tiny gemstone decorations that reflect natural elements. The end result is a sophisticated and elegant manicure that embodies the essence of spring!
When creating this look, remember to use a light hand while blending to prevent muddy colors, and feel free to experiment with various color combinations to achieve a style that is uniquely yours.
This design can be easily customized by adjusting the color palette to suit your personal taste or the mood of the season! For the perfect tools, consider a marble nail art kit and a sponge for blending, and finish your look with a topcoat for shine.
9. Playful Polka Dots

Get playful this spring with cheerful polka dots on your nails! This delightful design showcases bright colors and adorable dot patterns that can easily be crafted using a dotting tool set or even a simple toothpick. Begin with a solid base color, then layer on dots in contrasting shades to create a fun and vibrant look.
To enhance the design with a 3D effect, consider applying a clear gel for 3D effect to give the dots a raised appearance. This design is incredibly customizable—feel free to mix and match colors, sizes, and placements to make each nail unique!
For best results, start with a smaller dot and gradually increase the size for a layered effect. Don’t forget to finish with a shiny topcoat to ensure your playful creation lasts.
This whimsical design is perfect for casual outings and can easily be adapted for any season or occasion. To help you get started, consider using a bright gel polish set to give your nails that extra pop of color, and a nail art palette for organizing your colors and designs!
10. Serene Watercolor Blooms

Embrace the enchanting allure of watercolor art with serene floral designs on your nails!
This stunning style encapsulates the softness and fluidity of watercolor paintings, employing gentle brush strokes in pastel shades to create exquisite blooms. Begin with a white or light base, and use a fine brush, such as those found in a fine brushes set, to apply your colors in a loose, blended manner for a soft effect.
To enhance the 3D aspect of your design, consider adding small beads or glitter to the centers of your flowers for an extra touch of sparkle. You can find a great selection of nail beads to elevate your manicure. This design is both understated and elegant, making it suitable for any occasion!
For the best results, use a light hand when applying colors and allow each layer to dry before adding more details. Unique insights into watercolor designs reveal that they can be quite forgiving, allowing for experimentation with a variety of flowers and styles.
Don’t forget to use a topcoat for longevity to keep your artwork looking fresh and vibrant. Additionally, consider investing in a nail art palette to mix and create your perfect shades. Happy painting!
11. Geometric Spring Patterns

Get modern with geometric patterns that capture the essence of spring!
This design features clean lines and vibrant colors, resulting in a fresh and trendy look. Begin with a solid base color using a quality topcoat for shine and then use nail tape or nail stencils to create sharp geometric shapes in contrasting colors.
To achieve a stunning 3D effect, consider incorporating various textures, such as matte and glossy finishes, or embellishing your design with tiny studs or gems for added detail. This unique style is perfect for anyone who appreciates a contemporary aesthetic!
Remember to let your base coat dry completely before applying any tape to prevent peeling, and don’t hesitate to experiment with different color combinations for a bold impact. Geometric designs can be personalized to reflect your individual style, providing a fun and creative outlet this spring! For an array of colors, check out these gel polishes in vibrant colors to elevate your manicure even further!
12. Sparkling Crystal Blooms

Enhance your spring manicure with the dazzling charm of sparkling crystal blooms!
This design beautifully merges vibrant floral patterns with glimmering crystal accents, resulting in a glamorous and eye-catching look. Begin with a smooth base coat in a soft pink or nude shade, and paint your flowers in lively colors to bring them to life.
For that stunning 3D effect, place small rhinestones at the center of each flower, ensuring they are securely attached with nail glue. This design is ideal for special occasions or a night out on the town!
To keep your crystals firmly in place, consider applying a layer of gel polish, and a matte finish on the flowers can enhance the overall contrast, making the design even more striking.
Crystal blooms not only add a touch of elegance but also symbolize beauty, making them a fabulous choice for any special event.
Don’t forget to stock up on essential tools like nail art brushes, shiny topcoat, and an array of rhinestones in various sizes to create your perfect spring look!
13. Soft Pastel Ombre

Embrace the timeless beauty of the ombre style this spring by opting for soft pastel colors that beautifully encapsulate the season!
This delightful design showcases a smooth gradient effect, seamlessly blending one hue into another. Begin with a light base coat, then utilize a sponge for blending to apply your selected pastel shades, taking care to create a flawless transition.
To elevate the manicure, consider embellishing the tips with charming 3D elements such as tiny flowers or hearts in a contrasting color. This simple yet sophisticated design makes it perfect for any event!
For the best outcome, practice your sponging technique and ensure each layer is thoroughly dry before moving on to the next.
Remember, ombre designs are fully customizable, allowing you to incorporate your favorite colors or seasonal themes, unlocking endless creative possibilities!
For your nail art toolkit, consider these essential products: a pastel gel polish set, nail art decorations, and a topcoat for a shiny finish. Additionally, a nail art palette can be a handy tool for organizing your colors and ensuring a seamless blending experience!
14. Whimsical Garden Paths

Create a whimsical garden path on your nails, where vibrant flowers and playful elements come together! This delightful design features hand-painted flowers complemented by tiny 3D stones or gems that mimic pebbles on a garden path.
Begin with a bright base color and use a colorful gel polish set to paint the flowers in vibrant hues. Don’t forget to add the 3D elements for that extra playful touch, using 3D stones or gems to enhance the garden effect.
To truly make your design pop, finish with a glossy topcoat that will enhance the colors and give your manicure a polished look. This fun and creative design is perfect for those who love a touch of whimsy!
For the best results, utilize fine brushes for detailed flower work and ensure the 3D elements are securely placed for longevity. The storytelling aspect of this design makes it a fantastic conversation starter at gatherings! Don’t forget to have a nail art palette on hand for easy mixing and color application.
15. Sunflower Delight

Celebrate the cheerful days of spring with a delightful sunflower design on your nails! This stunning look features vibrant yellow sunflowers set against a rich brown or green background, perfectly embodying the warmth of the season. Begin with a solid base coat, then carefully paint the sunflowers using yellow and brown gel polish. Layer your colors to add depth and dimension to the flowers.
To enhance the 3D effect, consider adding small gems at the center of each sunflower for an eye-catching sparkle. You can find these perfect accents here: small gems for center accents. This simple yet vibrant design is ideal for anyone who adores the sun and flowers!
For best results, practice your flower strokes on paper and use a dotting tool for precise centers. Don’t forget to finish with a quick-dry topcoat to seal your masterpiece; you can grab one here: quick-dry topcoat. With these products and techniques, you’ll create a manicure that radiates happiness and positivity, just like the sunflowers themselves! For added precision, consider using nail art brushes to make your flowers truly pop!
16. Enchanted Forest

Step into a whimsical enchanted forest with a nail design that captures the essence of nature’s beauty!
This stunning manicure showcases a delightful mix of hand-painted trees, vibrant flowers, and charming forest creatures. Begin with a soft green base, then use fine brushes to layer on your designs, adding depth and dimension for a captivating 3D effect.
To elevate your enchanted forest, consider embellishing it with tiny gems or beads to resemble dew drops glistening on leaves. This magical design is ideal for those who appreciate whimsical elements in their nail art!
For best results, use a variety of colors for your trees and flowers, which will create stunning depth and visual interest. Don’t forget to finish off your look with a glossy topcoat to give your manicure a polished shine.
With each glance at your nails, this enchanting design will evoke a sense of wonder and imagination, making it a fantastic conversation starter. Gather your supplies, including a variety of gel polishes and a nail art palette, and let your creativity bloom!
17. Classic French Twist

Transform the traditional French manicure into a stunning spring-inspired look with a colorful twist!
Begin with a nude base coat and then add tips in delightful pastel shades or vibrant colors. For an extra flair, consider incorporating 3D elements like tiny flowers or playful dots at the corners of the tips. This modern interpretation of the classic design is ideal for those who appreciate timeless styles with a refreshing update.
Remember to let your base coat dry completely before applying the tips to prevent any smudging. Don’t hesitate to play around with various color combinations to create a unique and fun appearance. With its ability to reflect your personality, this versatile design is perfect for any occasion!
To achieve this look, we recommend using a pastel gel polish set for those beautiful colors, fine brushes for precision application, and a dotting tool to create your 3D designs. To finish it off, a quick-dry topcoat will ensure your manicure stays flawless while a nail art palette can help you mix and match your colors with ease!
18. Vintage Floral Lace

Embrace the timeless beauty of vintage floral lace designs for your nails! This exquisite look blends delicate floral motifs with intricate lace accents, resulting in a stunning manicure that is sure to turn heads. Begin with a soft base color and utilize fine brushes, such as those available here, to paint your floral designs. For the lace details, you can use nail art pens, which you can find here, or opt for stencils for added precision.
To achieve a captivating 3D effect, consider embellishing the center of your flowers with small beads or pearls, available for purchase here. This added touch of glamour makes the design perfect for anyone who appreciates vintage aesthetics.
Don’t forget to finish your look with a topcoat for added shine, which you can find here. As a helpful tip, practice your lace technique on paper before applying it to your nails, and ensure each layer is completely dry before adding more details. Vintage floral lace can evoke a sense of nostalgia, making it a charming choice for special occasions, and you may also want to consider using a nail art palette, which can be found here, to organize your colors and designs effectively.
19. Tropical Paradise

Escape to a tropical paradise with stunning nail art that showcases the beauty of exotic flowers and lush palm leaves!
This vibrant design is all about bold colors and playful patterns, making it an ideal choice for those who love to express a lively aesthetic. Begin with a bright base color and use a bright gel polish set to paint intricate exotic flowers and leaves in vivid shades.
For an eye-catching 3D effect, layer your designs and incorporate tiny gems to mimic the look of dew drops—check out these tiny gems for details that will elevate your manicure!
This design is perfect for embracing summer vibes and getting your nails vacation-ready. Remember to use fine brushes for precision and practice your tropical motifs on practice nails before going all out.
To finish, apply a topcoat for shine that will give your nails a glossy finish and protect your artwork.
Tropical designs not only look fabulous but also evoke feelings of joy and adventure, making them the perfect choice for any occasion! Don’t forget to use a nail art palette to mix and match your colors for the ultimate creative experience!
20. Ethereal Moonlit Garden

Transform your nails into an ethereal moonlit garden, beautifully intertwining dark and light elements for a mystical effect that captures the enchanting essence of a nighttime garden.
Begin with a deep, dark base and hand-paint vibrant flowers using fine brushes like those found in this set of fine brushes. To add a magical glow, incorporate glow-in-the-dark nail polish into your design, allowing your nails to shine even in the dark.
For that extra dimension, embellish with small crystals or gems from this set of small crystals or gems to enhance the mystical vibe. Don’t forget to finish with a glossy topcoat, such as this glossy topcoat, to seal in your artwork and give it a stunning shine.
Tips for success include practicing your glow-in-the-dark techniques and ensuring your flowers pop against the dark backdrop for maximum visual impact. This unique design not only evokes feelings of wonder and imagination but also serves as a great conversation starter among friends! For convenience in mixing your colors, consider using a nail art palette to create the perfect shades for your mystical masterpiece.
21. Feathered Elegance

Transform your nails into a canvas of elegance with stunning feathered designs that capture the essence of nature!
Begin your manicure with a neutral base and use fine brushes to expertly paint delicate feather patterns in soft, pastel shades. This technique creates a light and airy effect that is perfect for the spring season.
For added depth and dimension, consider layering the feathers or embellishing them with tiny beads that enhance the 3D effect. This design is ideal for those who appreciate subtle beauty and wish to express their individuality.
To ensure your feathers come out beautifully, practice your strokes on paper first and don’t hesitate to experiment with different colors for a truly unique look. Don’t forget to finish off your masterpiece with a topcoat for shine, ensuring your nails look polished and vibrant.
With a feathered manicure, you not only embrace a stunning aesthetic but also convey a sense of freedom and grace—making it a perfect choice for the blossoming season! For a seamless nail art experience, consider using a nail art palette to mix and match your colors effortlessly.
Conclusion

Spring is the perfect time to experiment with vibrant and creative 3D nail art!
With these 21 gorgeous designs, you can express your style and embrace the beauty of the season.
Whether you prefer playful florals, elegant patterns, or whimsical themes, there’s a design here for everyone. Let your creativity bloom and make your nails a canvas for spring’s vibrant spirit!
Note: We aim to provide accurate product links, but some may occasionally expire or become unavailable. If this happens, please search directly on Amazon for the product or a suitable alternative.
This post contains Amazon affiliate links, meaning I may earn a small commission if you purchase through my links, at no extra cost to you.