
Nail art has me obsessed lately! With so many styles to explore, it feels like a canvas just waiting for your creativity. Whether you’re gearing up for a special occasion or just want to pamper yourself at home, adding some flair to your nails can be the perfect finishing touch. Who doesn’t love a fresh manicure that makes them feel fabulous? That’s why I created this post, packed with 20 trendy nail art designs you can easily DIY at home.
If you’re someone who enjoys beauty and loves to express yourself through your nail art, this one’s for you! You don’t have to be a professional to create stunning designs. From classic looks to fun and quirky patterns, you’ll find something that speaks to your unique style. You’ll get step-by-step ideas that are easy to follow, fun to try, and perfect for any skill level. So grab your nail supplies and get ready to turn your nails into mini masterpieces!
In this guide, I’ll walk you through 20 fabulous nail art ideas, including a special mention of #11 that will blow your mind. This article aims to help you discover new techniques while enjoying the process of nail art. You’ll impress your friends, elevate your style, and more importantly, have a blast experimenting with different designs right from the comfort of your home. Let’s dive in!
Key Takeaways
– Discover 20 trendy nail art designs that you can easily create at home, suitable for all skill levels.
– Get inspired by unique styles like classic French tips with a twist and geometric patterns, designed to elevate your nail game.
– Find practical steps and materials needed for each design, making it simple to follow along and recreate them yourself.
– Enjoy the process of DIY nail art, which not only saves you money but also allows for personal expression and creativity.
– Look out for #11 in the list—it’s a standout design that will redefine your nail art experience.
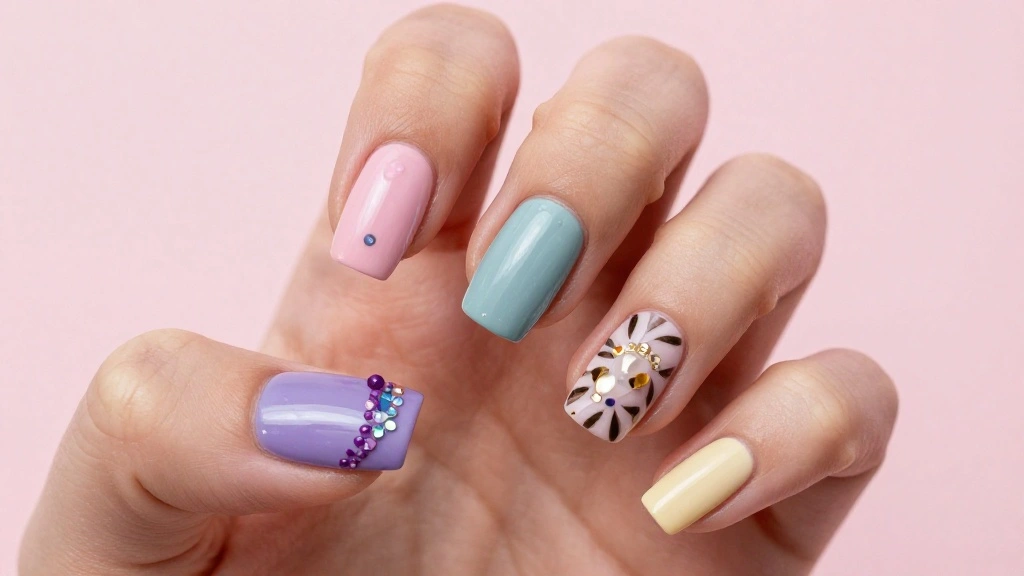
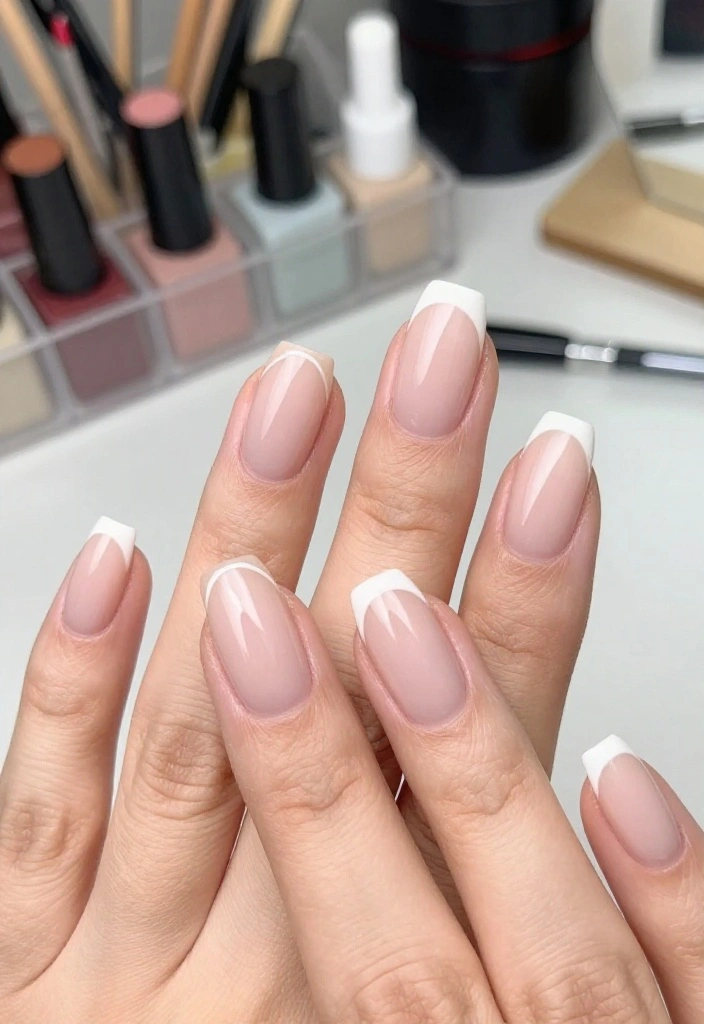
1. Classic French Tips with a Twist

Revamp the classic French manicure with a vibrant twist! This trendy design retains the iconic white tips but adds a splash of color at the base for a fresh, youthful appeal. Imagine soft pastels or striking neons complementing your look, making it suitable for any occasion.
To achieve this playful style, start by applying a neutral base coat and allow it to dry completely. Next, use tape to ensure clean lines as you paint the tips with your chosen color. Finish off with a glossy top coat for that salon-quality shine.
Here’s how to perfect this design:
– Use high-quality tape for crisp lines.
– Experiment with a gradient effect for a modern touch.
– Mix colors on different nails for an eye-catching ensemble.
Your chic nails will stand out and are surprisingly easy to create!
Classic French Tips with a Twist
Editor’s Choice


2. Geometric Patterns
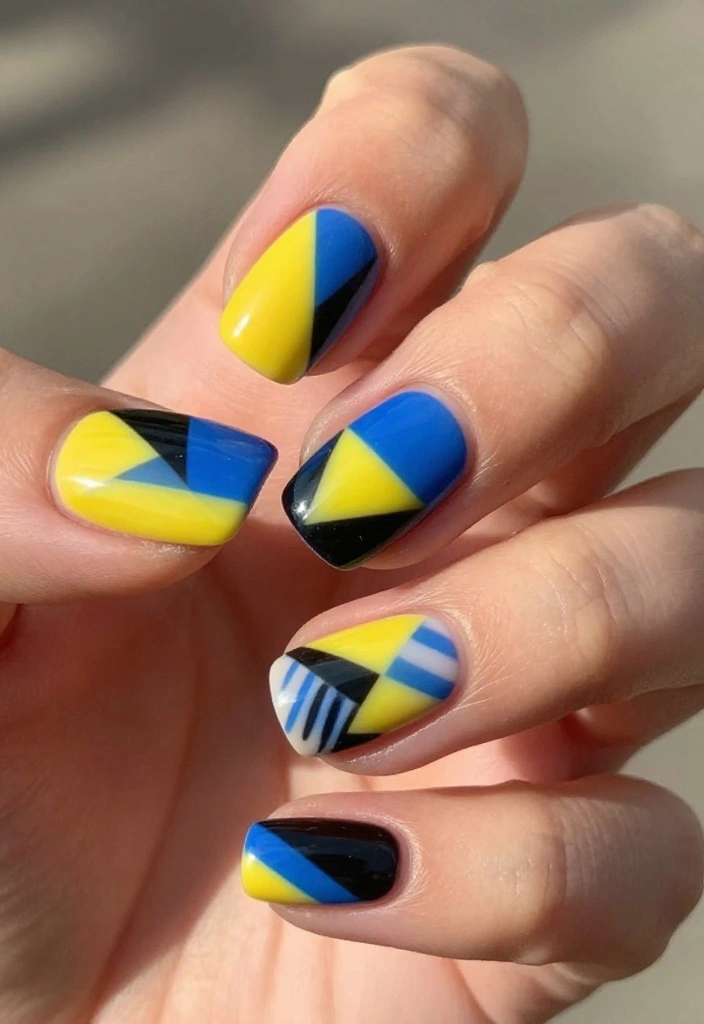
Dive into the world of geometric nail art, where clean lines and bold shapes take center stage! This design is all about triangles, squares, and stripes, allowing for creativity with contrasting colors.
Start with your favorite base color and let it dry thoroughly. Then, grab a thin brush or nail tape to craft your geometric masterpieces. You can opt for bold contrasts or stick to a monochrome palette for a sleek look. Don’t forget to top it off with a glossy coat for shine and durability!
Here are some tips to get you started:
– Try a matte top coat for an edgier vibe!
– Incorporate negative space for a modern twist.
This style is perfect for anyone who loves minimalistic yet striking designs.
3. Floral Accents
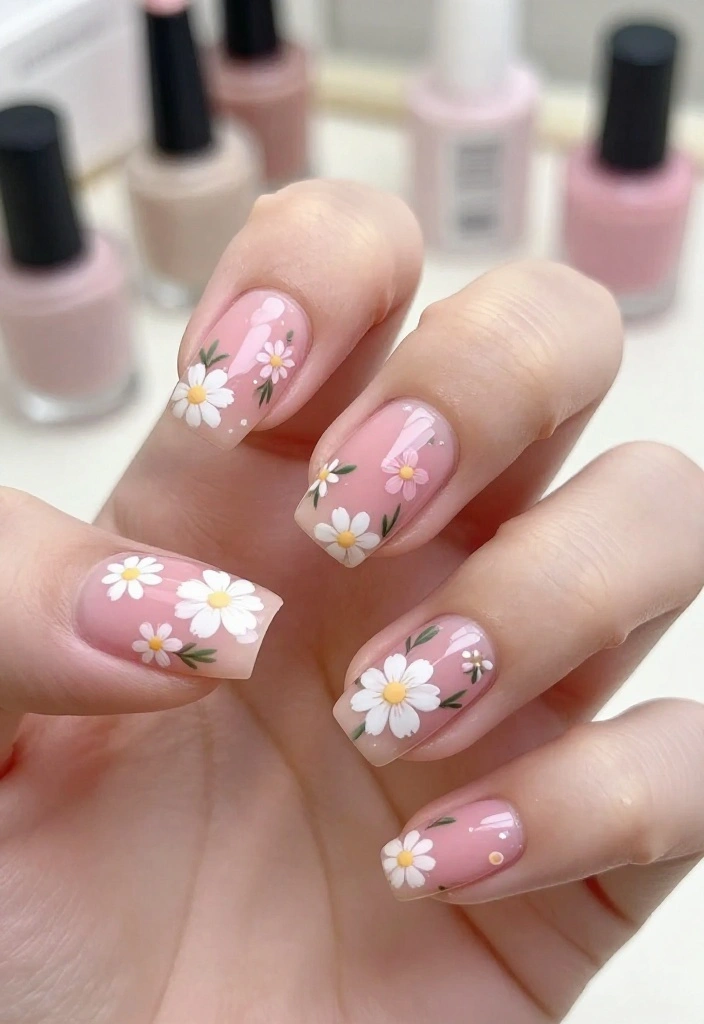
Add a touch of nature to your nails with beautiful floral designs! Ideal for the spring and summer months, floral nail art can range from simple blooms to intricate patterns.
Begin with a light base color, then use a fine brush to paint delicate flowers like daisies or roses. If freehand painting feels daunting, nail stickers can also provide stunning results.
For your floral designs:
– Use a dotting tool for perfect flower centers.
– Pair with pastel bases for a fresh, spring-inspired look.
This lovely design is a feminine touch that effortlessly elevates any outfit!
Fun fact: 78% of people trying DIY floral nail art designs report pastel bases make the blossoms pop. A dotting tool centers the flower perfectly, and stickers can save time without sacrificing detail. Start light, layer with delicate petals, and seal with a quick top coat.
4. Ombre Effect
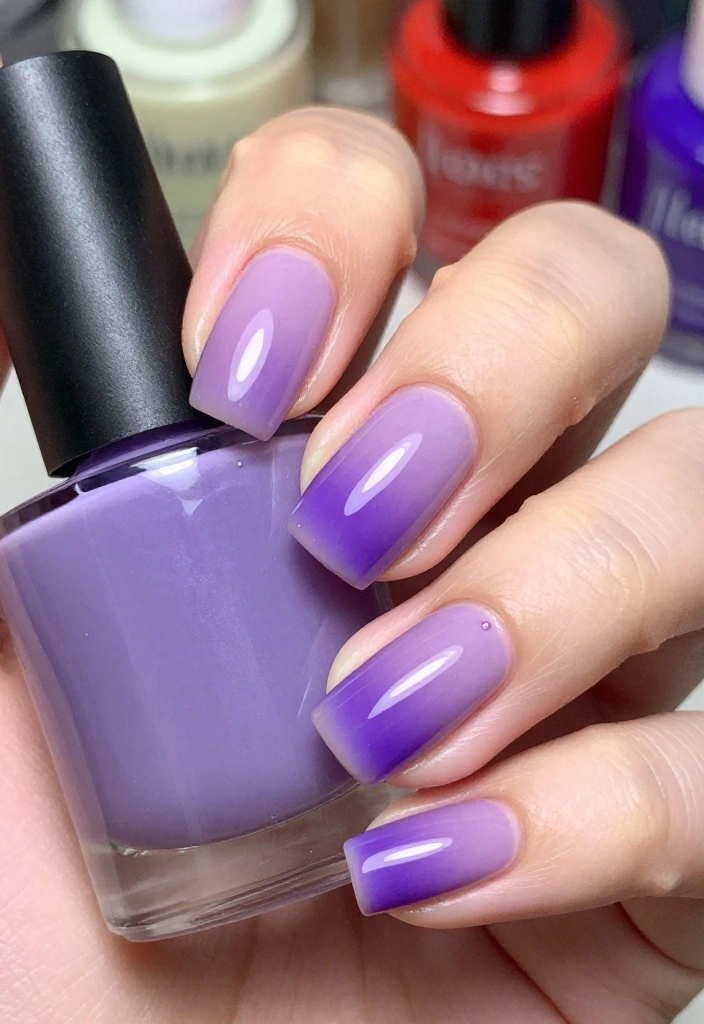
Create a mesmerizing gradient with ombre nails that blend two or more colors! This versatile design allows you to choose shades that reflect your mood or the season.
To achieve the ombre effect, start with a white base coat and let it dry. Mix your chosen colors on a makeup sponge and dab it onto your nails, blending seamlessly as you go. Finish with a top coat for a glossy, polished look.
To enhance your ombre:
– Experiment with contrasting colors for drama.
– Use a fine brush to tidy up edges for a neat finish.
Your ombre nails will impress everyone and look as if you just stepped out of a salon!
Ombre Effect
Editor’s Choice


📹 Related Video: DOs & DON’Ts: Ombré Nails | how to do ombré nails with regular polish
5. Metallic Accents
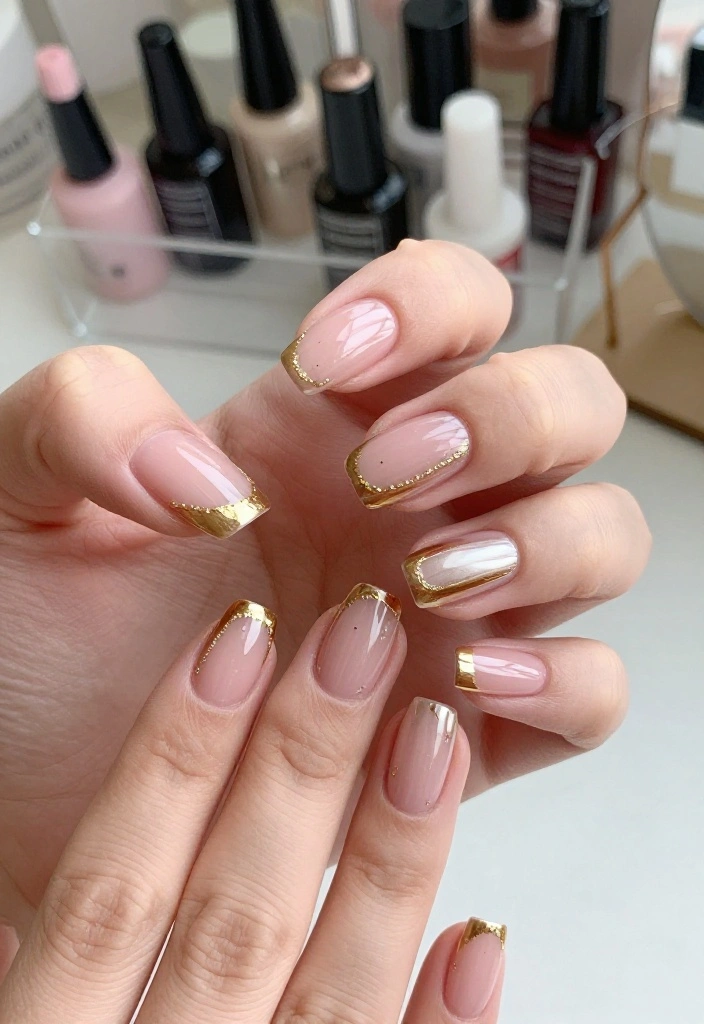
Shimmer and shine with metallic accents that elevate your nail game! Whether you choose gold, silver, or rose gold, these trendy finishes add glamour to any look.
Create a full metallic nail or opt for a chic accent nail to highlight your design. Start with your base color, let it dry, and then apply metallic polish on tips or in specific designs. Seal it all with a glossy top coat to maintain that fresh appearance.
For stunning metallic nails:
– Pair with neutral colors for balance.
– Use nail tape for sharp lines and intricate designs.
Get ready to dazzle with this stylish nail design!
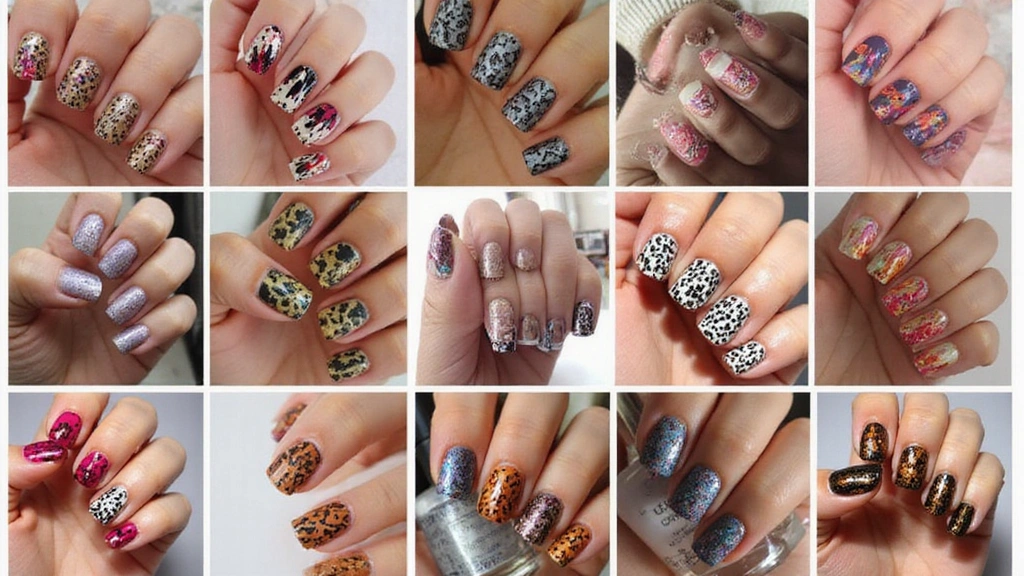
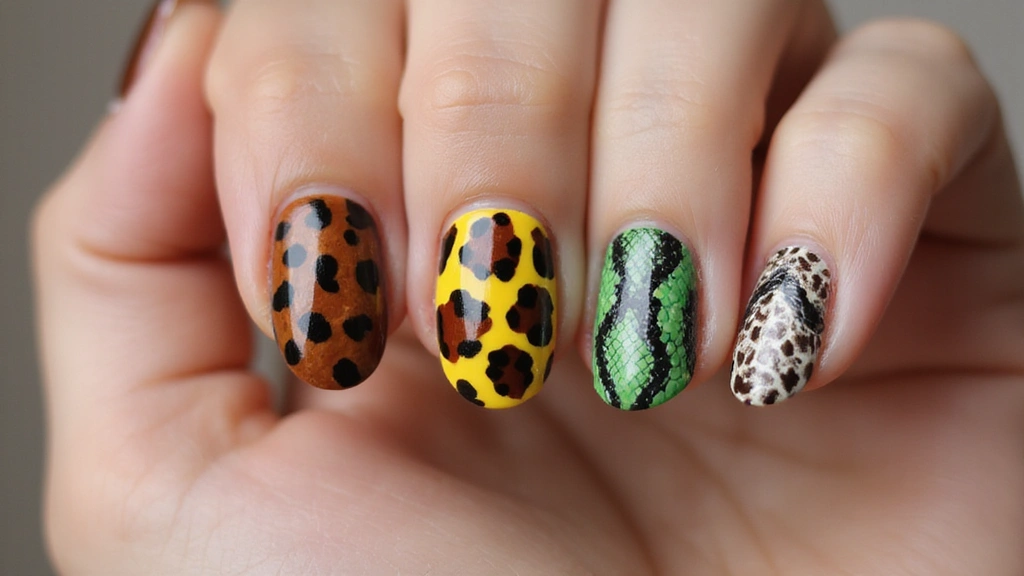
6. Animal Prints
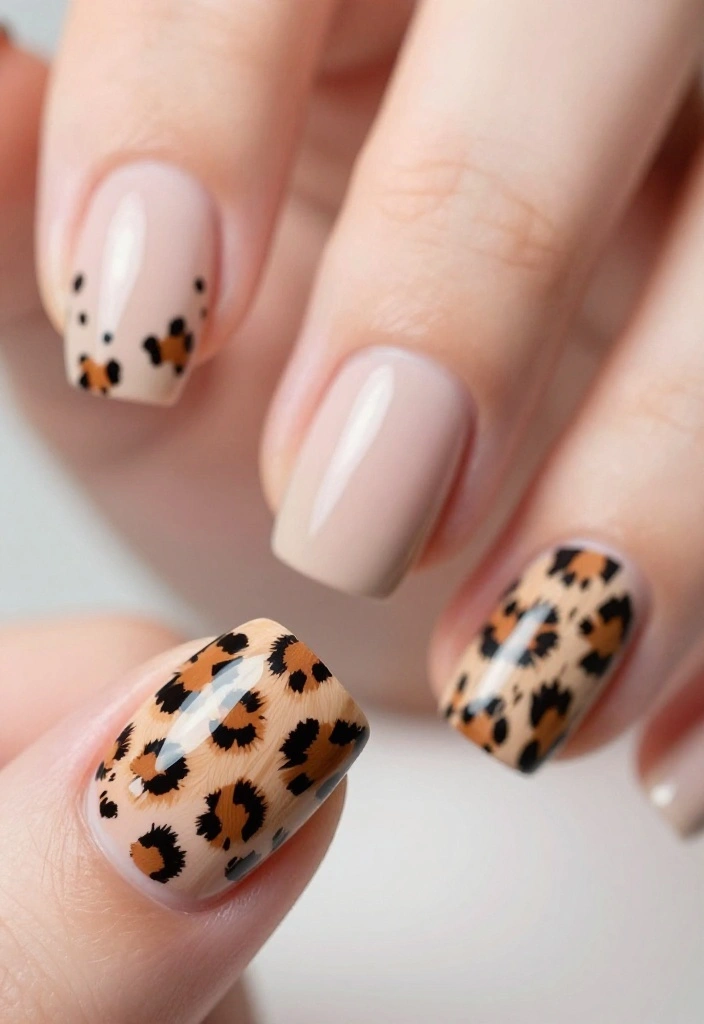
Express your wild side with playful animal print nail art! This bold design is perfect for those who love striking styles.
Choose from leopard spots, zebra stripes, or snake skin patterns, using a steady hand and vibrant colors. Start with a base color, let it dry, and then paint the animal patterns using a fine brush. Alternatively, nail stickers offer an easier option. Seal your look with a glossy top coat for a polished finish.
Here are some helpful tips:
– Mix and match prints for a quirky touch!
– Use a matte top coat for an unexpected finish.
Animal prints are a fantastic way to showcase your personality and style!
7. Rainbow Brights
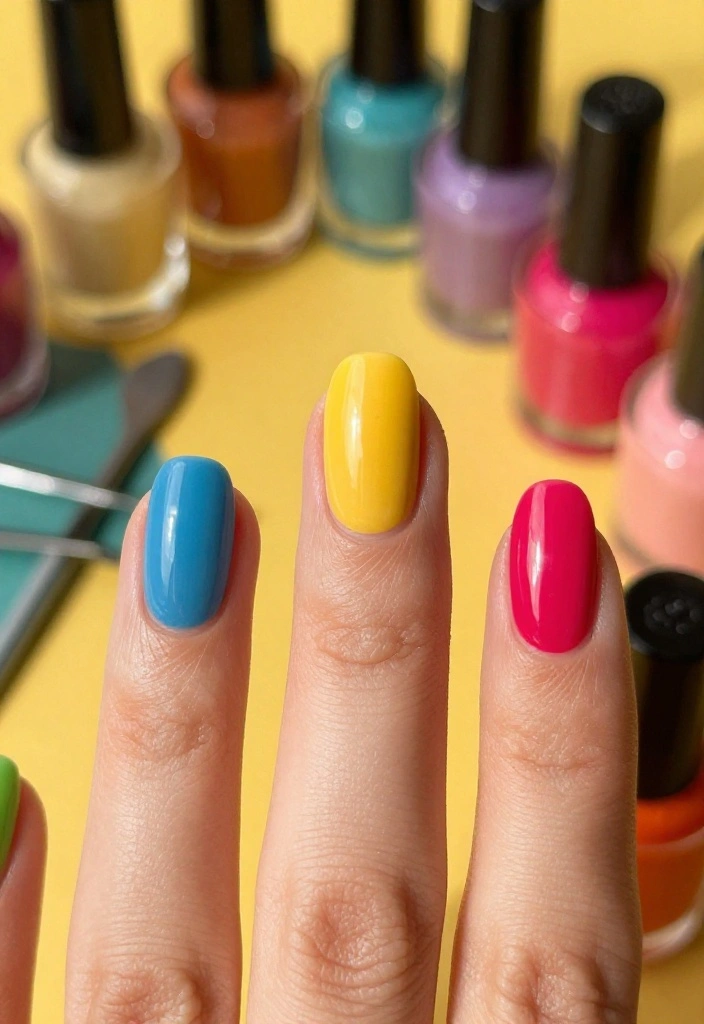
Spread joy with vibrant rainbow nail art! This design is all about bright colors and fun, perfect for adding a cheerful touch to your style.
Start with a white base to let the colors shine. Using a brush or sponge, apply your rainbow colors in stripes or dots. More colors mean more fun! Seal your masterpiece with a clear top coat for a glossy finish.
To make it extra special:
– Add glitter on top for dazzling sparkle.
– Use contrasting colors for a bold statement.
These cheerful nails are ideal for summer festivals or whenever you want to brighten your day!
How To Choose Trendy Nail Art Designs
Choosing the right nail art designs can be a fun but overwhelming experience. With so many styles, colors, and techniques available, it’s essential to narrow down your options to find what suits you best. Here are some tips to help you decide on the perfect nail art for your DIY project.
1. Nail Length:
Your nail length plays a crucial role in determining which designs will look best. For shorter nails, opt for minimalist designs like lines or dots. Longer nails allow for more detailed artwork, such as floral accents or intricate patterns. Measure your nails and decide how much art you want to display.
2. Personal Style:
Consider your style and the message you want to convey. If you love bold statements, go for vibrant colors or abstract designs. If your style is more subdued, opt for soft pastels or classic French tips with a twist. Reflect on your wardrobe; your nail art should complement your look.
3. Special Occasions:
Think about any upcoming events. If you have a wedding or party, choose designs that match the occasion’s vibe. Seasonal designs can also be fun, like autumn leaves or holiday-themed art. Make sure your nail art is appropriate for the setting you’ll be in.
4. Skill Level:
Be honest about your DIY skills. Some designs require advanced techniques, while others are beginner-friendly. If you’re new to nail art, start with simpler designs such as ombre effects or confetti nails. As you gain confidence, you can tackle more complex styles like marbled effects or animal prints.
5. Tools & Materials:
The tools and materials you have at home can influence your choice. Ensure you have the right supplies for the design you want. For example, if you’re going for a glitter gradient, you’ll need a good-quality base coat, colored polish, and glitter. If you’re missing key items, you might want to adjust your design choice accordingly.
6. Trends:
Keep an eye on current nail art trends for inspiration. Browsing social media or nail art blogs can spark ideas. Look for designs that catch your eye and consider how you can adapt them to your style. Don’t hesitate to combine elements from different trends to create something uniquely yours.
Pro Tip: Always practice on a nail wheel or a piece of paper before applying the design to your nails. This way, you can perfect your technique and avoid any mistakes on your actual nails.
Armed with these tips, you’re ready to explore trendy nail art designs that reflect your personality and style! Happy DIYing!
8. Minimalist Lines
Embrace the ‘less is more’ philosophy with minimalist nail art! This trend focuses on clean lines and simple shapes, making it ideal for a subtle yet stylish look.
Begin with a nude base coat and add fine black or white lines, dots, or tiny shapes for a chic design. Precision is key, so take your time to ensure everything looks neat. Finish with a top coat to keep your nails fresh.
Pro tips include:
– Use tape for straight, clean lines.
– Mix various shapes for a unique style!
Minimalist nail art makes a sophisticated statement, perfect for any occasion.
You might also like

9. Confetti Nails
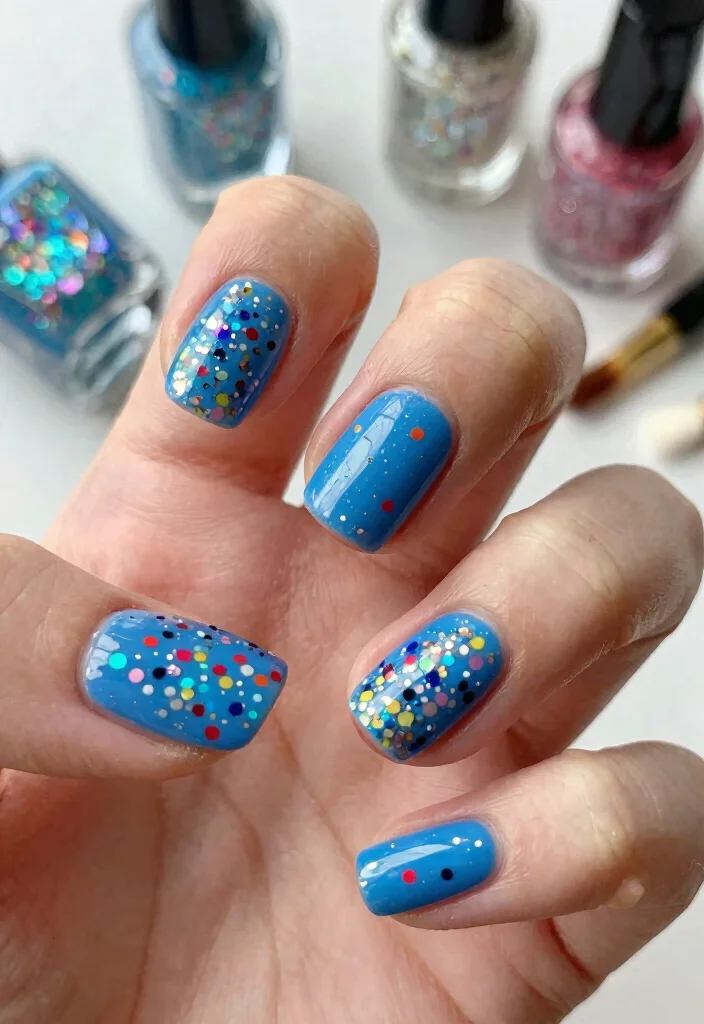
Add a festive touch with confetti nail designs! Perfect for celebrations, these playful nails are sure to grab attention.
Start with a solid base color, and once it’s dry, apply a clear top coat and sprinkle colorful confetti or glitter on top. For an easier option, nail stickers can do the trick too. Seal everything with a top coat for long-lasting fun.
To try out:
– Mix different sizes of confetti for added texture.
– Coordinate your color palette with your outfits for a cohesive look.
Confetti nails are a delightful way to make your manicure pop with excitement!
10. Marbled Effect

Create stunning marble nails that look chic and sophisticated! This design appears intricate but is surprisingly easy to execute.
Start with a white or light base color, then use two or three shades of your choice. Swirl the colors together using a toothpick or nail art brush, and then dip your nails into the mixture to achieve that marbled look.
To perfect your marble nails:
– Apply a top coat to enhance shine and seal the design.
– Experiment with different color combinations for a unique finish.
Your marbled nails will look elegant and stylish, perfect for any occasion!
11. Abstract Art
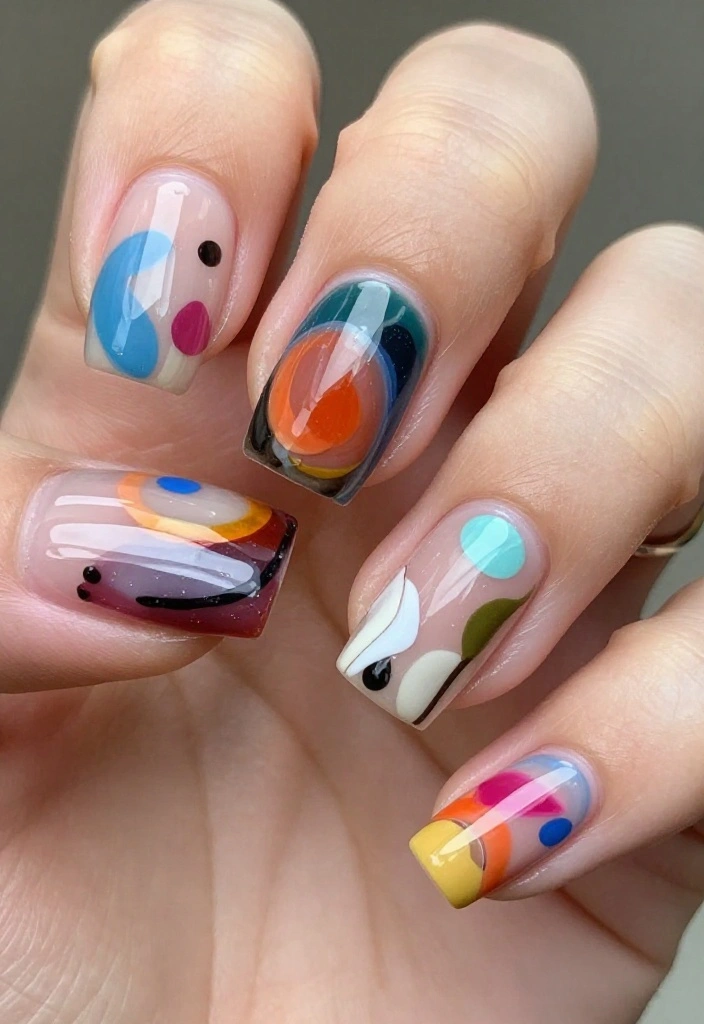
Let your creativity flow with abstract nail art! This trendy style allows for personal expression through bold colors and unique patterns. It’s all about mixing shapes, lines, and colors however you like.
Start with a solid color base and use a thin brush to add your designs, whether it’s lines, dots, or shapes in complementary hues. The key is to enjoy the process and let your artistic side shine!
Pro tips:
– Embrace imperfections; it’s part of the abstract charm.
– Use contrasting colors for a more dynamic appearance.
Abstract nails are a fantastic conversation starter and showcase your individuality like nothing else!
12. Glitter Gradient
Sparkle and shine with a glitter gradient on your nails! This stunning look is perfect for parties or whenever you want to feel fabulous.
Start with your favorite base color and let it dry completely. Then, using a makeup sponge, dab glitter from the tips of your nails, gradually blending it downwards. Seal your design with a top coat for a smooth finish.
For this trendy look:
– Use fine glitter for a subtle sparkle.
– Mix different glitter shades for a unique effect.
Your glitter gradient nails will catch everyone’s eye, adding a touch of glamour to your style!
13. Color Block
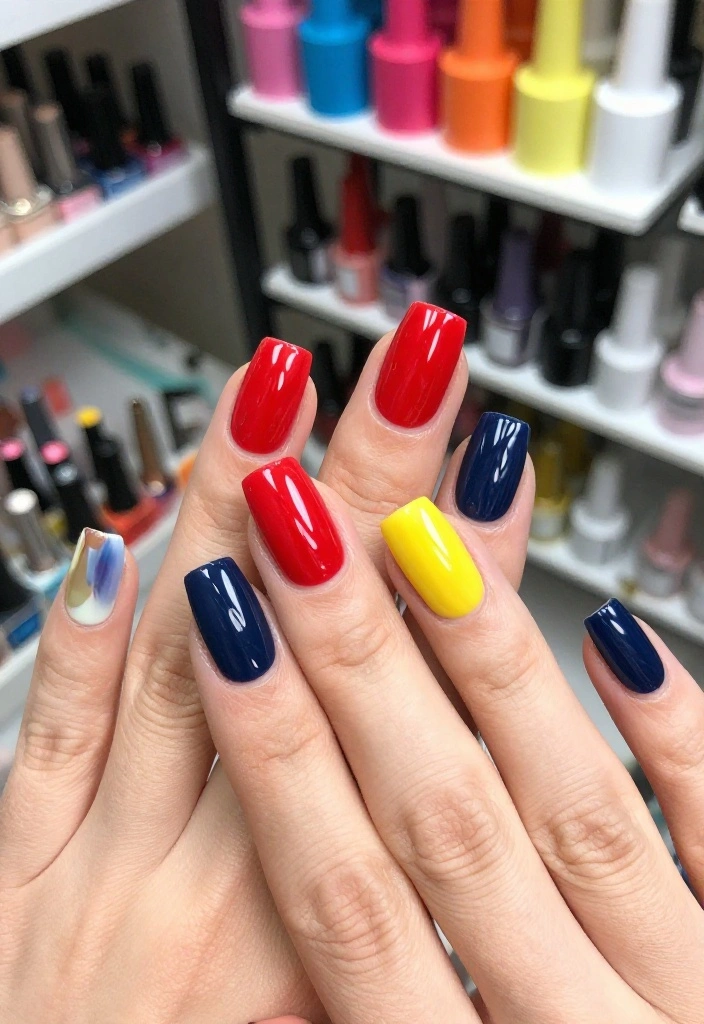
Add a modern flair to your nails with color block designs! This trend features bold, solid colors divided by sharp lines, making a statement.
Select two or three complementary colors and start with a base coat. Use tape to section off parts of your nails and apply your chosen colors. Finish with a top coat to seal your colorful creation.
Handy tips include:
– Try using three colors for a more dynamic appearance.
– Experiment with different shapes and angles for added interest.
Color blocking is a fun way to play with colors and elevate your manicure!
14. Tie-Dye Delight
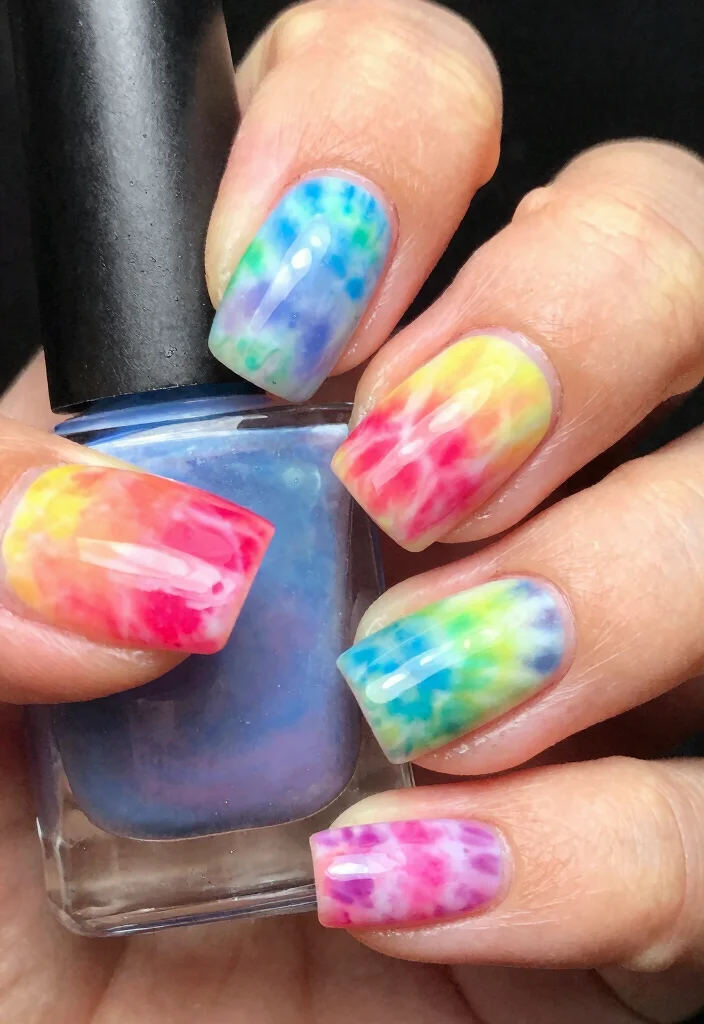
Enjoy a playful vibe with tie-dye nails! This colorful design is perfect for summer festivals and brings a fun element to your style.
Start with a white base coat and use a small brush or sponge to apply various colors in circular motions. Blending colors helps create that classic tie-dye look. Seal it with a top coat for lasting wear.
For tie-dye nails:
– Use bright colors for a striking effect.
– Embrace randomness; imperfections add to the charm!
Your tie-dye nails will certainly steal the spotlight and reflect your carefree spirit!
15. Candy Stripes
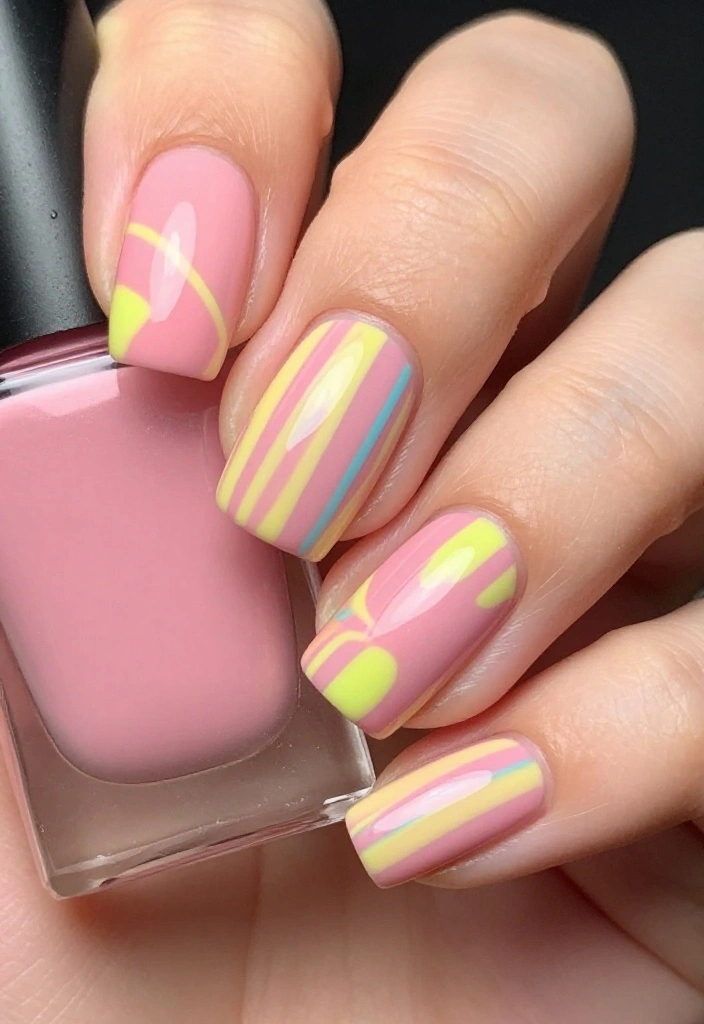
Sweeten your manicure with candy stripe nails! This fun design is playful and perfect for those who adore bright colors.
Begin with a base coat of your choice, then use striping tape to create clean lines. Alternate colors in stripes, achieving a candy-like effect. Finish off with a glossy top coat for extra shine.
For candy stripes:
– Choose pastel colors for a softer aesthetic.
– Consider glitter polish for added sweetness.
Candy stripes will definitely brighten your day and treat your nails to a fun makeover!
Candy Stripes
Editor’s Choice


You Might Also Like
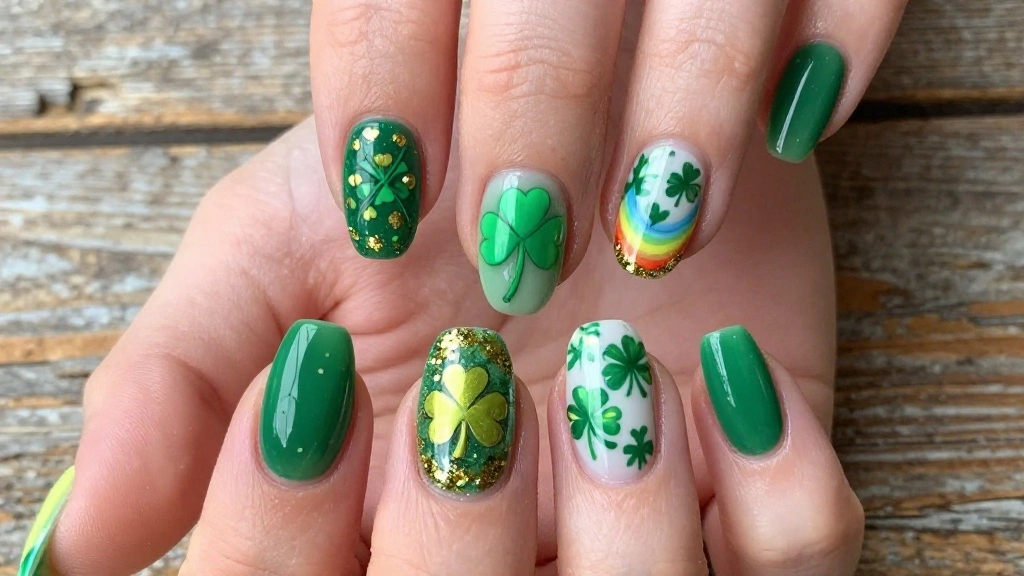
16. Seasonal Designs
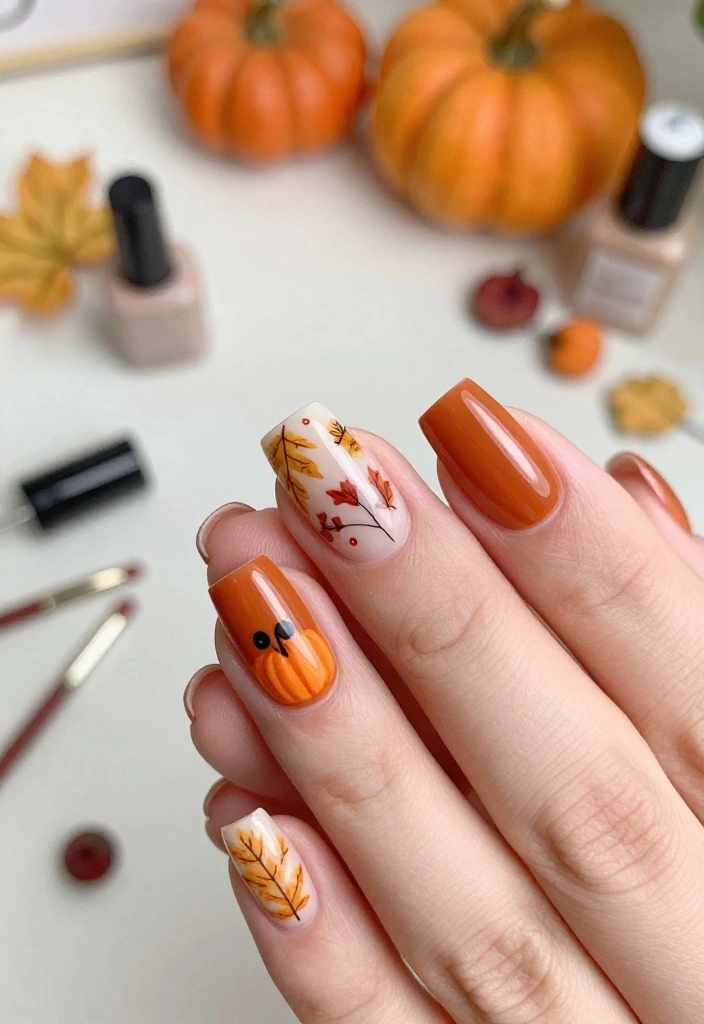
Celebrate the beauty of seasons with themed nail art! Whether it’s autumn leaves, winter snowflakes, or summer florals, seasonal designs express your love for nature throughout the year.
Select a base color that fits the season, then add thematic designs using a fine brush or nail stickers. A top coat will help your art last longer.
Seasonal tips:
– Draw inspiration from nature for unique ideas.
– Use contrasting colors to make your designs pop.
Seasonal designs connect you with nature’s beauty and can bring a smile to your face!
Fun fact: 8 out of 10 nail art designs fans say seasonal themes spark creativity and mood—think autumn leaves, winter snowflakes, and summer florals. For best results, pair a season-appropriate base color with a fine brush or stickers, then seal with top coat.
Seasonal Designs
Editor’s Choice

17. Neon Dreams
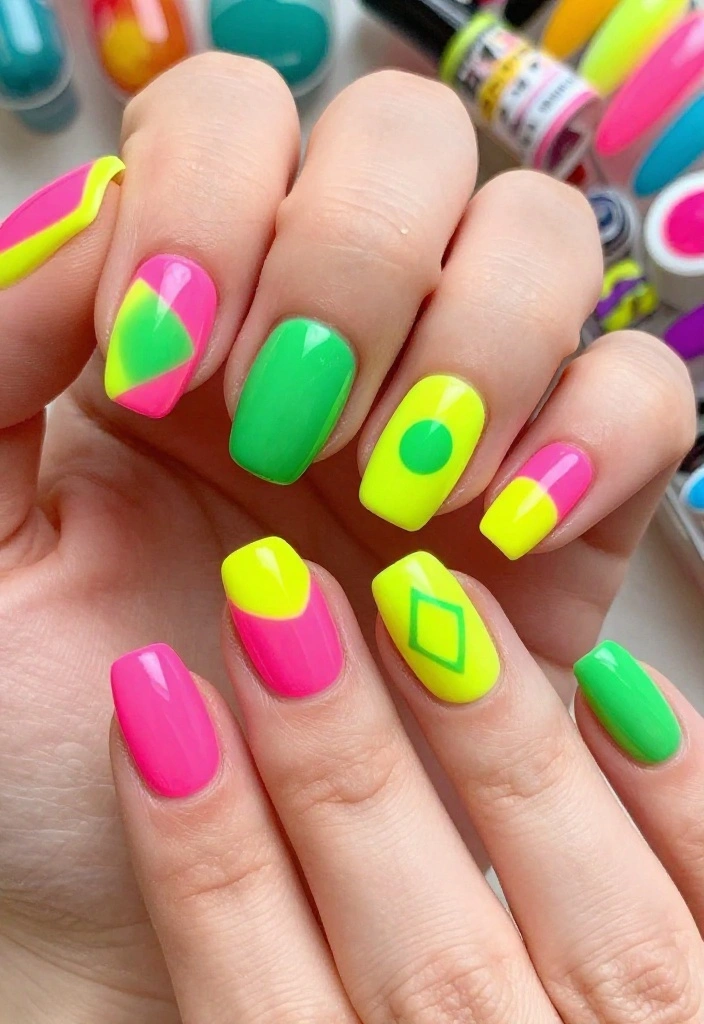
Brighten your manicure with vibrant neon nail art! Neon shades are perfect for making a bold statement, especially in the warmer months.
Start with a base coat and apply your favorite neon colors. You can go all out with neon nails or create exciting patterns. A glossy top coat enhances the brightness of those neon shades.
To perfect your neon nails:
– Use a white base coat to amplify the colors.
– Mix different neon shades for a trendy effect.
Neon nails are a fantastic way to stand out and showcase your lively personality!
18. Gradient Glitter

Get ready to shine with gradient glitter nails that dazzle! This design combines the elegance of a gradient with the glimmer of glitter.
Start with a solid base color, then apply glitter at the tips and blend it downward. You can use a sponge for smooth blending. Seal your design with a top coat for a polished finish.
For gradient glitter:
– Use fine glitter for a subtle sparkle.
– Play with different color combinations for a unique look.
Your gradient glitter nails will shine brightly, drawing compliments wherever you go!
Gradient Glitter
Editor’s Choice


19. Vintage Patterns

Embrace retro charm with vintage pattern nails! This trendy design celebrates classic patterns like polka dots, paisley, or houndstooth, perfect for those who appreciate nostalgia.
Start with a solid base color, then use nail art brushes or stickers to create your favorite patterns. A glossy top coat will keep your design looking fresh and vibrant.
Pro tips:
– Choose a color palette that reflects vintage aesthetics for authenticity.
– Mix various patterns on different nails for a playful touch.
Vintage pattern nails are chic, stylish, and sure to make a statement!
Fun fact: vintage pattern nails are among the most striking nail art designs you can DIY at home, using just dots and stripes. Start with a bold base, then layer polka dots, paisley, or houndstooth for chic, retro vibes. Finish with a glossy top coat to keep it flawless.
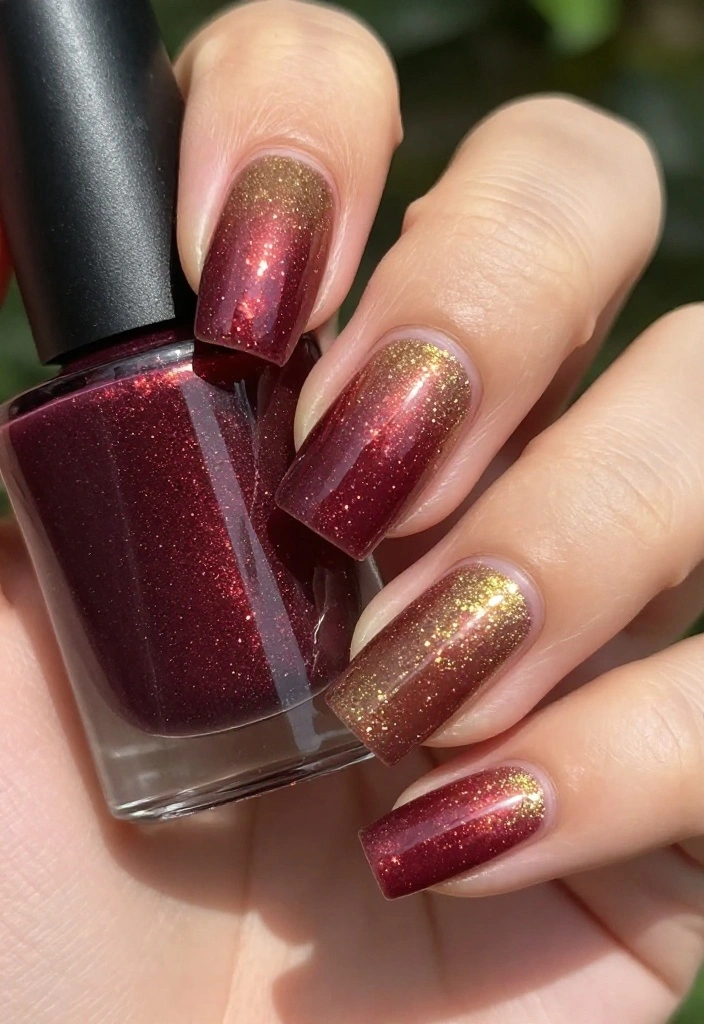
20. Radiant Ombre with Foil

Elevate your ombre nails with luxurious gold or silver foil accents! This stunning design combines the beauty of ombre with the glamour of metallic foil.
Begin with a light base coat and create your ombre effect using two or three complementary colors. Once dry, carefully apply pieces of metallic foil on the tips or throughout the nails for an eye-catching effect. Seal with a top coat to secure it all in place.
To make your design shine:
– Use bold color combinations for a striking ombre that highlights the foil.
– Experiment with foil placement for unique designs.
This radiant ombre style will give your nails a luxurious and captivating look!
Conclusion

With these 20 trendy nail art designs, your fingertips will be the talk of the town!
Whether you’re looking to keep it chic or go bold, there’s a design for every mood and occasion. So grab your nail polish and get creative—you never know what stunning masterpieces you’ll come up with!
Which design are you excited to try first? Share your nail art journey with us!
Note: We aim to provide accurate product links, but some may occasionally expire or become unavailable. If this happens, please search directly on Amazon for the product or a suitable alternative.
This post contains Amazon affiliate links, meaning we may earn a small commission if you purchase through our links, at no extra cost to you.
Frequently Asked Questions
What are some easy nail art designs I can DIY at home?
There are plenty of nail art designs you can master without a pro. Start with beginner-friendly ideas like a clean color block using tape, classic polka dots with a dotting tool, minimalist stripes with striping tape, a simple French tip in a contrasting color, or a two-tone gradient using a sponge. These techniques are approachable and require only a few supplies. If you want a wow factor, try design #11 from the article for a standout DIY look.
Tip: seal your work with a top coat to extend longevity and practice on a nail wheel or swatches before applying to nails.
Which nail art trends are popular for DIY right now?
If you’re chasing trendy nail art designs, you’ll love these DIY-friendly looks: negative-space nails, soft marble or water-marble with a sponge, pastel gradients, minimalist line art, and chrome or foil accents. All of these can be recreated at home with a few common tools like tape, brushes, and foil sheets. The article’s top 20 designs highlight these trendy options and show you how to nail them yourself.
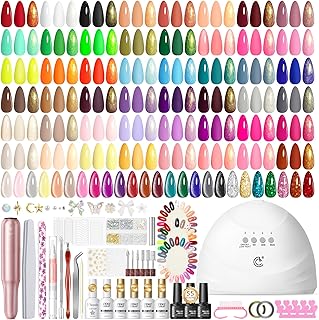
What supplies do I need to start DIY nail art designs at home?
Getting started doesn’t have to be overwhelming. For DIY nail art designs, gather: base coat, top coat, 2–3 polish colors, a dotting tool, striping tape, a small nail brush, cotton pads, nail polish remover, and a cuticle pusher. Optional but helpful: a makeup sponge for gradients, foil sheets for accents, and quick-dry drops. With these basics, you can recreate many designs from the article and expand as you gain confidence.
How can I make nail art designs last longer and prevent chipping?
Prolonging your nail art designs is all about technique and protection. Apply thin coats and let each layer dry fully, then cap the free edges with the polish to seal the tips. Use a quality top coat and re-apply every couple of days to lock in the look. Wear gloves for chores that involve water or cleaning, and moisturize nails and cuticles to prevent dryness from causing peeling. A quick cleanup with a small brush and remover can fix mistakes without ruining the design.
Is this collection beginner-friendly, and how should I pick my first design?
Absolutely—this article is designed for DIY beginners. Start with simple, forgiving designs like a single solid color with an accent nail or easy dot/stripe patterns. Follow a base-to-top-coat process: prep, base coat, color, design details, and top coat. Choose designs based on your comfort with tools (dots, tape, sponges) and gradually try more complex looks as you gain confidence. You’ll find plenty of inspiration in the 20 nail art designs featured, including options that are perfect for first-timers.
Related Topics
nail art designs
trendy nails
DIY nail art
beginner friendly
easy designs
minimalist nails
colorful patterns
seasonal nail art
quick tutorials
creative nail tips
home manicure
advanced techniques