

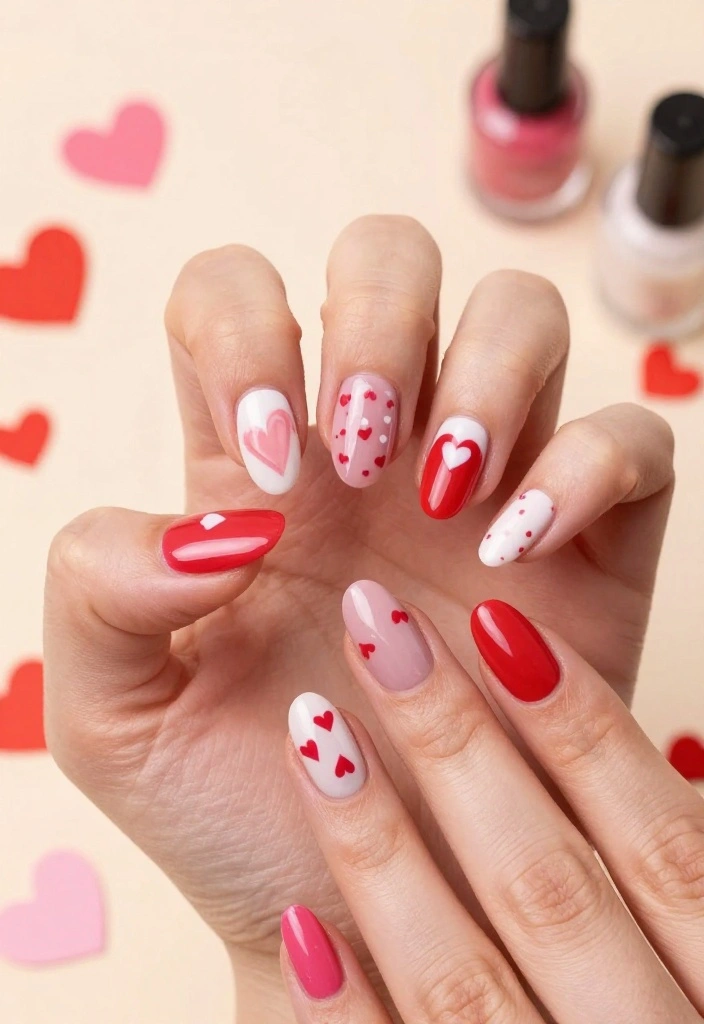
Valentine’s Day is just around the corner, and that means love is in the air! As hearts flutter and chocolates abound, many of us start craving ways to express our affection, not just through gifts but also through our style. What better way to show your love than with adorable Valentine’s nails? Whether you’re gearing up for a romantic dinner, a fun night out with friends, or just want to sport a cute look at home, having the perfect nail design can really elevate your vibe.
If you’re someone who loves nail art and enjoys celebrating the season of love, this post is for you. We’ve crafted a delightful collection of creative, eye-catching Valentine’s nail ideas that will ignite your passion for all things nail art. From sweet heart designs to playful love themes, these nail designs are bound to make you swoon. You’ll find options that are chic, fun, and oh-so-romantic, perfect for anyone looking to embrace the festive spirit this February.
In this guide, you’ll discover 14 adorable Valentine’s nail ideas that are sure to make you fall in love at first sight! Each design offers a unique twist, whether you prefer something minimalistic or want to go all out with glitter and hearts. Let’s dive into this colorful world of nail art and get ready to impress everyone this Valentine’s Day!
Key Takeaways
– Explore 14 adorable Valentine’s nail designs that cater to different styles and preferences, ensuring you’ll find something you love.
– Each nail idea features creative themes of love, perfect for celebrating Valentine’s Day in style.
– Discover step-by-step guides for some of the designs, helping you recreate them easily at home.
– Get inspired by trendy color palettes and materials that can elevate your nail game this season.
– Learn about personal touches you can add to the designs, making them uniquely yours and perfect for any romantic occasion.
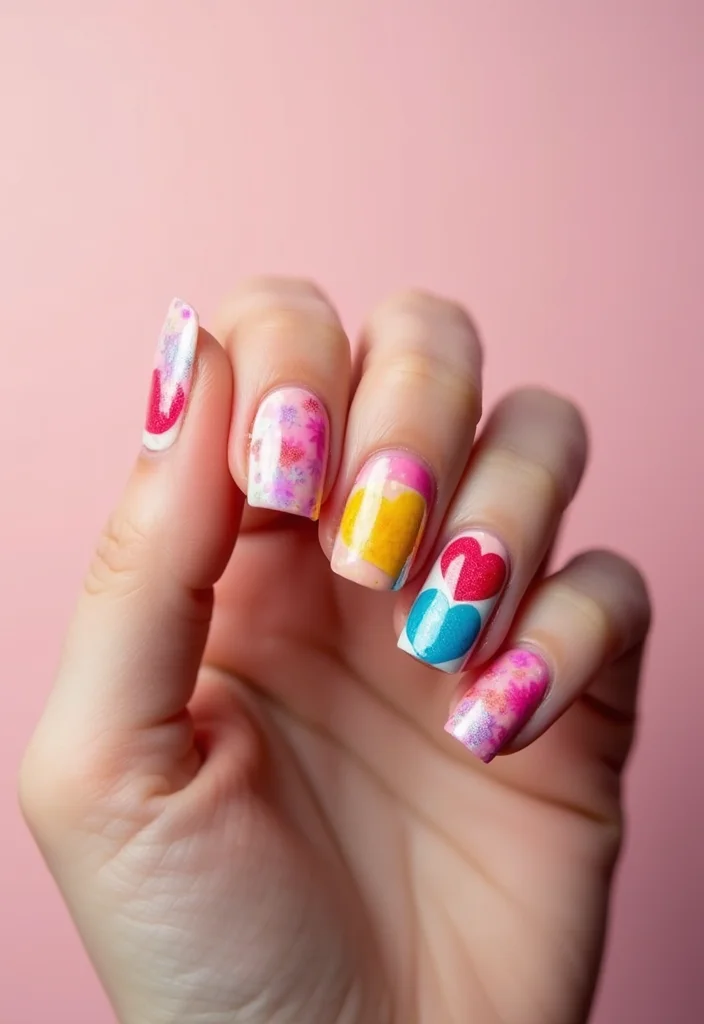
1. Sweetheart Ombre
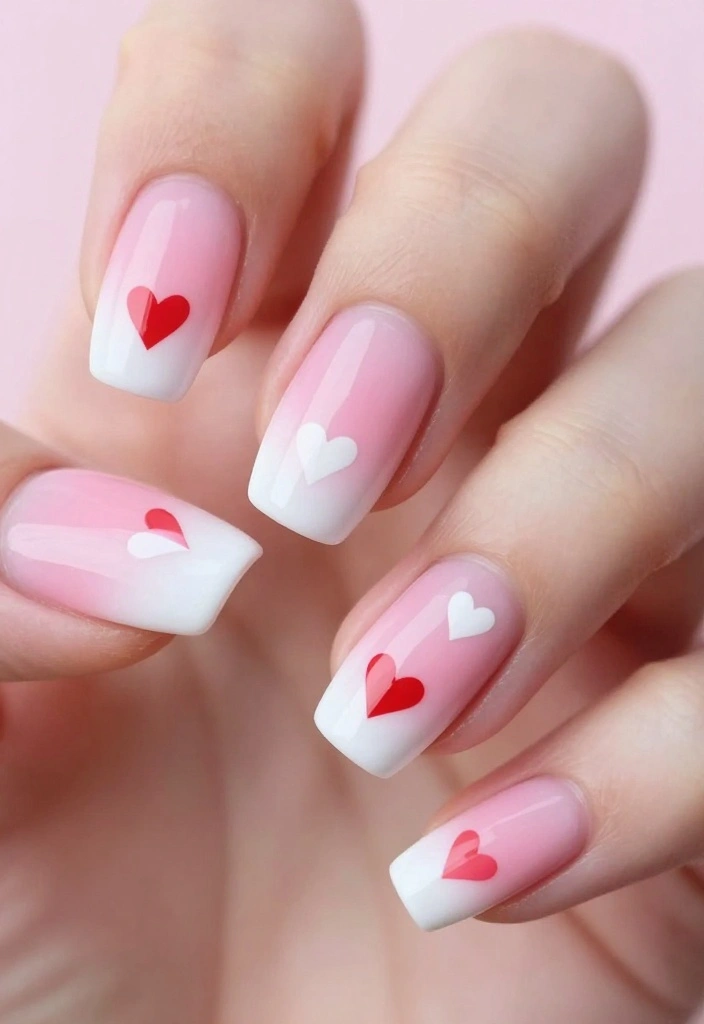
Imagine stepping into a world where soft pinks blend effortlessly into charming whites, creating a dreamy ombre effect on your nails. This design is not just visually appealing, but it also adds a touch of romance to any occasion. Perfect for a casual day out or a special date night, the Sweetheart Ombre nails are sure to capture hearts everywhere you go.
To achieve this lovely look, start with a light pink base coat and let it dry completely. Next, use a makeup sponge to dab on white polish, blending it into the pink for that flawless ombre effect. Finish by adding tiny hearts in red or white with a dotting tool for an extra sprinkle of love. Here’s what you’ll need:
– Light pink nail polish
– White nail polish
– Red nail polish
– Top coat
– Makeup sponge
– Dotting tool or fine brush
Remember to keep your layers thin for a seamless blend, and always seal your masterpiece with a top coat for long-lasting wear.
Sweetheart Ombre
Editor’s Choice


2. Love Letter Nails
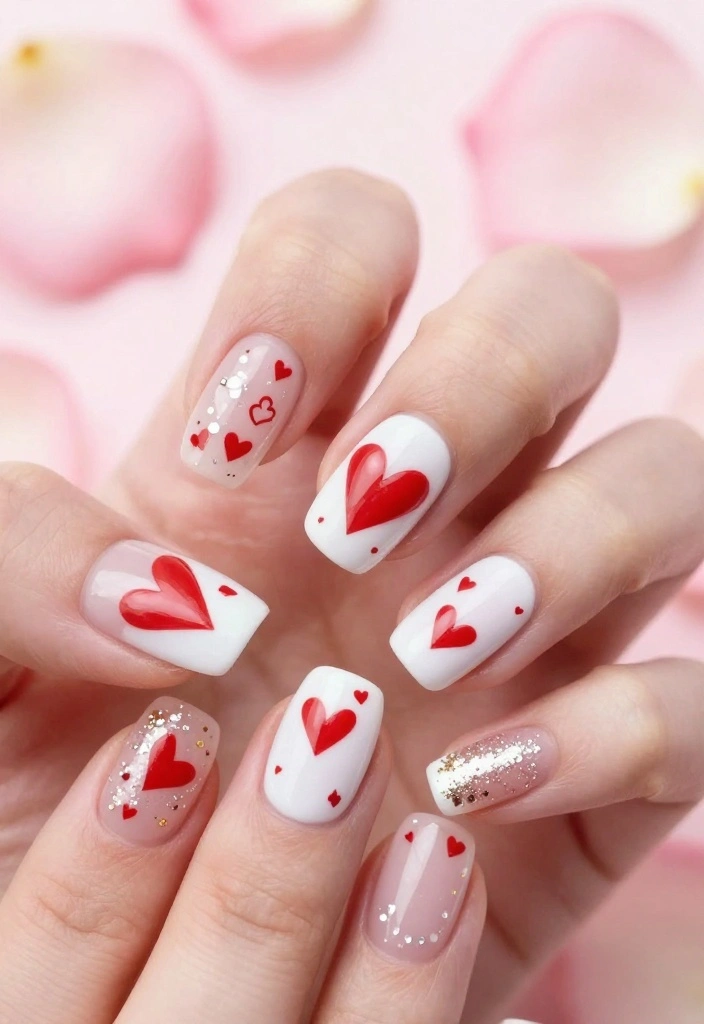
Bring the charm of classic love letters right to your fingertips with this delightful design! Adorned with elegant reds and whites, Love Letter Nails are the perfect way to express your affection. Picture tiny envelopes filled with heartfelt messages or sweet notes nestled among your nails – how cute is that?
Start by painting your nails a crisp white for a clean slate. Once it dries, use red polish to create tiny love letters. A fine brush or nail art pen works wonders for adding details, and a hint of gold can elevate the elegance! Don’t forget to outline your envelopes for that perfect finish. What you’ll need:
– White nail polish
– Red nail polish
– Gold nail polish (optional)
– Top coat
– Nail art pen or fine brush
Take your time with each tiny detail; patience is key to achieving a polished look!
How To Choose the Right Valentine’s Nail Ideas
Choosing the perfect design for your Valentine’s nails can be a fun yet overwhelming task. With so many options, it’s essential to narrow down your choices. Here are some key aspects to consider when selecting your nail designs.
1. Know Your Style
Start by identifying your personal style. Are you more into elegant designs or bold and playful ones? Think about what makes you feel confident. A minimalist approach with simple heart tips might suit some, while others may love colorful candy hearts. Understanding your style will guide your choice and ensure you feel fabulous.
2. Consider the Occasion
Think about where you’ll be wearing your nails. A romantic dinner might call for something classic like vintage lace. On the other hand, a fun Galentine’s Day party could be perfect for pop art love designs. Match your nails to the occasion for added flair and to complement your outfit.
3. Nail Length and Shape
Your nail shape and length can dramatically affect the appearance of the design. Shorter nails might not showcase intricate patterns as well as longer nails do. If you’re sporting a trendy almond shape, designs like glittery love would look stunning. Choose designs that work harmoniously with your natural nail shape.
4. Skill Level
Be honest about your nail art skills. If you’re a beginner, opt for easier designs like heartbeat patterns or minimalist tips. Advanced nail artists might enjoy tackling more intricate designs, like romantic marble or love letter nails. Choose a design that matches your skill level for a satisfying result.
5. Time and Resources
How much time do you have to spend on your nails? Some designs, like glitter gradients, may take longer to achieve than simple heart stamps. Consider your schedule and pick a design you can realistically complete. Also, ensure you have all the necessary supplies like polish, brushes, and nail art stickers.
6. Color Palette
Valentine’s Day is all about love, and the right colors can enhance your theme. Traditional red and pink shades evoke romance, while pastels can give a softer feel. You might even consider a playful mix of colors for a candy heart look. Choose a color palette that resonates with your personal taste and complements your outfit.
Pro Tip: Don’t be afraid to mix and match elements from different designs! For instance, you could combine a minimalistic heart tip with a glittery base for a unique twist. Be creative and let your personality shine through your Valentine’s nails!
With these tips in mind, you’re better equipped to choose the ideal Valentine’s nail design that captures your style and spirit. Enjoy the process of selecting your favorite looks, and get ready to flaunt those adorable nails this Valentine’s Day!
3. Cupid’s Arrows
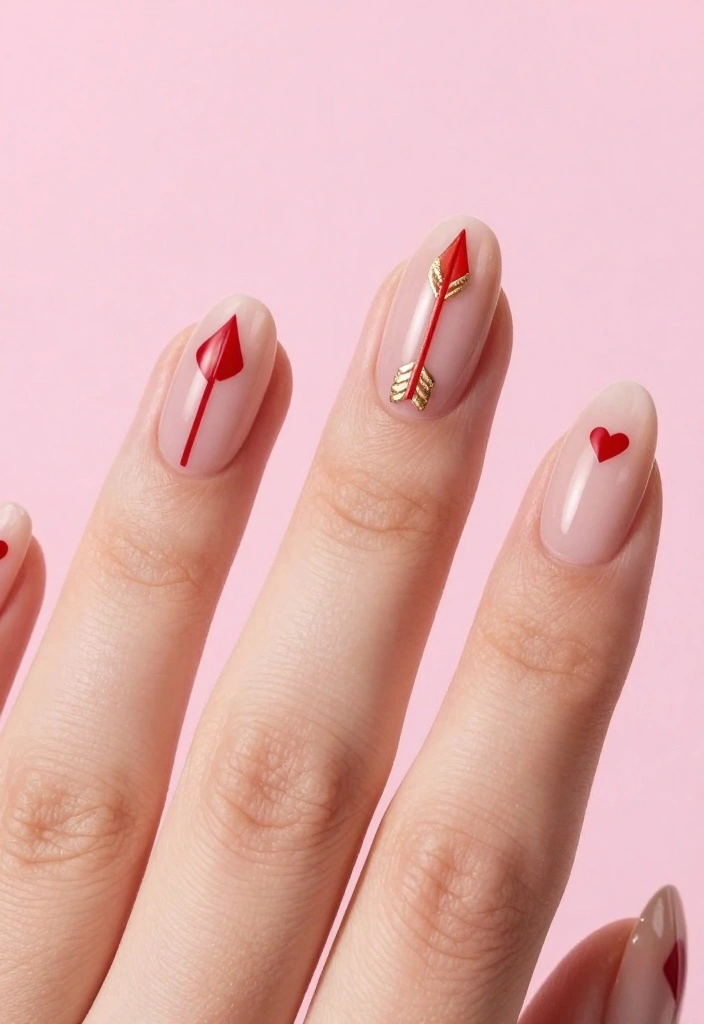
Let your nails flirt with style inspired by Cupid’s arrows! This playful design features bold reds, shimmering golds, and soft whites, ensuring your nails are the center of attention. Whether you choose a nude base or a bright red backdrop, Cupid’s Arrows will surely spread love vibes.
Begin by painting your nails in your chosen base color and allow it to dry thoroughly. With a thin brush, draw simple arrow shapes in red and gold polish, and feel free to accentuate the tips with tiny hearts for that extra love touch. Supplies needed include:
– Nude or red nail polish
– Red nail polish
– Gold nail polish
– Top coat
Practice your arrows on paper first if you’re unsure, and then confidently bring your design to life on your nails!
4. Heartbeat Designs
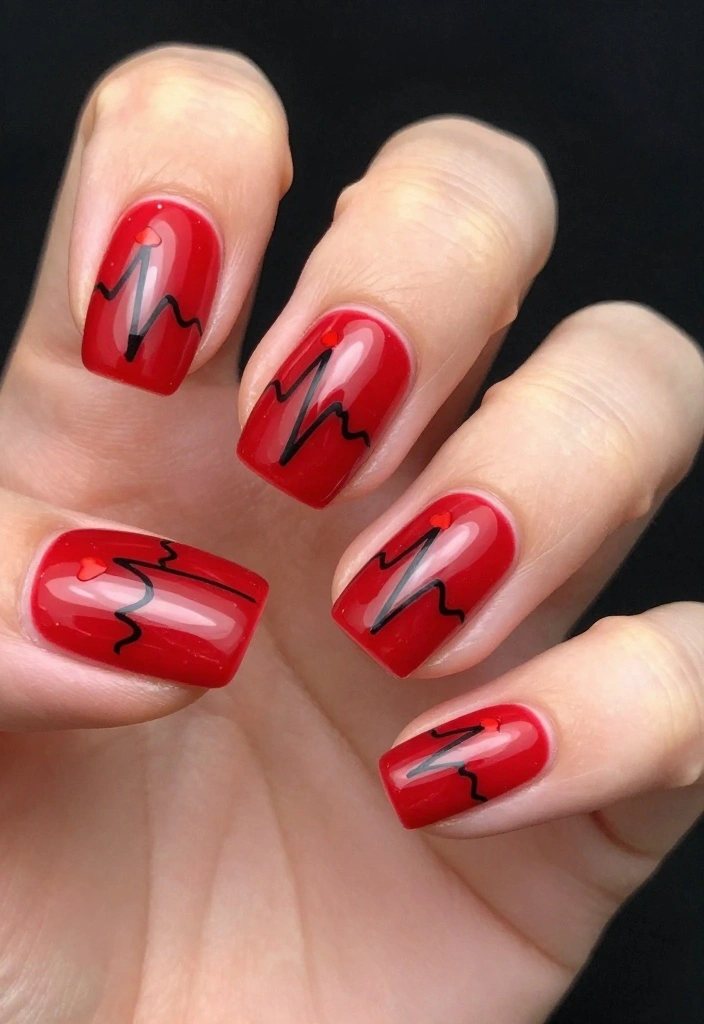
Infuse your nails with life through creative heartbeat designs! This concept combines chic elegance with a playful twist, making it ideal for anyone who wants to stand out this Valentine’s Day. You can mix vibrant colors or keep it classic with timeless black and white.
To achieve the heartbeat effect, paint your nails with your favorite base color. Once dry, use a thin brush to create a heartbeat line, and consider adding a tiny heart at the line’s peak or base for a sweet touch. Here’s what you’ll need:
– Base color nail polish (any color)
– Black or red nail polish
– Top coat
Keep your line steady by using short strokes and a steady hand; practice makes perfect!
Fun fact: heartbeat-inspired nail art surged 40% this season among valentines nails enthusiasts. Pair a bold base with a thin heartbeat line and a tiny heart at the peak for instant romance—it’s practical, chic, and easy to DIY at home.
Heartbeat Designs
Editor’s Choice


📹 Related Video: Valentine’s Day Nails | Black Lace with Heart Beat EKG Nail Art Design
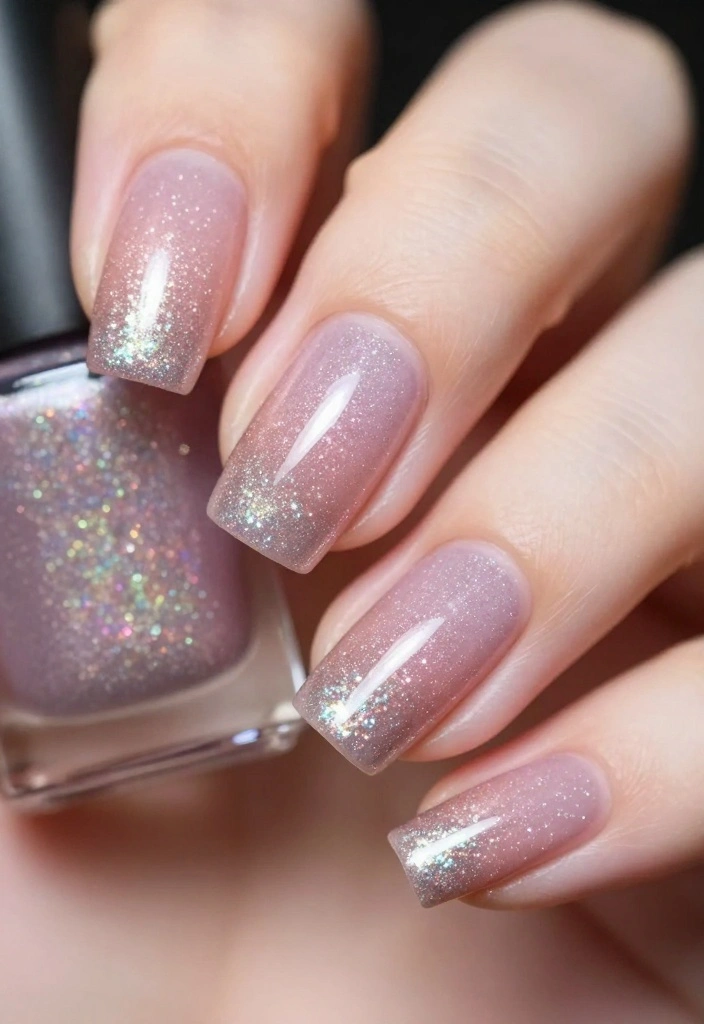
5. Glittery Love
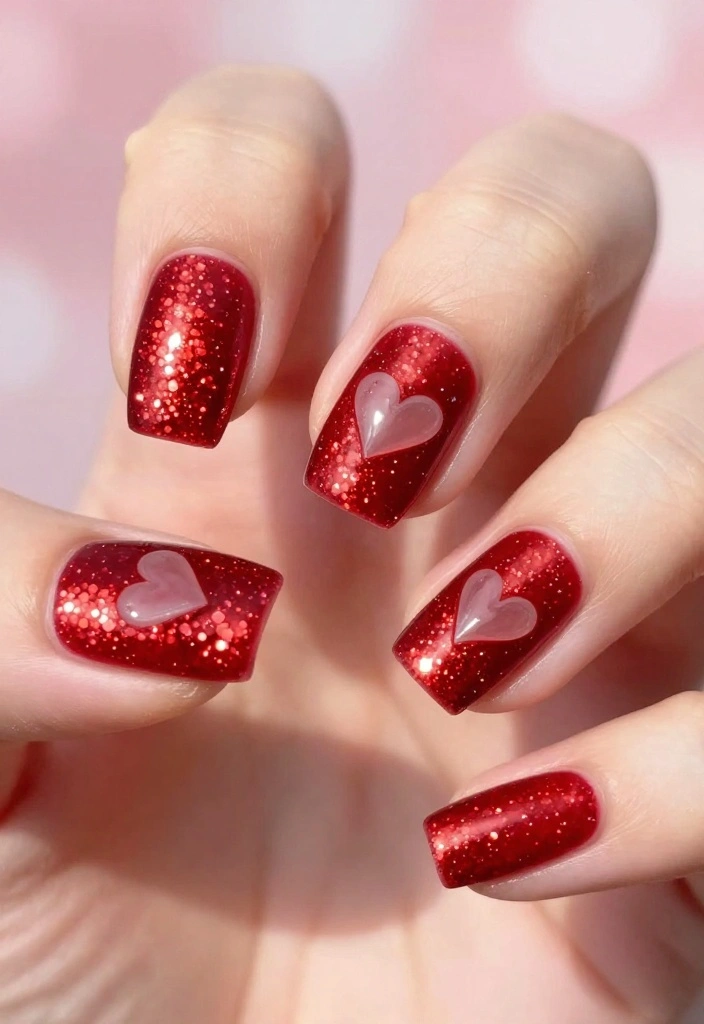
Who can say no to a bit of sparkle? Glittery Love nails bring that dazzling effect right to your fingertips! Perfect for a festive Valentine’s vibe, this design combines glitter with heart motifs to elevate your style.
Start with a base coat in your favorite color; deep red or soft pink works beautifully. Once dry, apply a layer of glitter polish, focusing on the tips or specific areas for a stunning gradient effect. Use a dotting tool or your brush to create small hearts on a couple of accent nails. You’ll need:
– Base color nail polish
– Glitter nail polish
– Dotting tool or fine brush
– Top coat
Always allow each layer to dry properly to prevent smudging and ensure your nails shine bright!
Glittery Love
Editor’s Choice


6. Minimalist Heart Tips
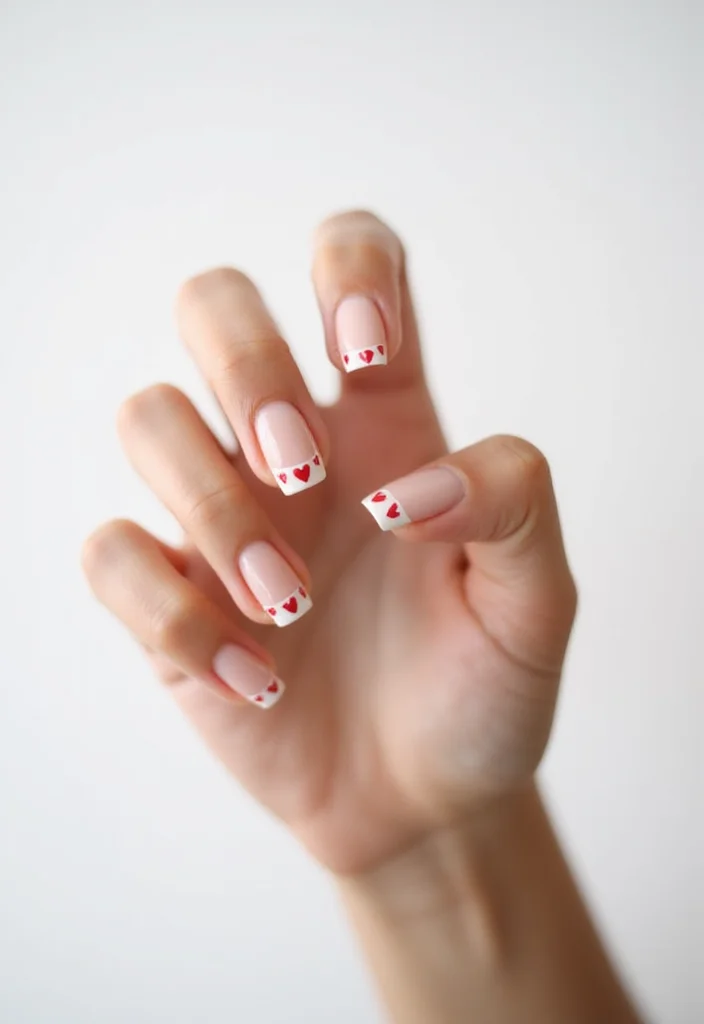
Sometimes, less truly is more! Minimalist Heart Tips provide a simple yet elegant take on Valentine’s Day nail art. This style is perfect for those who appreciate subtlety, allowing your nails to look chic without being overly flashy.
To create this look, paint the majority of your nail in a nude or light shade. Once that’s dry, use a thin brush to paint a small heart at the tip with red polish. This design is incredibly easy and effortlessly classy! Supplies you’ll need include:
– Nude or light color nail polish
– Red nail polish
– Top coat
Feel free to vary the heart size for a playful touch; experiment with different shapes to discover what you love most!
You might also like

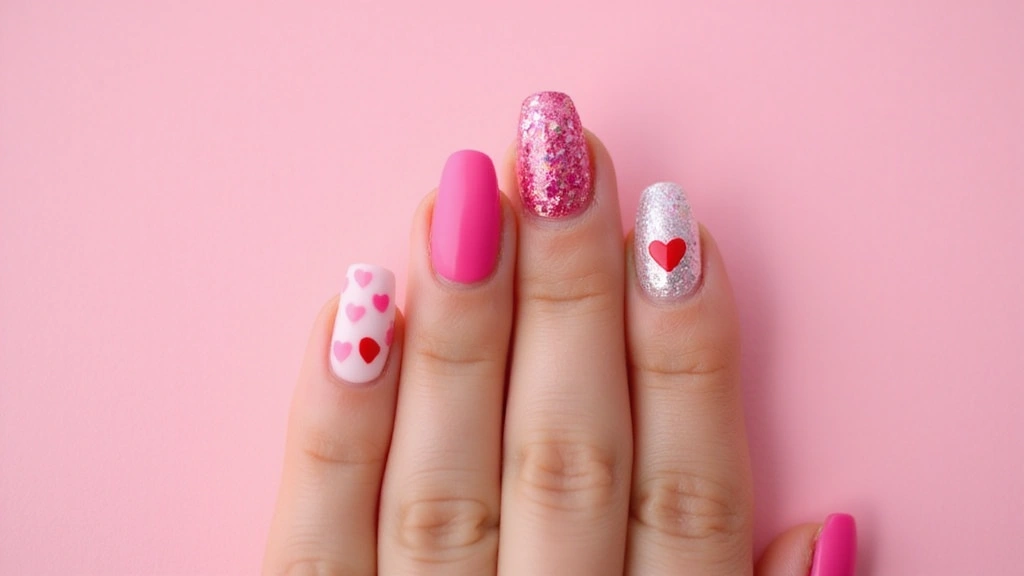
7. Colorful Candy Hearts
Bring back sweet childhood memories with vibrant Colorful Candy Hearts! This cheerful design is full of personality, ensuring your nails look fun and inviting.
Start with a pastel base color like mint green, pink, or lavender. Once the base is dry, use a dotting tool or tiny brush to create candy heart shapes filled with various colors. You can even write cute words like ‘Love’, ‘Hug’, or ‘Kiss’ inside the hearts for an extra touch. Here’s what you’ll need:
– Pastel base color nail polish
– Various color polishes for hearts
– Top coat
Look up real candy hearts for inspiration on shapes and colors. Let your creativity shine with this fun design!
8. Floral Love
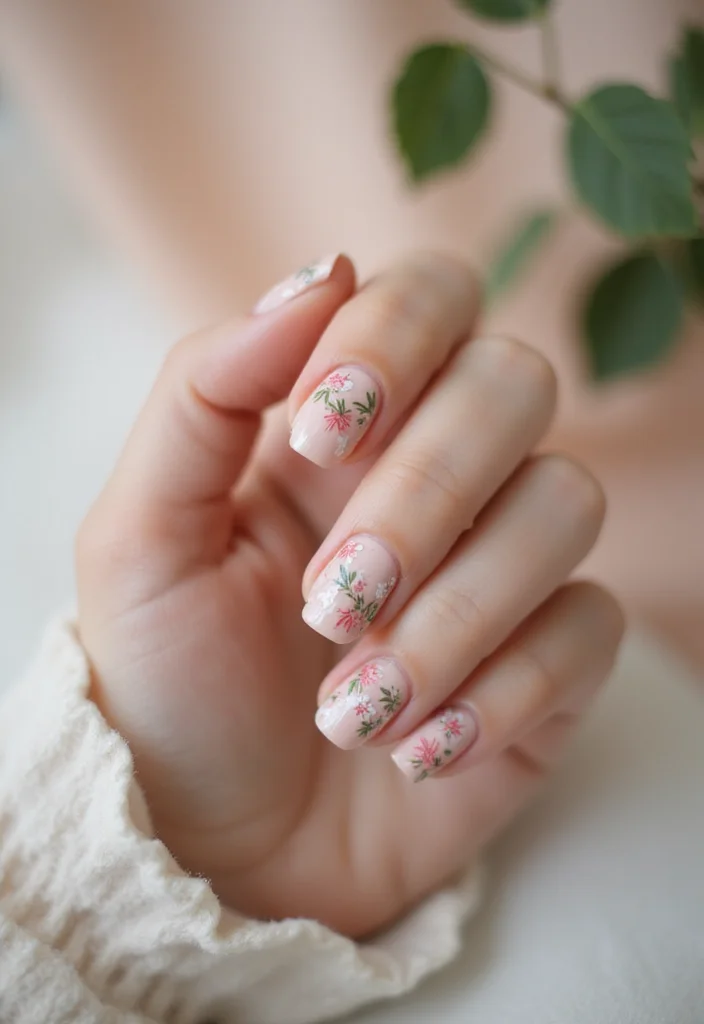
Floral designs are a beautiful way to express love and elegance! Whether you prefer delicate roses or simple daisies, Floral Love nails can enhance your style effortlessly.
Start with a light pink or nude base coat. Once it dries, use a fine brush to create tiny flower designs in white or pastel colors. Adding a few green leaves will make your design stand out! Here’s what you need:
– Light pink or nude nail polish
– White or pastel polishes for flowers
– Green nail polish for leaves
– Top coat
Don’t stress about perfection; the charm of floral designs lies in their delightful variety!
Floral Love
Editor’s Choice


9. Romantic Marble
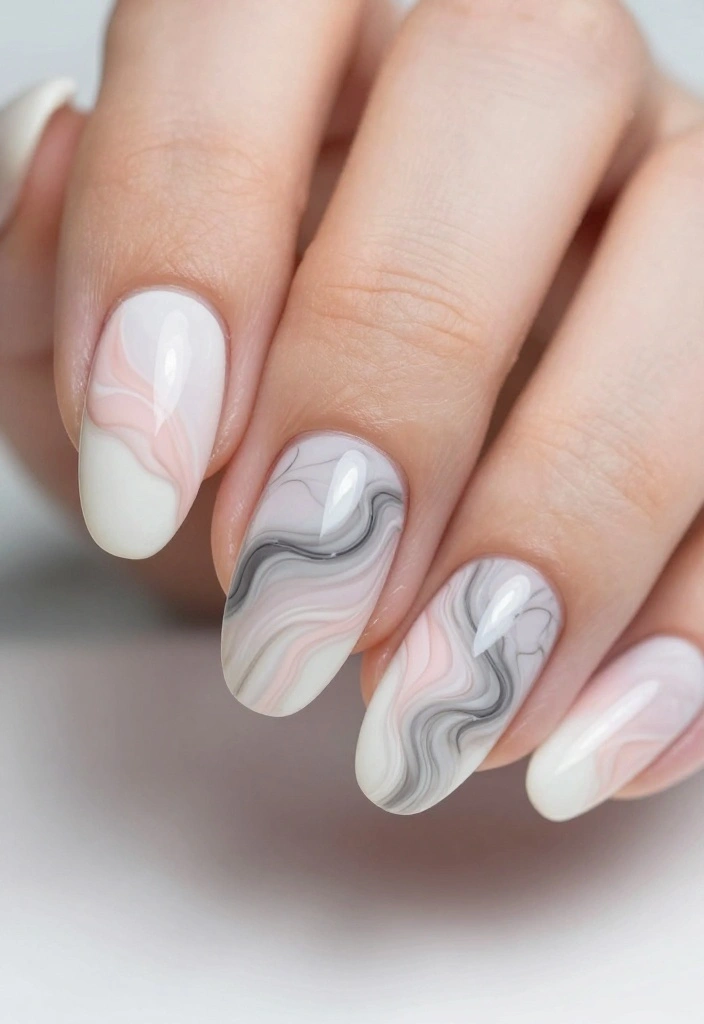
Add a high-fashion touch to your Valentine’s look with stunning marble nails! This design replicates the elegant appearance of marble stone, perfect for those wanting to exude sophistication.
Choose two or three complementary colors; white, gray, and blush pink create a beautiful marble effect. Apply your base coat, and then swirl the colors together using a nail art brush for that perfect marbled finish. Here’s what you’ll need:
– Base color nail polish (white or light)
– Gray and blush pink polishes
– Nail art brush
– Top coat
Take your time swirling the colors to achieve that flawless marbled appearance. If you’re unsure, practice on a fake nail first!
10. Pop Art Love
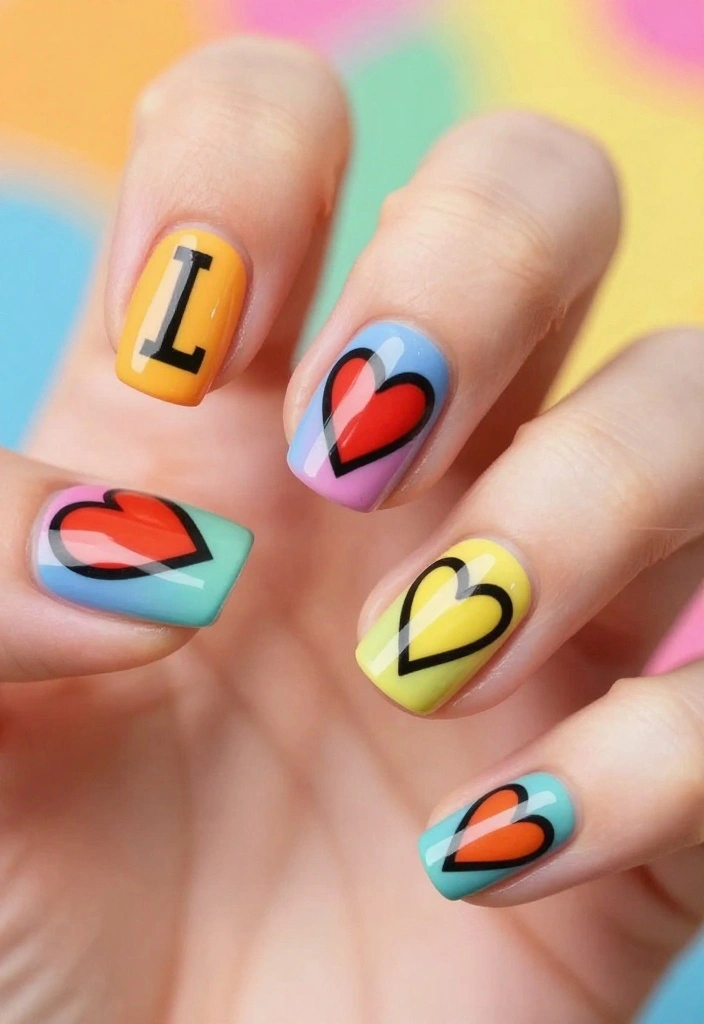
For those who enjoy a bold aesthetic, Pop Art Love nails are a thrilling choice! Bursting with bright colors and playful designs, this nail art will definitely spark conversations.
Choose a vibrant base color like red or blue. Using black polish, create comic-style heart shapes with bold outlines, and consider adding fun phrases like ‘Pop!’ or ‘Love!’ for that playful comic effect! Supplies you’ll need:
– Vibrant base color nail polish
– Black nail polish
– Various colors for hearts
– Top coat
Experimenting with different phrases and designs can make your nails even more unique and fun!
11. Glitter Gradient
Elevate your nail game with a stunning glitter gradient! This captivating design is perfect for adding just the right amount of sparkle to your Valentine’s nails.
Start with a solid color base and let it dry completely. Gradually apply glitter polish from the tips toward the middle for a beautiful ombre effect. Consider colors like silver, gold, or colorful glitter for a fun twist! Here’s what you’ll need:
– Base color nail polish
– Glitter nail polish
– Makeup sponge for gradient effect
– Top coat
Be sure to tap off excess glitter to avoid a chunky finish; you want a smooth and elegant look!
Did you know a glitter gradient can be done in just 3 steps and under 10 minutes? Start with a base color, dab on glitter with a sponge, then blend toward the middle for stunning valentines nails.
Glitter Gradient
Editor’s Choice


You Might Also Like

12. Sweet Strawberry
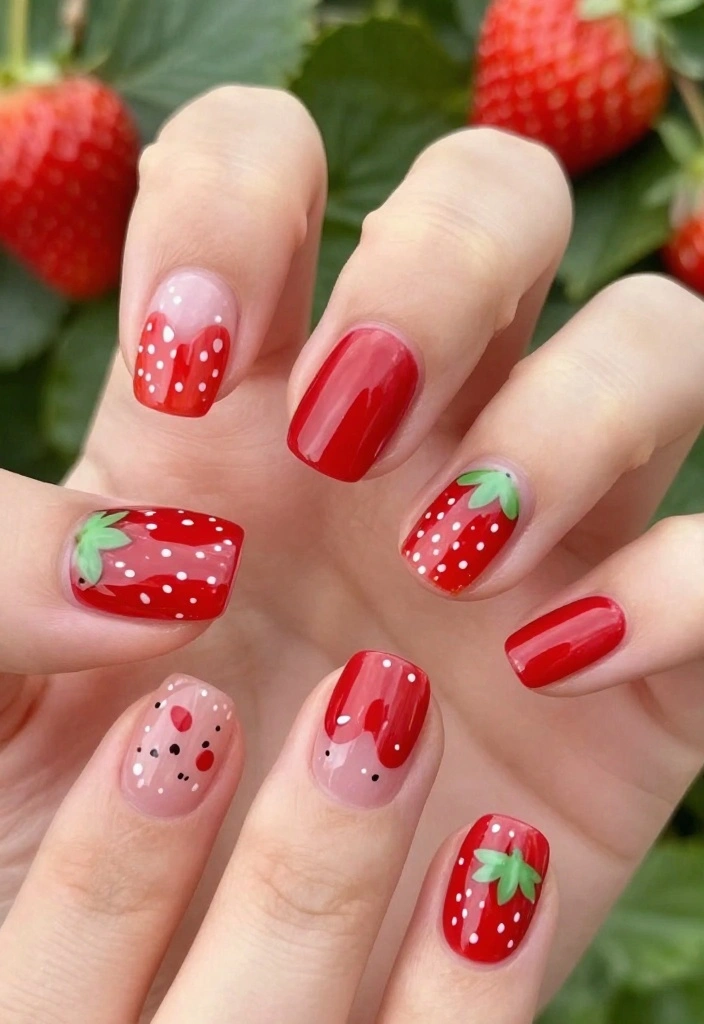
Embrace your fruity side with Sweet Strawberry nails! This design is cheerful, playful, and perfect for celebrating love in the springtime.
Start with a bright red base coat. Once dry, use a fine brush to paint little green leaves and white seeds on your nails to mimic strawberries. For added fun, consider giving a few nails cartoonish faces! Supplies needed:
– Bright red nail polish
– Green and white nail polish
– Top coat
Keep the designs whimsical and playful; don’t worry about precision – these strawberries are all about fun!
Sweet Strawberry nails are a little reminder that love can be playful. When you pair a bright red base with tiny leaves and seed details, valentines nails feel fresh, confident, and totally share-worthy.
13. Vintage Lace
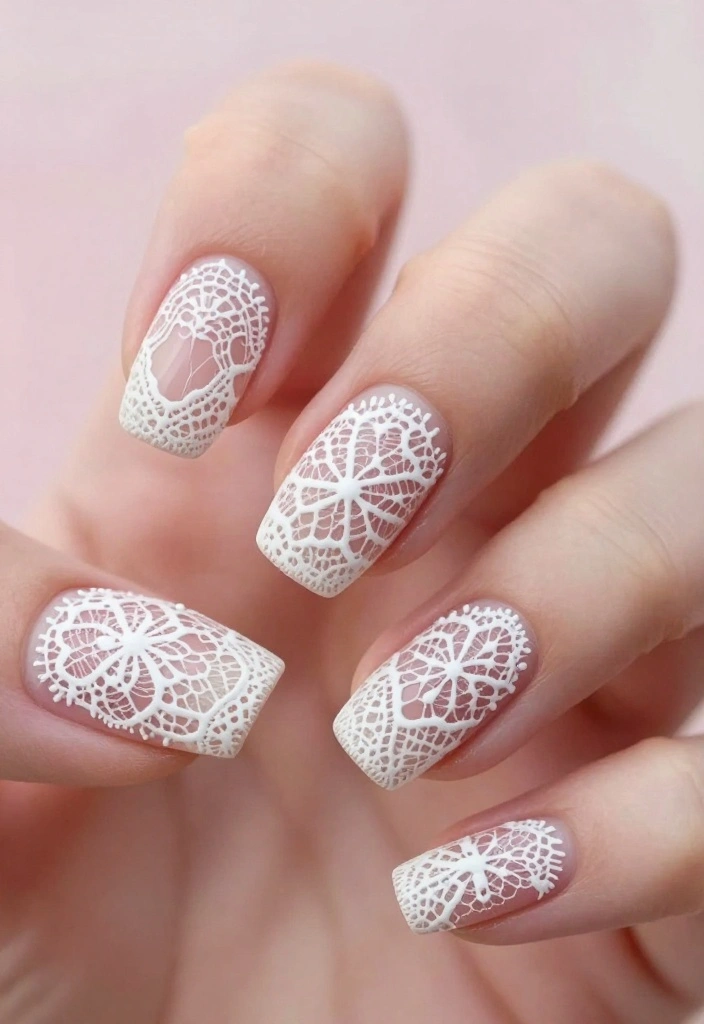
If you’re captivated by vintage romance, lace-inspired nails are a stunning choice! This design adds elegance and sophistication, making it perfect for special occasions.
Begin with a soft pastel base, such as lavender or blush. Then, using a fine brush or nail stamping plate, create delicate lace patterns in white or gold. These accents will look timeless and classy! Here’s what you’ll need:
– Pastel nail polish
– White or gold nail polish
– Nail art brush or stamping plate
– Top coat
Practice your lace designs on paper first to get familiar with patterns and styles!
14. Heart Beat Stamps

Wrap up your nail art journey with trendy Heart Beat Stamps that add a stylish twist to your nails! This design merges modern flair with classic heart themes for a chic and sweet look.
Opt for a dark base color, like navy or deep red, and once it’s dry, use heart stamp decals in contrasting colors, such as white or gold, to create a stunning heartbeat effect. This is an excellent way to incorporate love while maintaining a chic appearance! Supplies you’ll need:
– Dark base color nail polish
– Heart stamp decals
– Top coat
Make sure your nails are completely dry before applying the stamps to avoid smudging your beautiful designs!
Conclusion
With these 14 adorable Valentine’s nail ideas, you’re bound to find something that suits your style and mood this February! Whether you love sparkles, intricate designs, or minimalistic elegance, there’s a look for every Valentine.
So grab your nail polishes and get creative! Share your favorite designs with friends or try a few different ones to keep the love flowing all month long. Happy Valentine’s Day!
Note: We aim to provide accurate product links, but some may occasionally expire or become unavailable. If this happens, please search directly on Amazon for the product or a suitable alternative.
This post contains Amazon affiliate links, meaning we may earn a small commission if you purchase through our links, at no extra cost to you.
Frequently Asked Questions
What are the best valentines nails designs for a romantic look?
There are simple and cute options for valentines nails that suit any length.
Start with a soft pink or nude base and add a classic red heart on the accent nail, or try a white French tip with tiny pink hearts.
For shorter nails, a tiny heart near the cuticle or a delicate negative-space heart is chic; for longer nails, you can layer mini decals or a glitter gradient.
Practical tips: choose a high-quality base coat, use a fine nail art brush or dotting tool for clean shapes, and seal with a durable top coat to make your valentines nails last.
Finish with cuticle oil to keep the skin hydrated.
How can I recreate these 14 adorable valentines nails ideas at home?
Great for at-home manicure: gather supplies: base coat, top coat, red, pink, white polish, a small nail art brush, a dotting tool, decals or stamping plate, and optional rhinestones.
Steps: prep nails, apply base color, add your heart or love-themed design on an accent nail, cure or dry, then seal with a top coat.
Tip: practice designs on a nail wheel first and use tape or stencils for clean lines. With patience, your valentines nails will look pro without leaving the house.
Which colors and motifs work best for valentines nails and love themes?
Classic valentines colors like red, pink, nude, white, and rose gold never fail. For motifs, try hearts, XOXO, Cupid arrows, lips, or rose patterns.
To keep things chic, pair a bold heart with a neutral base, or use minimalist negative-space hearts for a modern twist.
If you want a bit of sparkle, add a glitter gradient on the tip or just a tiny rhinestone on the heart. These love themes nail designs are versatile for date nights and day-to-day wear.
What tools and products will make valentines nails easier and longer-lasting?
To nail these looks, invest in a good base coat, a durable top coat, and a reliable white, pink, and red polish set.
Add a dotting tool or fine nail-art brush, striping tape for clean lines, and optional stamping plates or decals.
For longevity, consider gel polish or cap the free edges with each coat, and always finish with a top coat. Don’t forget cuticle oil to keep nails and skin moisturized between designs.
How should I care for and remove love-themed nail art after Valentine’s Day?
Care and removal matter as much as the design. When ready to remove, use a gentle acetone-free remover and soak time or foil wraps if you used gel polish.
Gently push off any leftover decals with a wooden stick to avoid damage. After removal, moisturize nails with cuticle oil and a strengthening polish.
Give your nails a break between fun valentines nails designs and consider a nourishing treatment to keep them healthy.
Related Topics
valentines nails
nail art
love themes
heart designs
easy nail designs
trendy nail styles
cute nail ideas
festive nails
beginner friendly
romantic nail art
seasonal nail trends
quick nail designs
These nail ideas are so cute! I especially love the heart designs. Do you think they would look good in pastel colors too?
I tried a similar nail design last year, and let’s just say, my cat was not impressed with my painting skills! 😂 What’s your funniest nail fail?